Table of Contents
Configuration for Auction Factory 3.x.x and higher
Pre-Installation Notes
- Make sure the maximum file upload size of your server is greater than the size of the component zipped kit. If not, contact your hosting provider.
- Check directory write/read permissions and adjust them accordingly. chmod for UNIX, Windows ACL for Windows. Or contact your hosting provider.
- If you intend to use the Community Builder integration, install Community Builder before Auction Factory to avoid manual installation of the Auction Tabs and Plugins for the Community Builder user profile.
- Always backup your website before installing, updating or uninstalling extensions.
Installing Auction Factory
Auction Factory does install as any other Joomla extension. Firstly download the ZIP installation Kit from www.thephpfactory.com.
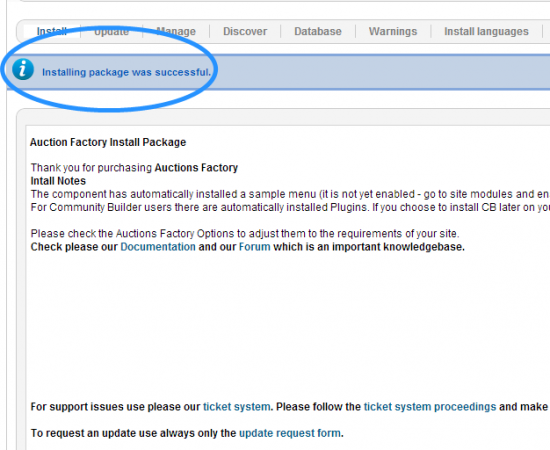
Then go to the upper Menu in the Joomla backend. There choose "Extensions"/"Extension Manager". In the field area Package File click on Choose File and select from your Computer HDD the ZIP file. After you selected the file click "Upload & Install". When finishing the installation the following screen will appear:
Now you have Auction Factory ready for Configuration!
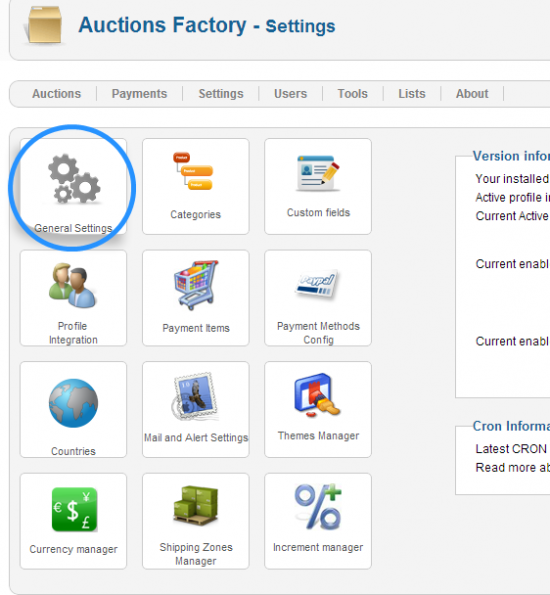
Go to Components/ Auction Factory / Settings :
Click on General Settings, then you get on the configuration screen:
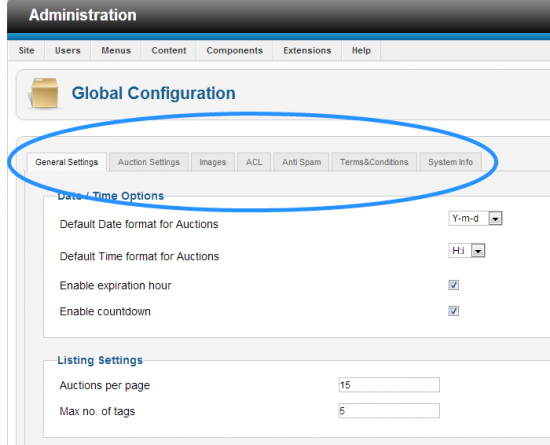 You can configure your component by choosing the proper settings regarding images, currencies, time display, time format, etc.
In order to have a fully functional Auction site, it is strongly recmmended to configure a CRON or PSEUDOCRON task / job. These are Scheduling services that ensure that a certain script runs at certain times. This way you can make sure that closing expired auctions, sending emails, updating proxies, etc is triggered at certain intervals. CRON is a service that is provided by your hosting account, and PSEUDOCRON are joomla plugins that emulate such a service. To configure a CRON service please check our documentation where you find some samples for most hosting panels.
Community Builder Integration
The CB Plugins will be automatically installed if the Auction Component will be installed after Community Builder. If Auction Factory will be installed before CB, then you will have to install manually by uploading them to Community Builder.
To configure the CB Integration click on PROFILE INTEGRATIONon the settings screen (image 2). Here you can assign the CB fields to their Auction Factory meaning like city, country, bidder, seller, paypal, etc. and integrate them in the component from the Auction Component Settings, CB Integration.
Payments and Settings
Payment Gateways can be enabled, configured and uploaded by clicking on the "Payment Methods Config" button in Settings Panel (image 2). You can set up for instance Paypal by changing the email address or if you want to test it and you have a sandbox paypal address, then check the box next to use sandbox select. On a live site this option should be left unchecked.
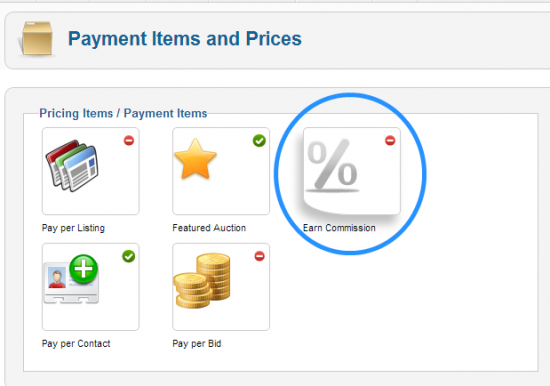
From the Settings Panel you can also access the Payment Items section of the configuration, this is where you can enable and configure certain features like Commissions or Paid Listings.
Payment Items are methods that allow webmasters to cash in on their website success. There are several out-of-the-box payment items:
- Pay per listing - set a price for auctioneers to get their product placed
- Pay for featured Auction - Get the auction displayed first by paying a certain price
- Comission - get a percentage from Sellers or from Buyers
- Pay per contact - get a price in order to display the contact information
- Pay per bid - Get buyers to pay a price in order to place bids
Auctions can be featured - meaning that they will have a special status on the listing and they will be highlighted on the listing. In order to benefit for a featured auction the auctioneer have to pay a certain price. After the Payment is made, the webmaster can enable the new status by approving the payment, or for payment gateways with IPN, the payment is approved automatically.
If you want to receive comissions for every succesful transaction, you have to enable the Commission plugin and configure it. Here you can set the percentage the site will get either from the Seller and/or from the Buyer. These two percentages can be set up independently.
Your users will be charged if auctions have a winner, and the percentage is calculated to the winning bid. You can see all these comissions and user balances in the Comission configuration screen.
Modules and Menus
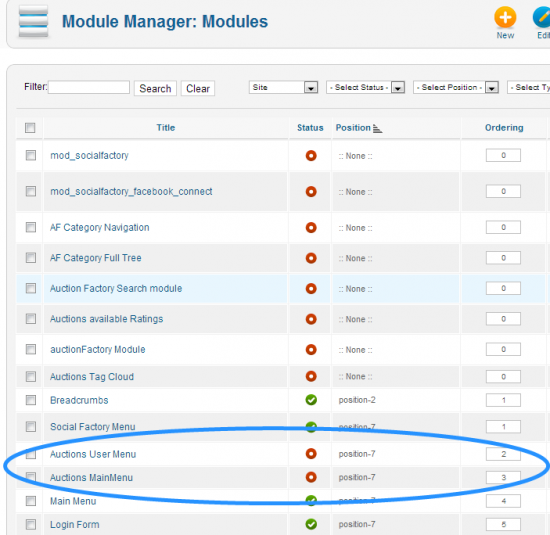
Auction Factory creates two menus upon install - Auction Menu and Auction User menu. In order to have access on the frontend to the component you have to publish these Menus in the "Module Manager". Auction Main Menu and User Menu modules - enable them in order to be displayed on the front-end:
Templates and Themes
You can customize the look of your auction site as you whish, by using the powerfull templating system. Click on the Themes Manager in the Settings Panel (image 2) and you will get to the available Theme list.
Language Files
Auction factory uses standard Joomla Language file definition, in order to create a new language file, copy the files with the appropriate new file name and translate the english texts. All used language strings in the extension can be found in these files.
For more information regarding the language files please check also the forum under:
http://thephpfactory.com/forum/auction-factory/1218-language-files#4752
http://thephpfactory.com/forum/community-news/921-altering-the-language-files#3668


