Table of Contents
Installation and Configuration
Pre-Installation Notes
Before you start with the installation, you need to check the following:
- Make sure the maximum file upload size of your server is greater than the size of the component zipped kit. If not, contact your hosting provider.
- Check directory write/read permissions and adjust them accordingly. chmod for UNIX, Windows ACL for Windows. Or contact your hosting provider.
- If you intend to use the Community Builder integration, install Community Builder before Auction Factory to avoid manual installation of the Auction Tabs and Plugins for the Community Builder user profile.
- Always backup your website before installing, updating or uninstalling extensions.
Installation
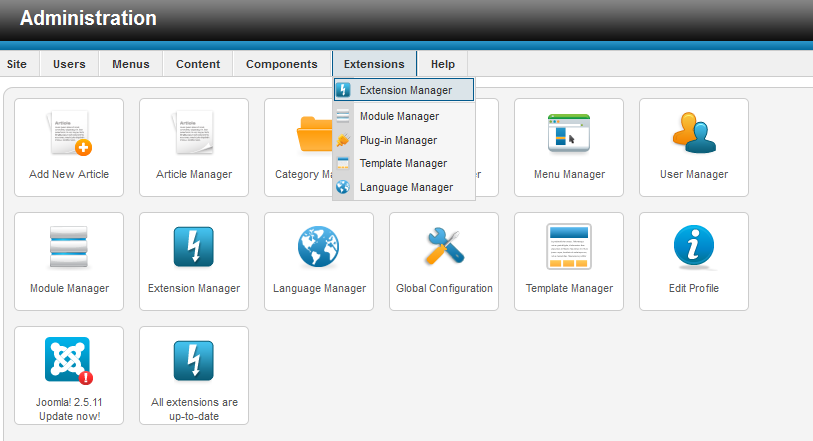
To install Auction Factory go to Extensions/Extension Manager in the upper menu of Joomla's backend.
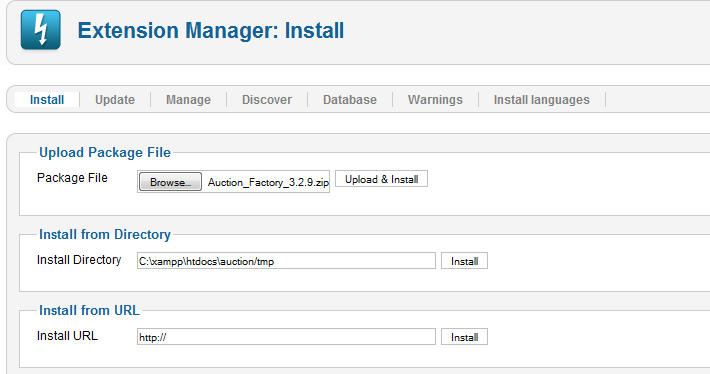
Then, in the "Upload Package File" area click on the "Browse…" button and choose the ZIP file from your computer. After doing so, click on the "Upload & Install" button.
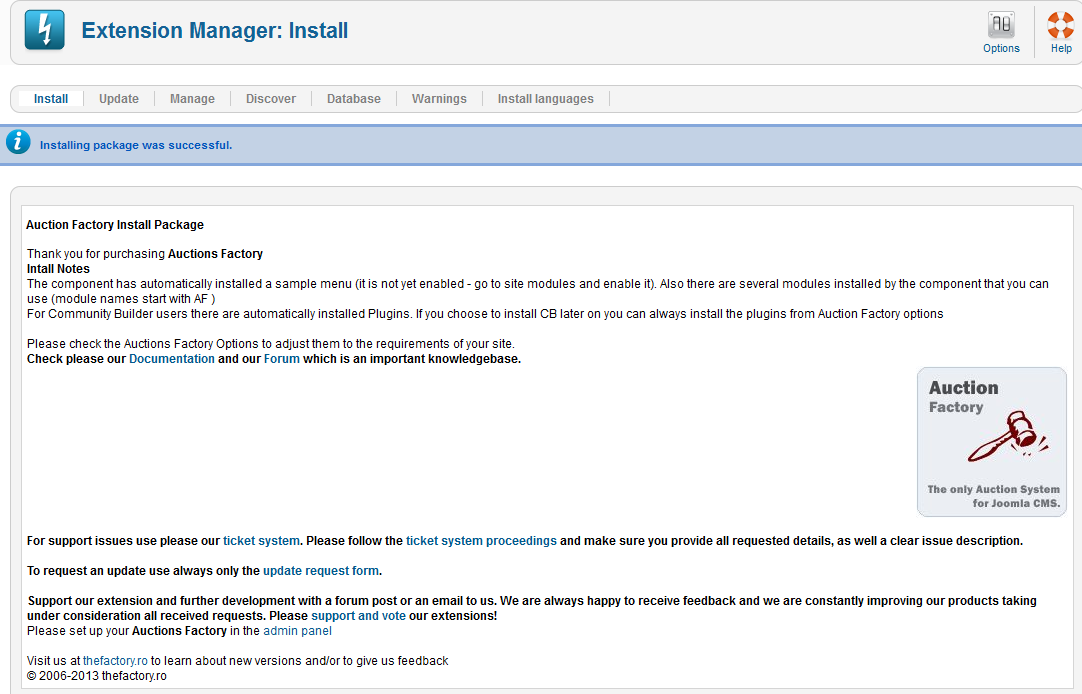
When the installation is done, the following message containing important install notes and other notifications should appear.
When you update the component, the installation will detect that you already had a previous installed version of Auctions Factory and it will not overwrite the templates folder in order to preserve any changes you might have done. However, a button should appear below the message that allows you to overwrite them by pressing on it.
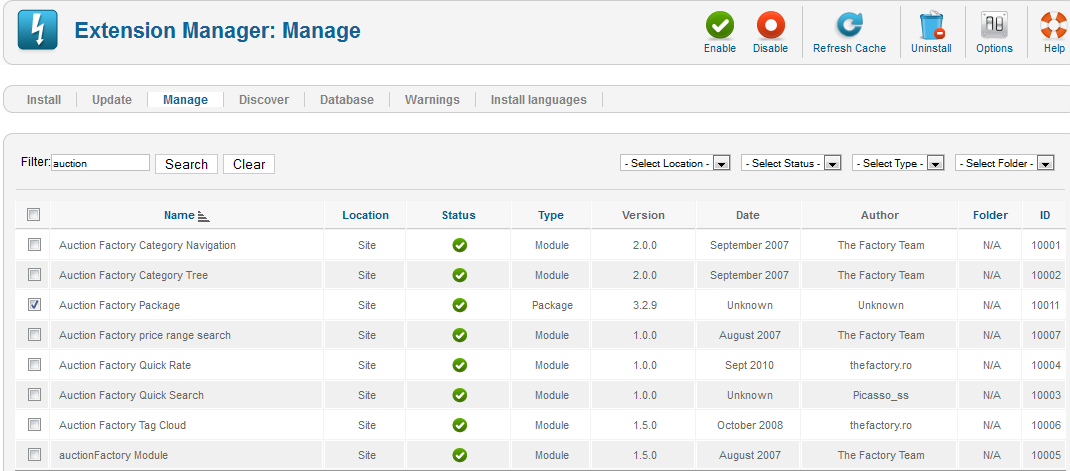
In case you wish to uninstall the component, simply go to "Manage", check the Auction Factory Package checkbox and click on "Uninstall".
Configuration
You can configure Auction Factory by managing currencies, gateways, categories and many more, all of these from the Control Panel.
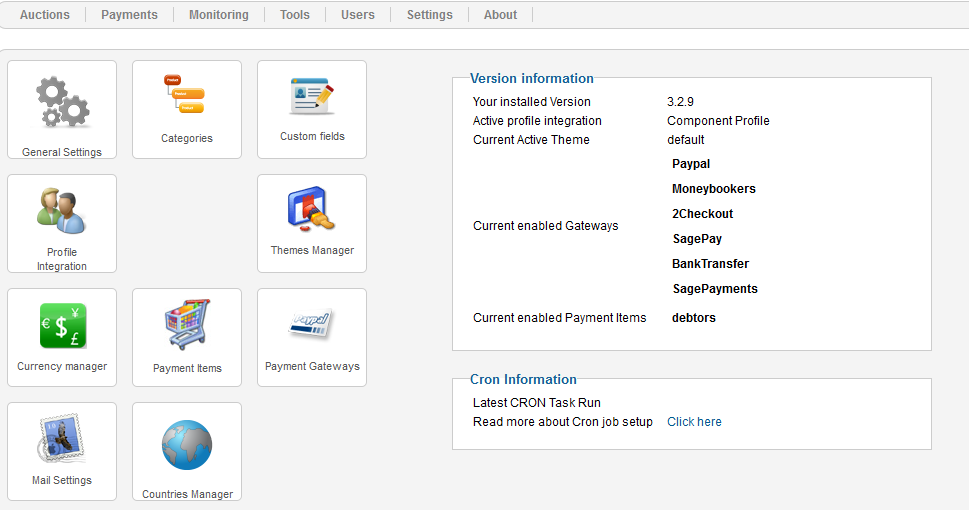
By going to the General Settings section you will find almost all the component's settings, along with some quick info.
General Settings
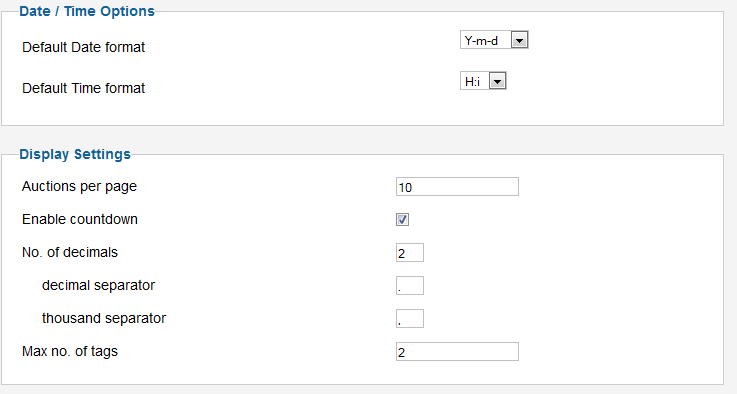
Choose the desired Date and Time format for the auctions, “d” stands for Day, “m” for Month and “Y” for year. “H:i” is for a 24 hour representation of time while “h:iA” is for a 12 hour format.
Set how many auctions to be displayed per page, exceeding this number will create pagination.
You can enable a Javascript Countdown to be displayed on the listings.
Choose how many decimals to be used on item's prices and which will be the separators for decimals and thousands.
Listings can have tags attached to them, set here the maximum number of tags allowed per listing. If this limit is exceeded, the extra tags will be removed when saving.
Search in sub-categories will also search in subcategories of the main category being searched.
Post only in "Last" categories will allow users to post auctions only in low tier categories, those with no subcategories.

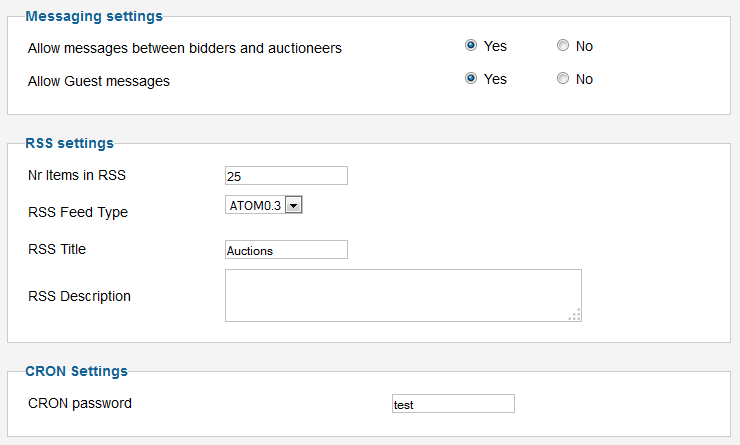
From the Messaging settings section you can allow messages to be sent between bidders and auctioneers and also to allow guests to use this feature. Guests will also be required to enter a Captcha word if enabled.
An RSS Feed can be created with our component, select from here the number of items to be displayed on it, the type of feed (RSS2.0, RSS1.0, OPML, ATOM, etc), along with a title and description.
Set a CRON Password to safely call the cron script. Check our CRON documentation for detailed information here.
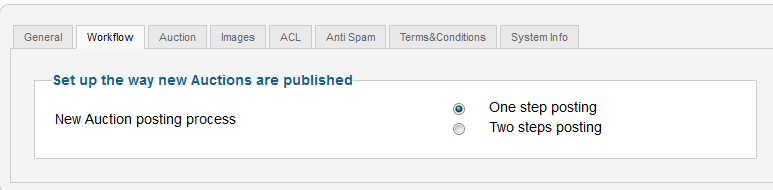
Workflow Settings
At the Workflow Settings tab you can choose from 2 ways on how the users can post their listings, one with a one step posting where all the listing information is entered in one page, and another, that will require users to set the category first and then the rest of the listing.
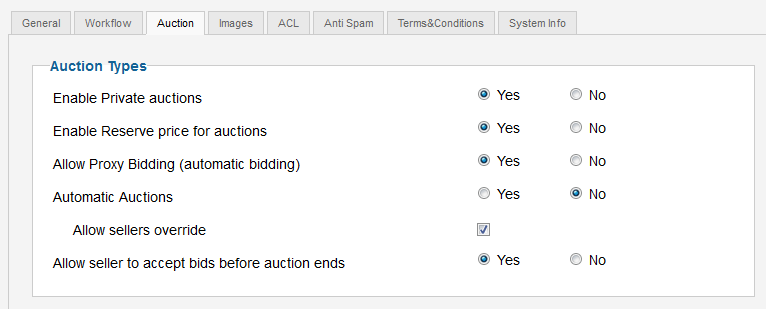
Auction Settings
You can allow users to make Private auctions which hide bids and messages from other users except the ones who made them and the owner with the Enable Private auctions option.
With Enable Reserve price for auctions set to "Yes", the auctioneer is allowed to not choose a winner if the respective price is not reached. The auctioneer can choose when creating the auction to display that reserve price to bidders.
Proxy bidding, Manual, and Automatic auction types
The Allow Proxy Bidding option, when enabled, will allow the bidder to set a hidden proxy bid which will automatically bid up to the maximum value set every time someone else outbids them. This occurs until the proxy bid value is reached. When the next bid required is higher than the proxy value, it will stop at the latest bid placed. Each subsequent bid is increased by the "minimum increase value" as with regular bids, making the lowest possible bid at all times. When first placing the proxy, an initial bid is made according to the current bid.
This is like sending someone with your money to a real auction to bid in your place. That person will have a limited amount with which to attempt the get the best possible price for an item.
Note that paid bids have a major effect in this workflow, limiting the potential benefits of proxy bidding and increasing bid costs - Use with caution and make sure your users are informed of the financial outcome when both these features are enabled.
You can choose to enable Automatic Auctions and furthermore give sellers the possibility to choose by their own if they want the auction automatic or to choose the winner manually after the auction ends.
In automatic auctions the seller will not be able to choose a bid before the auction ends, after the end timer is reached and the CRON script runs, then the auction will be closed and a winner will be picked, automatically. The Reserve Price is taken into account when selecting the winner. If there is a situation where 2 users may have the same bid(private auctions), the selection process will be passed to the auctioneer so he can take the best action.
In case of non-automatic public and private auction, you can enable Allow seller to accept bids before auction ends to give sellers the option to intervene before the auction closes and CRON steps in to pick the highest bid.
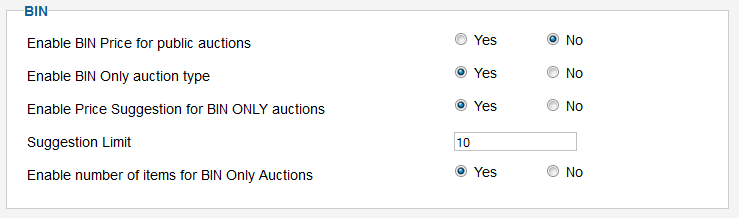
BIN - Buy it now
The BIN(Buy It Now) price can be enabled for public auctions to facilitate a faster process of the auction for both the seller and the buyer. The seller can even choose the option to auto accept BIN bids.
Besides Public and Private auctions, you can enable the BIN Only auction type which will be a simple click-to-buy auction. If no quantity is set or a user buys all the items, and the BIN is accepted, the auction will close instantly.
For this type of auction you can enable Price Suggestion allowing users to suggest other prices for BIN listings, this is helpful in case the seller sets the BIN price too high and he is not getting any bids. You can also set a maximum number of suggestions allowed per listing on the Suggestion Limit field.
Enable number of items for BIN Only Auctions will allow sellers to set the quantity of items they wish to sell for this type of auction.
When both suggestions and quantities are enabled, these features work together to allow bidders to suggest quantity prices. Bidders input a price per item and a desired quantity, this suggestion is then sent to the seller which can accept, reject, or reply to it with another suggestion. The bidder can also accept suggestion replies which results in the items being sold to him.
The "Minimum suggestion allowed" set by the seller when creating the auction is taken into account when a suggestion is placed. If this price per item is not met, the suggestion will auto reject.
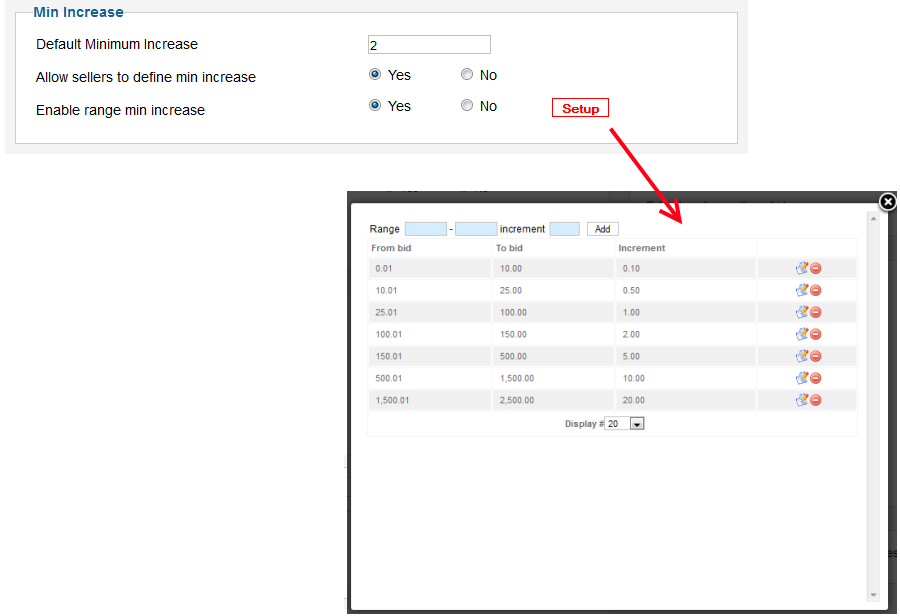
Minimum Increases
To force bidders to bid consistently higher and increase item value, you can enable minimum increases.
The next bidder will have to bid by at least the current maximum bid plus the minimum increase, from this area we can set this Default Minimum Increase. Notice that the first bid on an auction will not be subject to increases, since this is the original price set by the seller and would serve no purpose to increase the original price when no bids are placed.
You can also allow sellers to define this value by themselves for each individual auction they make.
Since the default minimum increase value is static by design, it does not scale and can be too low on high prices and vice versa. To increase the functionality of the increases, you can add various ranges of prices at which different minimum increase values will be applied. Clicking on the Setup button will pop-up a window where you can manage these values.
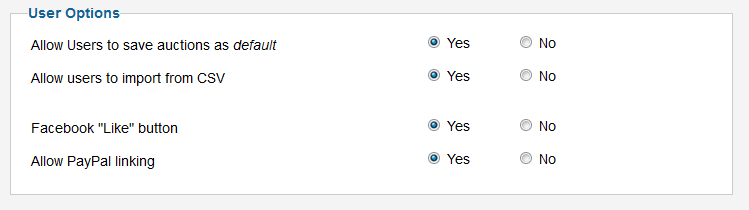
User Options
Allow Users to save auctions as default will enable a feature that will record values from certain fields when creating an auction, those fields will be auto filled on the respective user's future auctions. A special tab will also be available on his profile where he can edit these values. To change those default values the seller can also check a box in the auction form.
Enabling Allow users to import from CSV will add a button on the My Auctions page which users can click to bulk import auctions. The users will do so by uploading a CSV file with the proper structure and an image archive that corresponds to the uploaded CSV. Proper structure has to be followed in the CSV in order for the import to work as intended. CSV file structure at: Auction Factory - Import from CSV
You can choose to display a Facebook "Like" button on all auction detail pages and user profile pages by enabling the Facebook "Like" button option found here.
Allow PayPal linking will allow auction's winner to use seller's PayPal address to pay. When the seller has the PayPal field completed in his profile, a button will show, for the winner, on the auction with the winning bid. This button will direct the bidder to PayPal for payment with the value of the bid towards the seller.
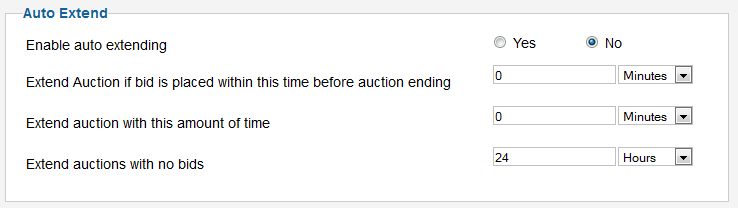
Auto Extend
With the Auto Extending function enabled, if a bid is received in the set period of time before an auction expires, it will automatically extend the expiration with the set amount. From this area you can set both these values.
In case of auctions without bids you can also choose to automatically extend the ending date of them from the Extend auctions with no bids option. When the CRON runs, instead of closing the auction it will extend it with that value.
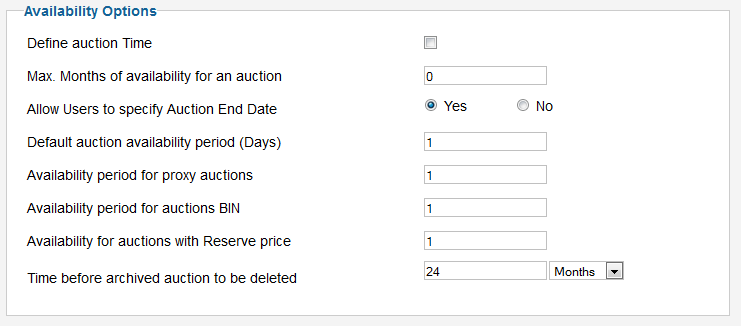
Availability Options
Here you can set various availability options regarding the auctions.
Checking Define auction Time will allow you to set a maximum amount of availability in months for an auction. Sellers will not be able to post auctions for longer than this.
You can Allow Users to specify Auction End Date but in case you choose not to, you can add below the default availability periods in days for all the auctions: only proxy auctions, only BIN auctions, or auctions with reserve price.
From here you can also set after how much time archived auctions are deleted, an auction is considered archived after it is closed.
Shipping
When creating a new auction, users can add different shipment prices depending on the zone of delivery if you enable the Multiple shipping prices option.
After enabling it, click on the Setup button and a pop-up window will appear where you can add these custom zones.
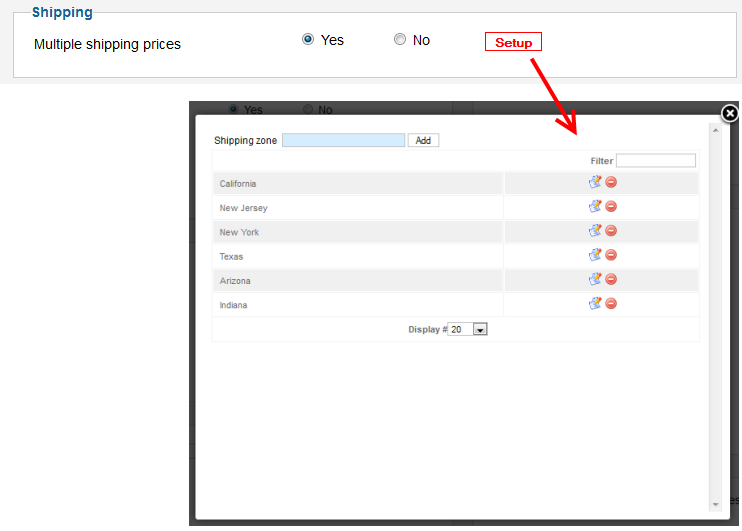
Image Settings
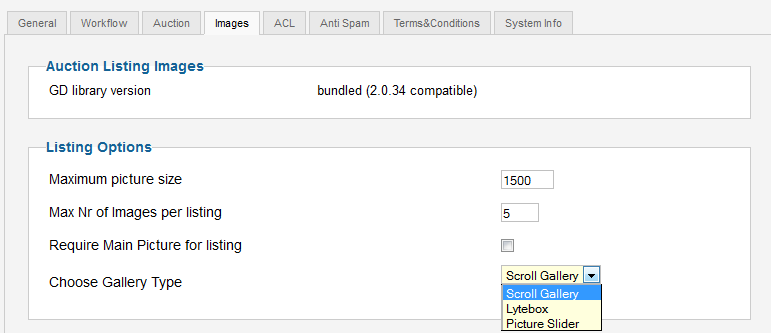
On the Auction Listing Images area you can view the current version of the graphic library.
You can define the settings of uploaded images on the Listing Options area.
Set a Maximum picture size which will deny the upload of images that exceed the respective size.
Here you can also set a maximum number of images per listing and to require a main picture for new listings.
Our component comes with 3 Gallery Types for images that have different behavior, Scroll Gallery, Lytebox and Picture Slider.
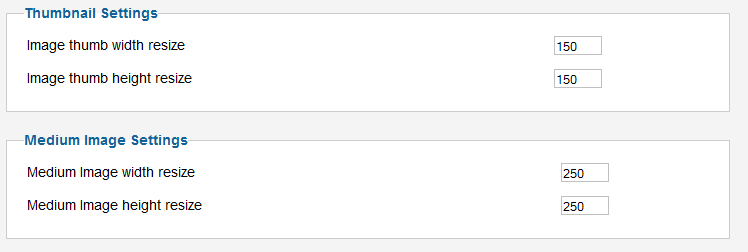
On the right side you can set the resize values of width and height of the thumbnails and medium images.
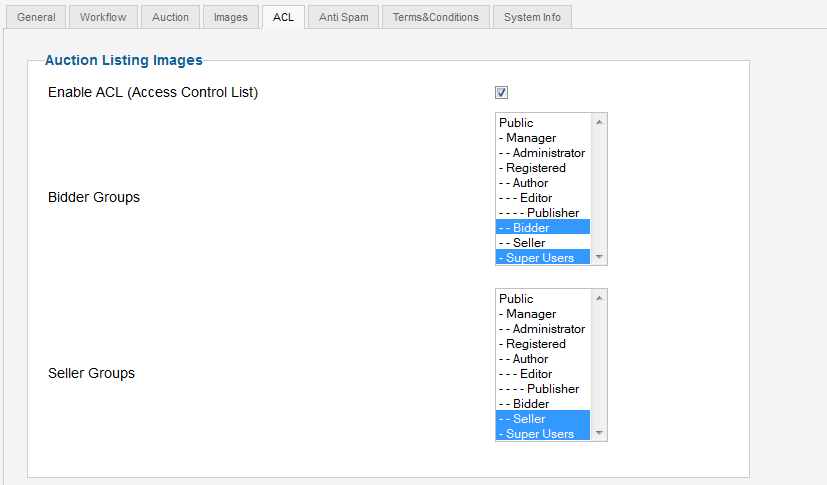
Access Control List
From this tab you can enable the ACL feature that will allow you to select specific groups of users that can bid or post auctions.
It is recommended that you create 2 new groups for both and set proper access levels before setting this up.
For more information regarding the ACL please visit our Auction Factory - Access Control List Guide.
Anti Spam
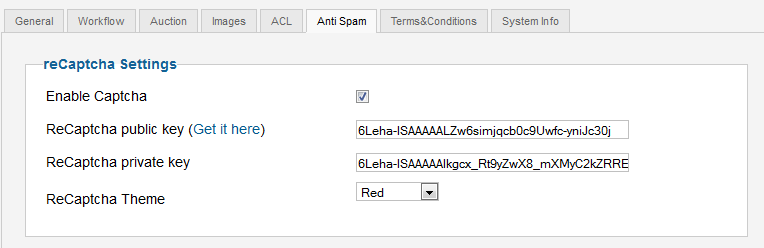
To protect your website against spam you can use reCaptcha and email protection such as reCaptcha Mailhide, this tab allowing you to set them up. The reCaptcha form will appear when guests attempt to post comments on auctions.
Check the Enable Captcha checkbox and then press on the Get it here link which will redirect you to ReCaptcha's website. Follow the instructions found there and copy/paste the public and private keys.
Optionally, you can change the ReCaptcha Theme to either Red, White, Backglass or Clean.
From the Email Spam Protection area you can enable the email protection by checking the checkbox and selecting which type you wish to be used.
The reCaptcha Mailhide works the same way as regular reCaptcha, but it is used when users want to see email addresses. Other mail protection methods are Smarty and Joomla. Smarty obfuscates the source code with Javascript, and Joomla simply hides the email.
In case you choose reCaptcha Mailhide, you have to add a public and a private key, clicking on Get it here will take you to the ReCaptcha's website to obtain the public and private keys.

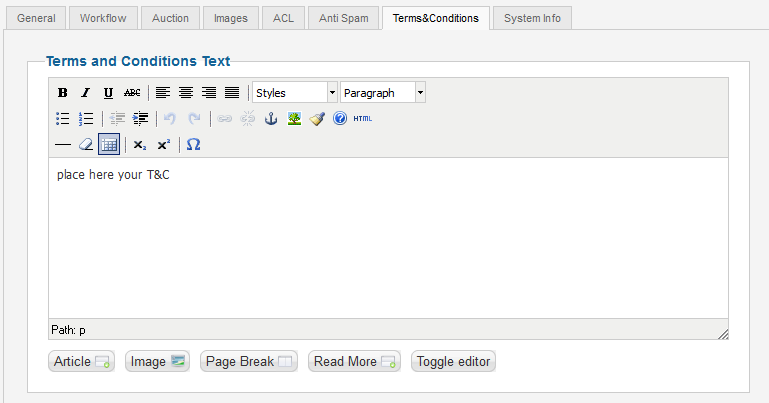
Terms & Conditions
This tab comes with a simple WYSIWYG editor where you can add your website's Terms and Conditions.
Users will have to read the Terms and Conditions and agree with them by checking the tickbox found on their profiles before they can bid, sell or access other features.
System Info
The System Info tab is implemented to provide basic information about the cache directory, upload directory or configuration file. These are required in order for the component to run properly, so make sure everything is green after installing Auction Factory.
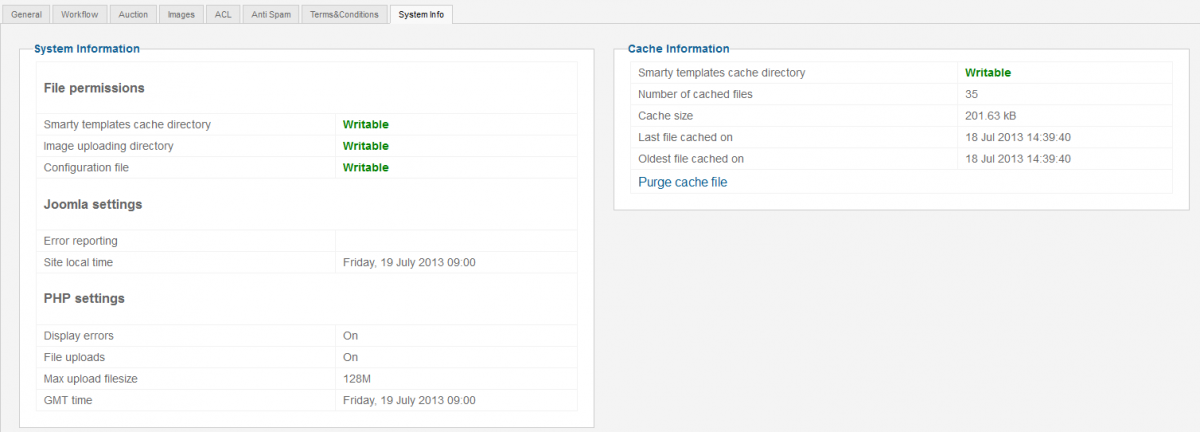
(!) After working on the smarty .tpl files, it is recommended to purge the cache so the changes can take effect right away. Remember that browser caching can also affect how changes are updated.
Currency Manager
The Currency Manager area, accessible from the Control Panel seen earlier, allows you to manage the list of currencies used on your website.
You can select a default currency so that when payments are made with other currencies it will convert them and recalculate the commission.
Clicking on Refresh Conversion Rates will update the rates using Google conversion. When changing the default currency, the currencies and prices for payment items will also be updated.
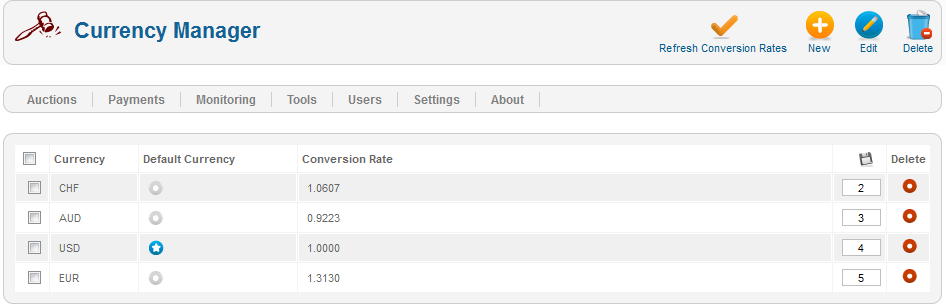
Clicking on New will allow you to add new currencies, simply add the currency abbreviation and optionally the conversion rate. In case you don't know the conversion rate you can leave the field empty and click on Refresh Conversion Rates later on to update it. The CRON script also updates currency exchange rates according to Google, check the CRON documentation for more. It is recommended you use the valid ISO currency codes in order for the conversion to work properly.

Manage Categories
Auctions can be assigned to different categories depending on what you have set on the backend.
Category Manager area allows you to add new categories or to sort the order of the already existing ones.
The component supports unlimited category levels.
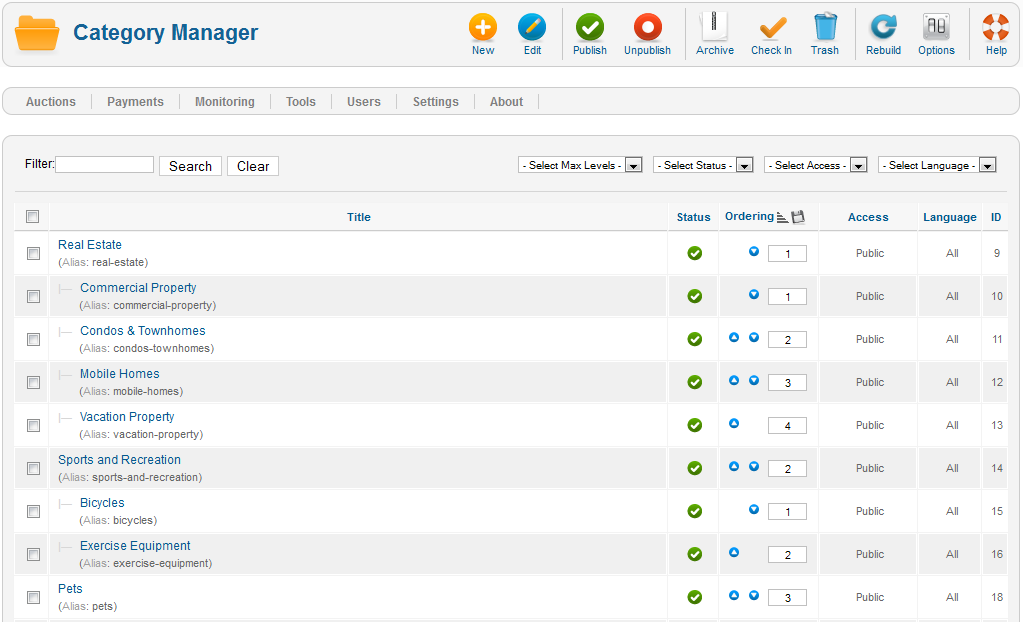
With version 3.5.0 of the component you can also use a Quick Add feature which allows you to add multiple categories in one run.
Component Menu
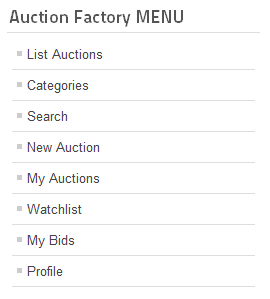
Auction Factory comes with many menu items that you can manage by adding or removing them from the user menu.
Here is an list of the default menus, the most important and at the same time the ones that are published in Auction Factory's menu from the installation:
- List Auctions - Shows lists containing active auctions with various filters.
- Categories - Shows a list with all the available categories in multiple layouts.
- Search - Shows a search form for auctions or users.
- New Auction - Shows a form for users to post new auctions.
- My Auctions - Shows a list with all the auctions posted by the logged user, and also the received suggestions.
- Watchlist - Shows a list containing auctions added as favorites by the user.
- My Bids - Shows a list with all the bids, won bids, and suggestions made by the user.
- Profile - Shows the page where the logged user can check and edit his profile, check his balance, payments, ratings and more - if Community Builder is enabled this will redirect to that profile.