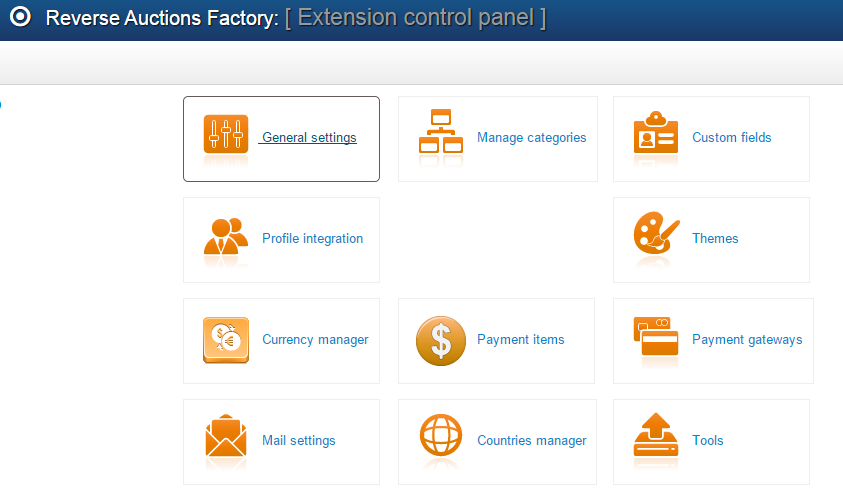
Table of Contents
Configuration
To configure most of the features offered by our component as well as the workflow of the auction system, go to the General Settings page found at Components/Reverse Auction Factory/Settings.
General Settings
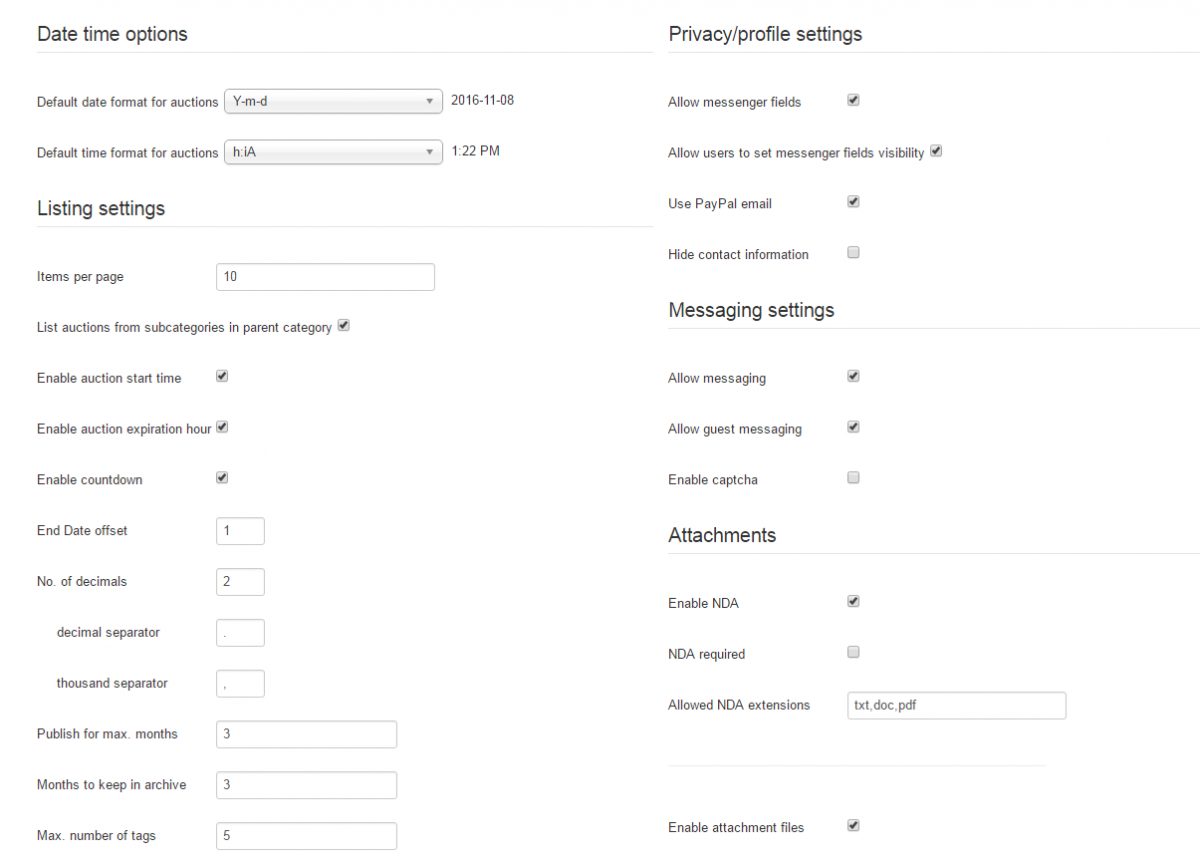
1. Choose the desired Date and Time format for the auctions, “d” stands for Day, “m” for Month and “Y” for Year. “H:i” is for a 24 hour representation of time while “h:iA” is for a 12 hour format.
2. Items per page will set how many auctions will be shown on listings. If the respective number is exceeded pagination will be created.
3. List auctions from subcategories in parent category will display all the auctions from a category including its subcategories altogether.
4. You can allow users to specify a starting and an expiration hour for their newly created auctions. By disabling these options, auctions start and expire at midnight, by default.
5. Enable countdown adds a timer for each auction displayed on the listings, which represents the amount of time left until that auction ends.
6. End date offset adds the number of days to offset the default end date from the current date. Take into account that time zone differences may affect this offset.
7. Define how the prices will be displayed by setting up the Number of decimals and the Separators for decimals and thousands.
8. Set the maximum amount of time (in months) the auctions can be published for, as well as the amount of time they will be kept in archive before the CRON deletes them.
9. From this section you can also set the Max Number of Tags allowed per auction. Tags are an excellent way for auctions to be filtered in a search. However, if a user puts too many tag words, his auction will pop up in every search. Some people may find this annoying. To ensure this does not happen, you should leave a decent limit on your tags, making the poster choose only the tags that are suitable for his auction.
1. Search for bidders: Creates a filter which allows users that are in the Bidders group to search for other bidders as well.
2. Search for buyers: Creates a filter which allows users that are in the Buyers group to search for other buyers as well.

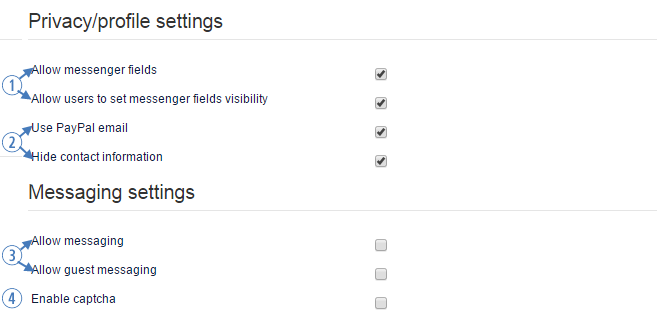
1. Allow messenger fields: allows users to add Instant Messenger information and also specify which one of these fields are visible when other users visit their profile.
2. Hide or show the users Contact Information like address, messenger or PayPal email (if enabled above) on the profile detail and listing sections.
3. Allow messaging: a messaging system which will allow bidders to interact with the buyers and vice versa. This can also be enabled for guests.
4. Enabling Captcha is recommended in order to prevent unwanted bot spam. You can configure this feature on the Spam Protection tab.
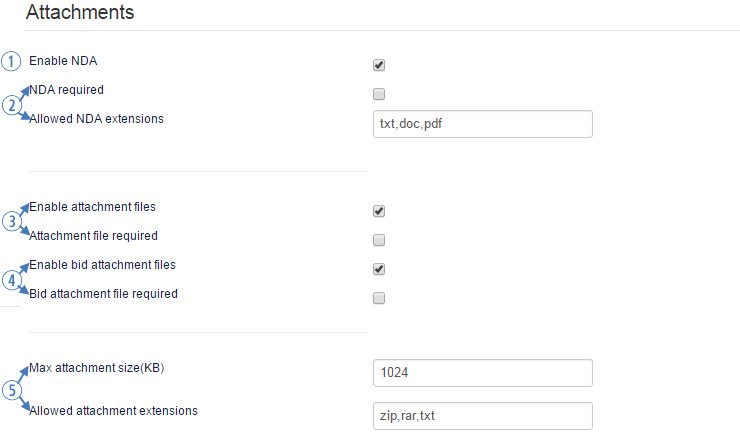
1. Enable NDA will allow users to ask for a non-disclosure agreement before bidding.
2. Having the NDA enabled will allow you to mark these files as required for all new auctions, and to also set which file extensions are allowed.
3. Enable Attachment Files to allow users to attach files when they create new auctions. This is useful when auction owners want to add detailed information about their auctions. This feature can also be made compulsory for every auction posted within the website, if the webmaster decides so.
4. Enable Bid Attachment Files will give bidders the possibility to attach additional files when they bid. This feature can also be made compulsory.
5. As a security measure, it is recommended to set a Maximum Attachment Size in KB of the uploaded files (in order to prevent infection from unwanted files) and also set the allowed extensions for the attachment files which can be uploaded on your website.
Auction Settings
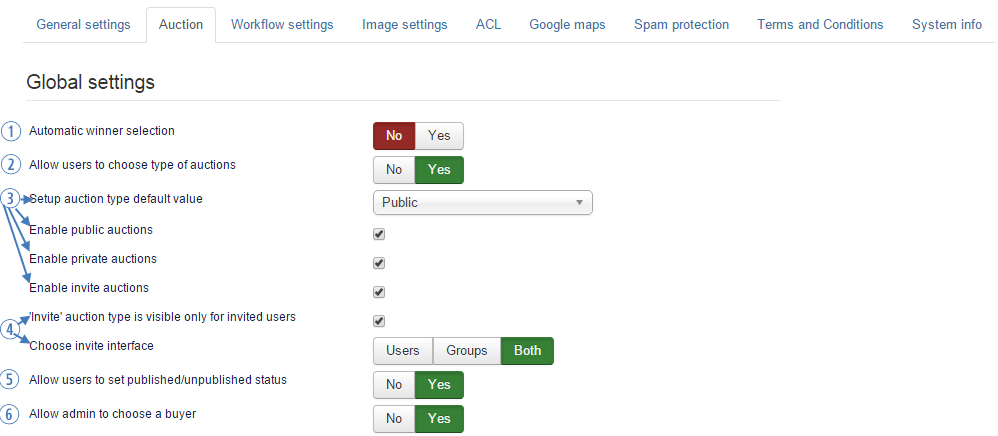
1. Automatic winner selection: enabling this option, the CRON task will automatically choose a winner based on the price comparison criteria when the timer expires. Keep in mind that, for this feature to work, you will have to set up your CRON Job. For more detailed information regarding this topic visit http://wiki.thephpfactory.com/doku.php?id=joomla30:auctionfactory:cronjob_info
2. You can either Allow users to choose the type of auctions by enabling the option or you can set a default from the drop-down list below.
3. There are 3 types of auctions available and you can choose which one of them are enabled by selecting their respective checkboxes:
- Public Auctions: A regular auction where every user and guest can see the list of bids and messages. This is the most common auction type.
- Private Auctions: The bids are hidden from all others except the auctioneer and the respective bidders. The bidders on the auction are hidden from other users, only the auctioneer having the option to see them. Messages are also hidden, the auctioneer can see all the messages and each bidder can only see his own messages.
- Invite Auctions: This allows auctioneers to open bidding only for invited users or user groups. Additional settings are available for this type of auction. If enabled, you can hide invite auctions from users who are not invited, and choose which invite mode to utilize: users, groups or both.
4. Invite type of auction can be hidden for specific users/groups who are not invited. This offers a better privacy of these auctions, and also avoid unwanted difficulties between users.
5. You can Allow users to set published/unpublished status for their auctions by themselves, or set a default status when posting new auctions from the drop-down list below.
6. Allow admin to choose a buyer will display a list of all buyers on the add/edit auction page.
As a multi-featured auction based component, Reverse Auction Factory allows you to change the functionality of some of the features that are available for the auction pages.
You can allow users to do the following:
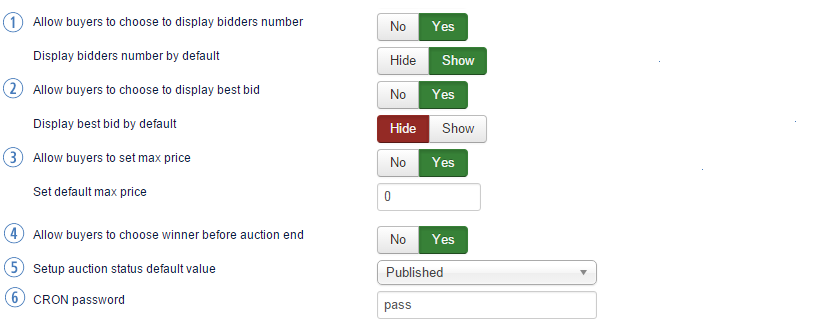
- 1. Choose to display the Bidders Number (Disabling this will allow you to set, if you wish to show or hide, by default, the bidders number for all auctions)
- 2. Choose to display Best bid (Disabling this will allow you to set if you wish to show or hide, by default, the best bid for all auctions)
- 3. Set the Maximum price (Disabling this will allow you to set a default maximum price. If the box remains blank or zero, then no maximum price is used)
- 4. Choose Winner before auctions end. (this does not overwrite the Automatic winner selection option)
- 5. In case users are not allowed to set the status for their auction, you can choose here if new auctions will be Published or Unpublished, by default.
- 6. Set a CRON Password which will be used to safely call the CRON script.
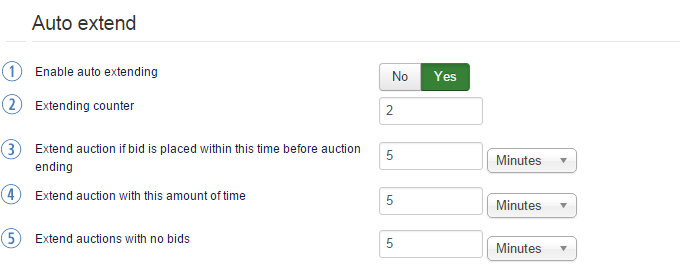
1. With the Auto extending function enabled, if a bid is received in the set period of time before the auction expires, it will automatically extend the expiration date with a predefined amount of time.
2. Extending counter allows you to set the maximum amount of times a single auction can be extended.
3. Set the amount of time required for the auction to receive a new bid before being closed, in order to become extended.
4. Set the amount of time the auctions will be extended, this can be set in seconds, minutes, hours, days, months, years.
5. With Extend auctions with no bids you can choose to also automatically extend the ending date of the auctions that received no bids. When the CRON runs, instead of closing the auction, it will extend it with the set value. This is useful when the auction doesn't meet the auctioneer's requirements.
Workflow Settings
From the Workflow Settings tab, you can set up a couple of things regarding certain processes of the component, which are related to the listing workflow.
There are 2 ways in which users can post their listings:
- one with a one-step posting, where all the listing information is entered in one page.
- a two-step posting, that will require users to set the category first, and then the rest of the listing.
Besides ACL, listings can also be actively moderated. By enabling the Admin must approve every Listing option, all auctions will need to be manually approved by an admin on the backend before publishing them. This can be good if you want to avoid unwanted content within your website.
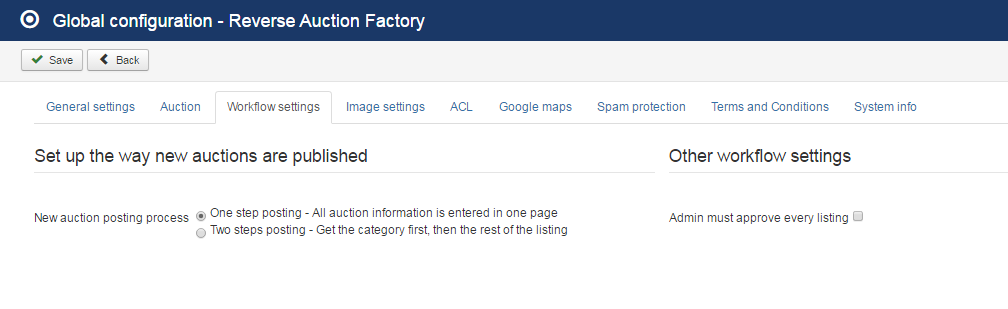
Image Settings
1. On the Auction Listing Images you can view the current version of the graphic library and to Disable Images for listings. In case you check this option, there will be no gallery on the listings, no image to upload, thus no image for the auction. We recommend you don't disable this option, having images further improving your chances to sell your product faster.
If the images are not disabled, you can define them on the Listing Options area.
2. Set a Maximum picture size. If a picture of a bigger size is being uploaded, it will cancel the upload and inform the user about the maximum allowed upload size.
3. To prevent any over-flood on your website you can limit the Max. nr. of images per listing.
4. Require main picture for listing will make the main picture required for all new listings. This is useful, since an auction which has at least one main picture can be seen as being more trustworthy.
5. There are 3 Gallery Types you can choose from that have different behavior: Scroll Gallery, Lytebox and Picture Slider. Be sure to check them one by one to see which one of them suits your website better.

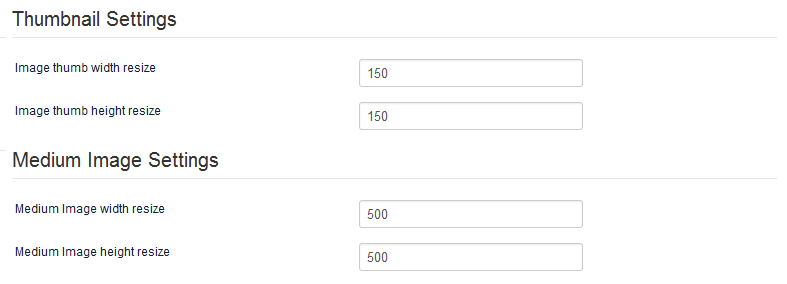
There are two sizes of images that can be set by you on this page. These are not for the full sized versions but for the their thumbnails, which are shown on the listings and auction details pages.
Thumbnail settings allows you to change the width and height of the images found on the listing pages, such as My Auctions and List Auctions. Medium image settings has assigned the images found on the detailed view of auctions.
(!) The full-size modal box, which appears when clicking on the image, is resized dynamically in Javascript, according to the clients' resolution.
That means that for any resolution the browser has, the image is always centered at about 90% of the height or width available on screen.
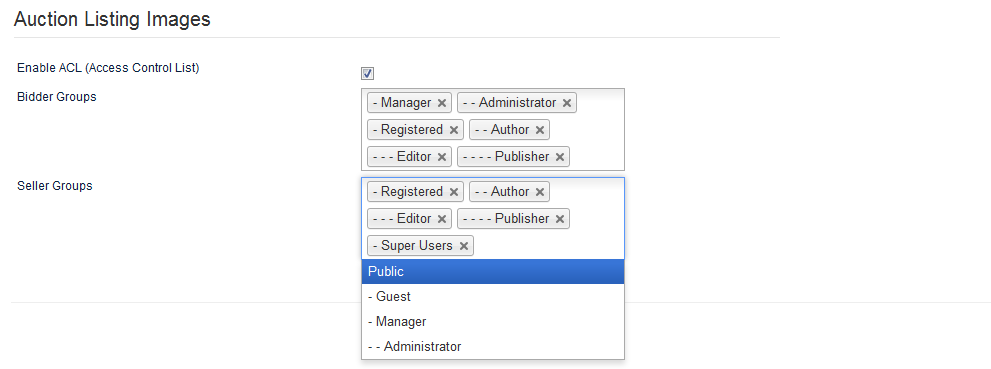
Access Control List
From this tab you can enable the ACL function of the component, which will allow you to select which specific groups of users are allowed to post auctions or place bids.
It is recommended that you create 2 new groups for both sellers and buyers, and set proper access levels before setting this up.
For more information regarding the ACL please visit our Reverse Auction Factory - Access Control List Guide.
Google Maps
To have functional Google Maps on your website you will need an API key. In order to get one, click on Get API Key and follow the instructions found there.
After you entered the API, you can define settings, like the default position of the map (by latitude and longitude, or simply choosing the default position by navigating on the map) and also the zoom level.
Below these you can select the distance unit(kilometers or miles) that will be displayed (and the values for it).

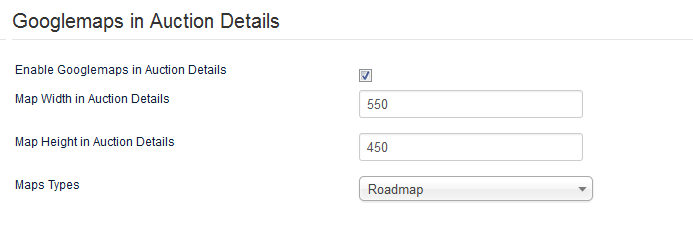
You can enable Google Maps to be displayed in every Auction Details page.
If enabled, you can define the width and height of the map for this section and select which type of map will be used.
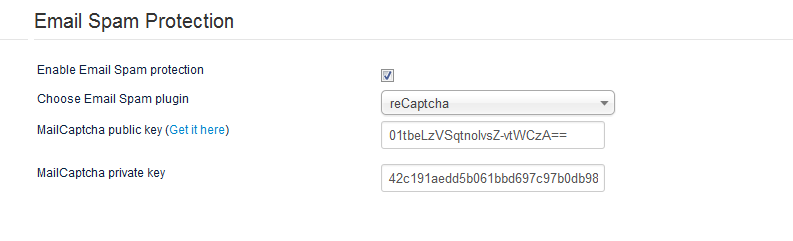
Spam Protection
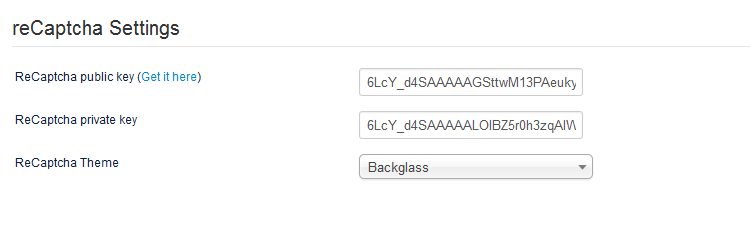
To protect your website against spam you can use reCaptcha and email protection like reCaptcha Mailhide. This tab allows you to set them up.
ReCaptcha can be enabled from the General Settings but, here, you must add a public and a private key for it to work. Click on Get it here to get both of the keys.
After doing so, you can select a theme from the dropdown menu.
From the Email Spam Protection area you can enable the email protection by checking the checkbox, and selecting which type you wish to be used.
The reCaptcha Mailhide works the same way as regular reCaptcha, the only difference being that it is used when users want to see email addresses. Other mail protection methods are Smarty and Joomla. Smarty obfuscates the source code with Javascript, and Joomla simply hides the email.
In case you choose reCaptcha Mailhide, you have to add a public and a private key, clicking on Get it here will take you to the ReCaptcha site to obtain your keys.
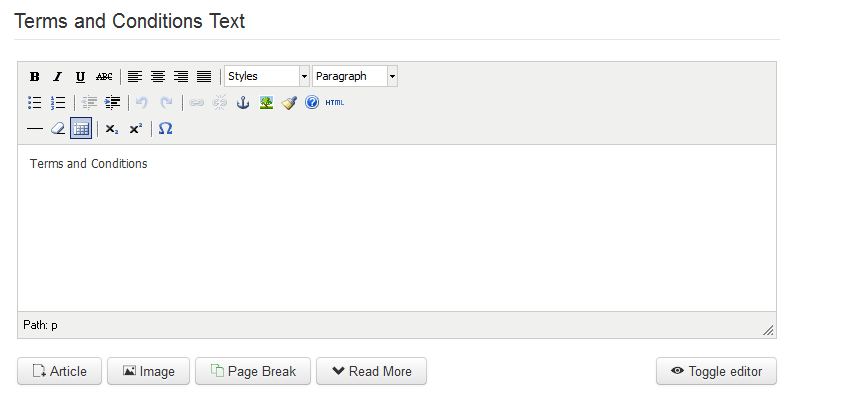
Terms and Conditions
This tab comes with a simple text editor where you can add the Terms and conditions.
Users have to read and agree to the Terms & conditions by checking the tick box every time they bid on auctions.
System Info
The System Info tab is implemented to provide basic information about the cache directory, upload directory or configuration file. These are useful for debugging, if any issues arise. The component handles the configuration file permissions itself. Even if the configuration file might be Unwritable, the component will still be able to save the configuration and restore previous permissions.

(!) After working on the smarty .tpl files, it is recommended to purge the cache so the changes can take effect right away. Remember that browser caching can also affect how changes are updated.
Component Menu
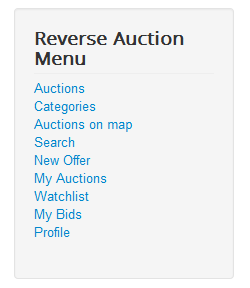
Reverse Auction Factory's menu comes with 9 menu items that you can enable/disable or edit afterward:
- Auctions - Provides a list with all the active and archived auctions from all users(2 separate tabs).
- Categories - Shows a list of all the available categories.
- Auctions on map - Google Maps integration, which displays the location on the map of all the auctions.
- Search - Provides a search form for auctions and users.
- New Offer - The place where users can post new auctions.
- My Auctions - Area where users can check their own auctions.
- Watchlist - A list with all the auctions added to the watchlist.
- My Bids - Shows all the bids made by the respective user.
- Profile - The place where users can check and edit their profiles, see the payment balance, add funds or check their ratings.
The Menu Item Names for the menus according to the default install are:
- Auction - Show Auction List
- Categories - Classical Category Layout
- Auctions on Map - List Auctions on Google Maps
- Search - Search Auction Form
- New Offer - Post New Auction
- My Auctions - My Auctions
- Watchlist - My Watchlist
- My Bids - My Bids
- Profile - User Profile Edit
Currency Manager
Currency Manager area allows you to manage the currencies used on your website.
You can select a default currency so that, when payments are made with other currencies, it will convert them and recalculate the commission.
Clicking on Refresh conversion will update the rates using Google conversion.
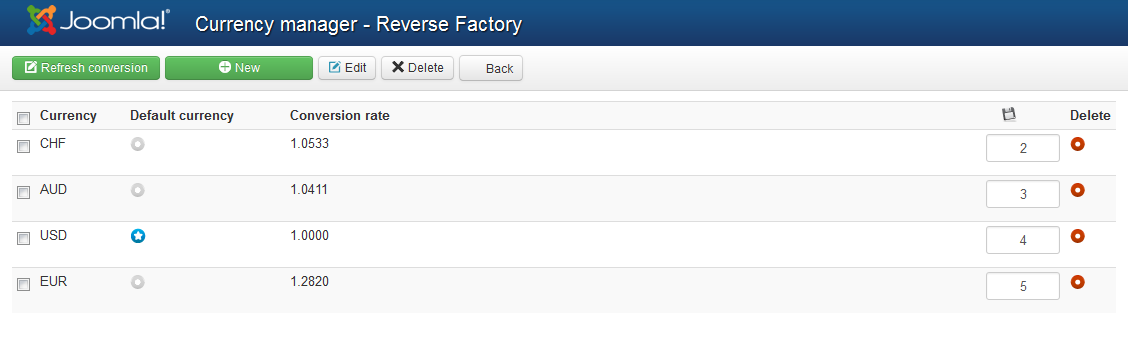
Clicking on New will allow you to add new currencies. Simply add the currency abbreviation and, optionally, the conversion rate. In case you don't know the conversion rate you can leave the field empty and click on Refresh conversion later on to update it. The CRON script also updates currency exchange rates according to Google. Check the CRON documentation for more.
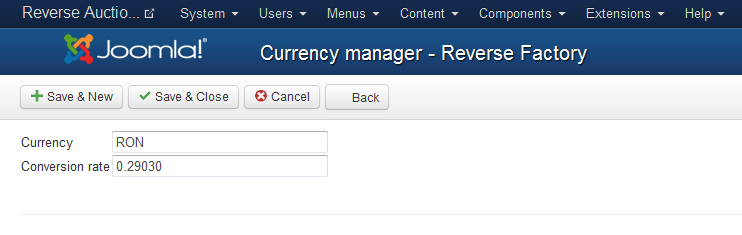
(!) You need to use internationally accepted 3 character currency codes; e.g. USD, EUR.
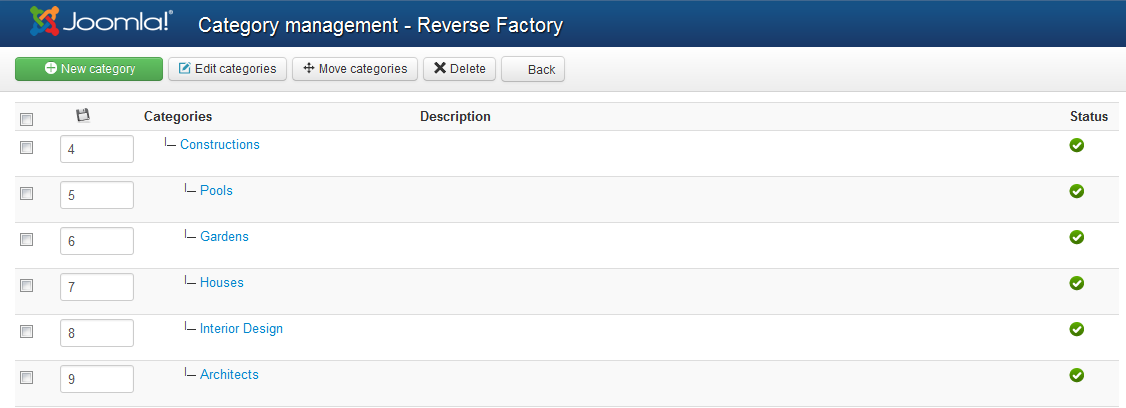
Manage Categories
Auctions can be added to different categories, depending on what you have set on the backend.
Manage Categories area allows you to add new categories or to move them around.
The component supports unlimited category levels.
(!) Documentation based on Reverse Auction Factory version 4.3.5