Table of Contents
Configuration
Swap Factory offers an easy to use and easy to manage exchange system of the goods added by users as classified ads. It gives you, as administrator, access to many settings and features that are configurable from the backend. While the component is installed with default settings allowing it to be up and running almost instantly, it still needs some certain settings in order to be used at its full potential.
To access most of the Swap Factory backend options go to Swap Factory's Control Panel and click on General Settings.

General Settings
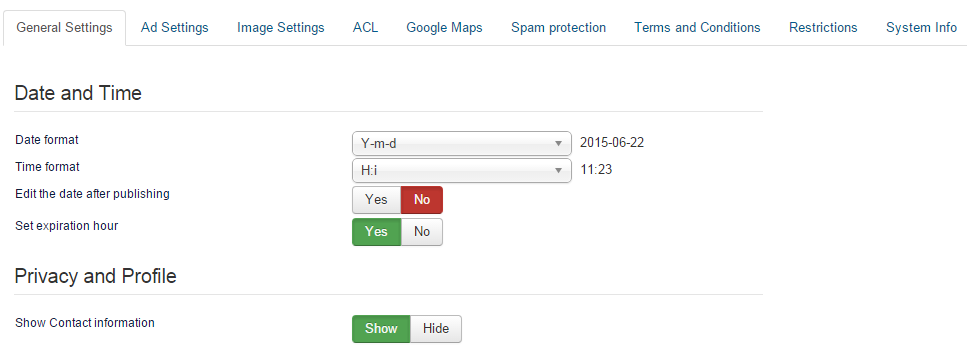
Choose the desired Date and Time format for ads, on the right side of the drop-down menu you can see how the selected format is displayed on the frontend after saving the changes. "d"
stand for Day, "m" for Month and "Y" for Year. “H:i” is for a 24 hour representation of time while “h:iA” is for a 12 hour. You can allow users to edit the date of their already published ads.
Set expiration hour allows users to specify an expiration hour for ads (if disabled, the ads expire at midnight).
Enable Show Contact information to display users address or emails from details page or listings.
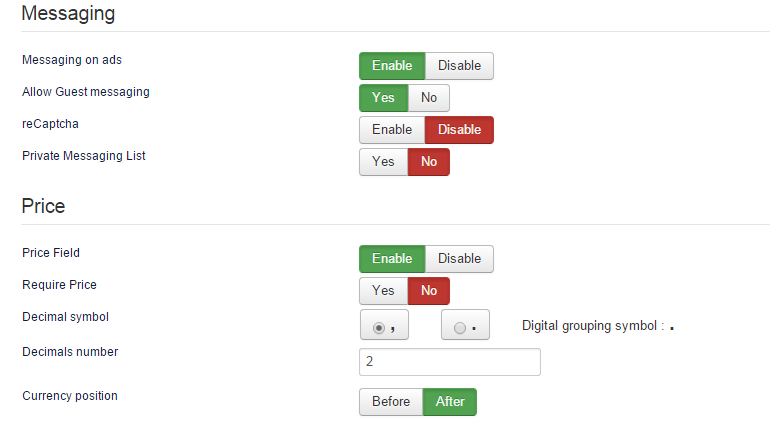
Messaging on ads will enable a tab on every ad where users can interact with the sellers for information regarding the items by sending messages. Enable Allow Guest messaging so that guests can also use the messaging system, this will require Messaging on ads to be enabled.
With the messaging system enabled, it is recommended that you also enable reCaptcha to protect your website against unwanted bot spam, this will require the user to enter certain letters or numbers that a computer can not read, thus preventing automated spam messages. Further configuration for reCaptcha will be needed on the Spam Protection tab.
With the Private Messaging List option enabled messages will be visible only for the users who created them and for the ad's owner. Guest messages will be visible only for the ad's owner.
Enable Price Field in order to display an asking price field on every ad. You can make this field mandatory by setting to "Yes" the Require Price option found below.
You can choose the Decimal symbol between a dot and a comma, this will be used before the fractional part of a number written in decimal form. The unchosen symbol will be used for digital grouping.
Choose how many decimals to be displayed by setting up the Decimals number field.
The symbol of the currencies can be displayed before or after the actual prices by setting up the Currency position option.
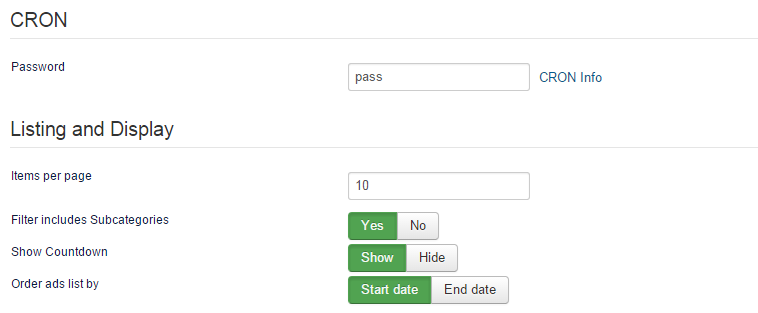
Set a Password which will be used to safely call the CRON script.
Add the number of ads shown on each page with the Items per page field, in case there are more to be displayed than the set value, pagination will become available.
Filter includes Subcategories will display ads from subcategories along with its parent category together in the category listing.
Enable Show Countdown in order to display how much time of availability there is left for every ad by using a Javascript countdown.
Choose the Order of the ads shown on listings, by starting date or ending date.
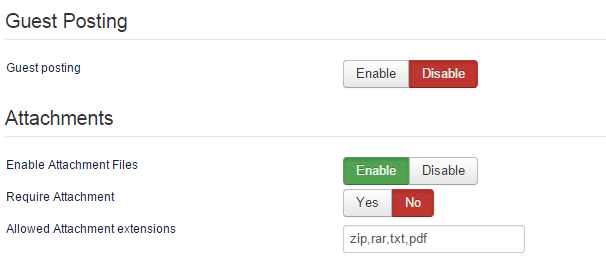
A useful feature offered by our component is that with the Enable guest posting option, visitors will be able to post ads without being logged in, they will just need to insert the name and an email address and then edit the ad with the key received on the email entered. In case the "Pay Per Listing" or "Pay Per Image" items are enabled, the ad will not be published.
Enable Attachment Files will allow users to attach files to their ads while the Require Attachment option will make the files mandatory for each new ad.
In case you enabled this feature, you can define the list of Allowed Attachment extensions such as zip, rar, txt, etc.
Ad Settings
New Ad posting steps allows you to choose from 2 ways on how the new ads will be created, either a one step posting process where all the listing information is entered in one page, or another, that will require users to set the category first before completing the rest of the details.
Besides ACL, ads can also be actively moderated. By enabling the Admin Approval option, all ads will need to be manually approved by an admin on backend in order to become published on frontend.
The exchange goods system can be disabled by selecting "No" on the Swapping option, this way the Propose Swap button and Offers List menu item will be unavailable. Users will still be able to view ads and exchange goods if they decide to by contacting other users.
The availability of ads can be defined by setting up how many days the users can extend their ad, for how many months it can be published or for how many months the expired/closed ads will be kept in archive.
Adding "0" for the later two means unlimited time. Users can extend ads when expired from "My Ads" page.

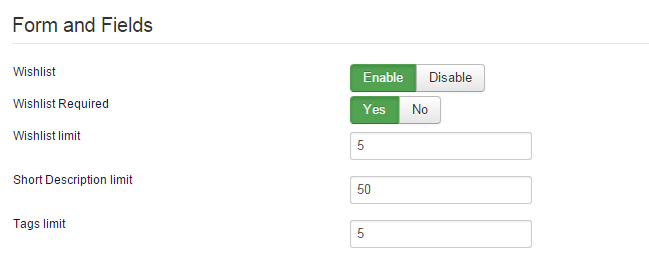
Enabling the Wishlist allows users to set a list of desired items they wish to trade with.
You can also make the field mandatory for every new ad by enabling Wishlist Required, as well as setting a maximum number of items allowed.
Set the Short description limit as the maximum number of characters allowed in the short description field.
Tags limit defines how many tags are allowed per ad. Tags are an excellent way for ads to be filtered in a search, however if a user puts too many tag words his ad will pop up in every search, some people may find this annoying. To ensure this does not happen you should leave a decent limit on your tags, make the poster choose only the tags that are suited for his ad.
There are 2 different ad types that are available for posters:
- Public Ads - Regular ads where all the information can be seen by all users and messages are seen by everyone. Unless the admin overrides it and messages can be seen only by logged in users.
- Private Ads - The owner of the ad and his address is hidden to users. Messages can only be seen by the owner and the user that sent/received the message.
From this area you can enable/disable these 2 types and also the option to allow users to Set the ad Type by themselves if both auction types are enabled. In case you won't allow them to choose the type, you must choose one of them as default from the Default ad type option available below.
Set the ad State will let posters to set the status of their ads. In case this option is disabled, you will have to choose the default value of the ads' status to either Published or Unpublished upon creating them.
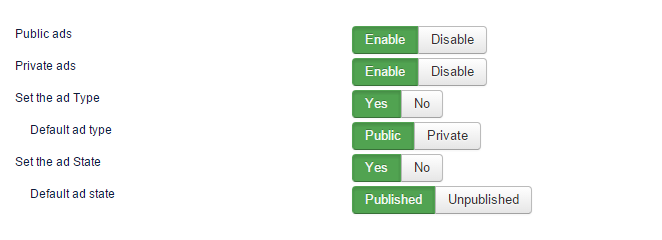
Image Settings
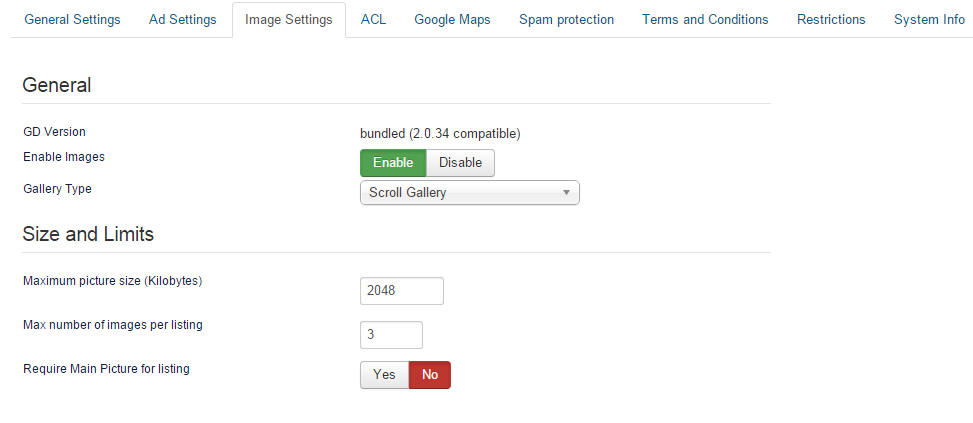
On the Image Settings tab you can view the current version of the graphic library and to Enable Images for listings. In case this feature is disabled, the image gallery on the listings will be unavailable and there will be no option to upload images.
Gallery Type option will allow you to select from 3 different gallery types that are available and selectable from the scrolldown menu: Scroll Gallery, Lytebox, and Picture Slider.
If the images are enabled, you can define them on the Size and Limits area.
You can add a value for Maximum picture size, and also to set a limit for the Maximum number of images per listing.
The main image of every new ad can be made mandatory by setting the Require Main Picture for listing to "Yes".
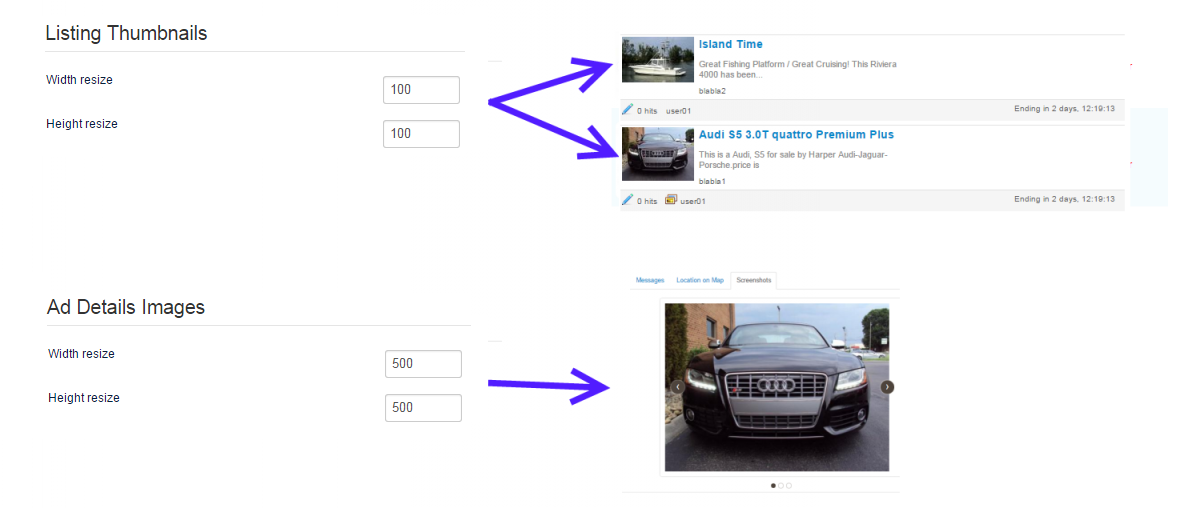
There are two sizes of images that can be set by you on this page. These are not for the full sized versions but for the thumbnails of them shown on the listings and ads details pages.
Listing Thumbnails settings allows you to change the size in width and height of the images found on the listing pages such as Ads list and My ads. Ad Details Images settings have assigned the images found on the detailed view of ads.
(!) The full size modal box which appear when clicking on the image is resized dynamically in Javascript according to the clients resolution.
That means that for any resolution the browser has, the image is always centered and about 90% of the height or width available on screen.
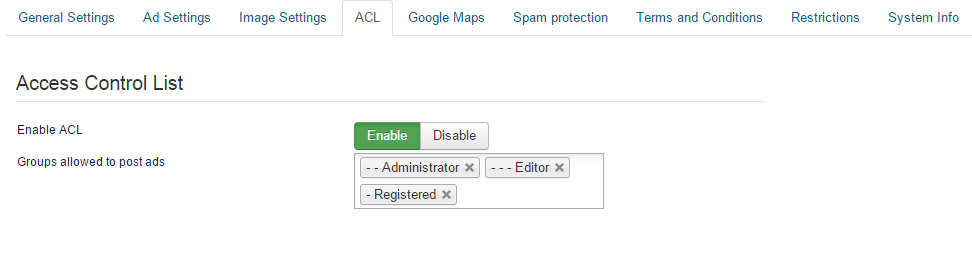
Access Control List
From this tab you can enable the ACL feature that will allow you to select specific groups of users that can publish ads.
Click on the Groups allowed to post ads field to add new groups, a drop-down menu will appear from where you can select the groups that will be able to post new ads.
Google Maps
For each ad a separate location can be specified using the Google Maps system. Users can view the map with all the active ads and their locations on the user menu's Ads on map page. Besides this, users can also view the location of a specific ad from the details page of it.
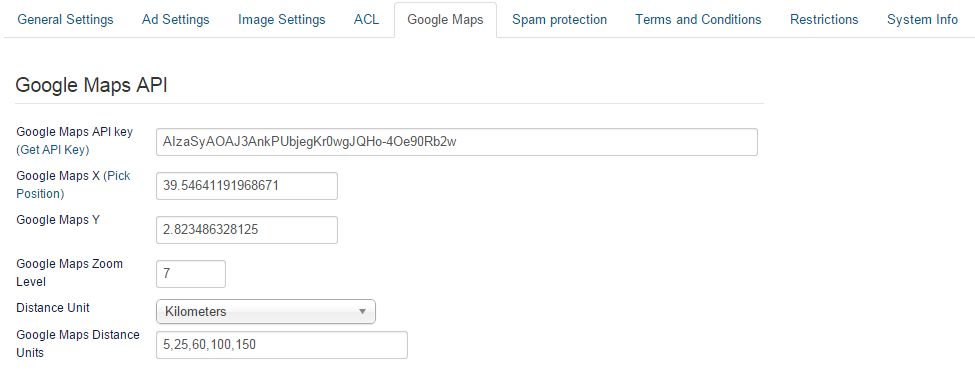
From this tab you can configure the Google Maps integration, this is needed before it can be displayed on frontend. To have this feature working you will need an API key, click on the Get API Key link provided and follow the instructions found there. Afterwards, copy/paste the link in the field and click on Save.
Now that the map can be displayed, you can set the default position of it by clicking on Pick Position or adding the latitude and longitude coordinates manually. Besides this, you can also set the default zoom level of the map from 1 to 10 on the Google Maps Zoom Level field.
Distance Unit allows you to choose either Kilometers or Miles as the metric system which will be used. Add specific values for the chosen metric system on the field below, these will be displayed on the actual map.
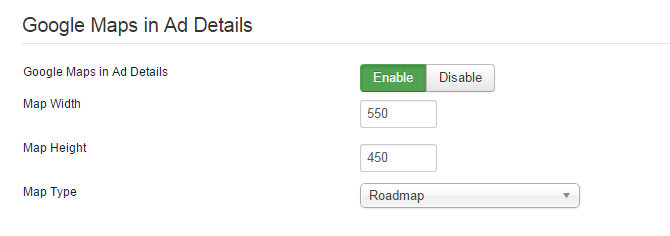
Enabling Google Maps in Ad Details users will have available for every ad a Location on Map tab where they can check the exact location of the respective ad.
If enabled, you can define the width and height of the map and select which type of map will be used: Roadmap, Hybrid, Satellite or Terrain.
Spam Protection
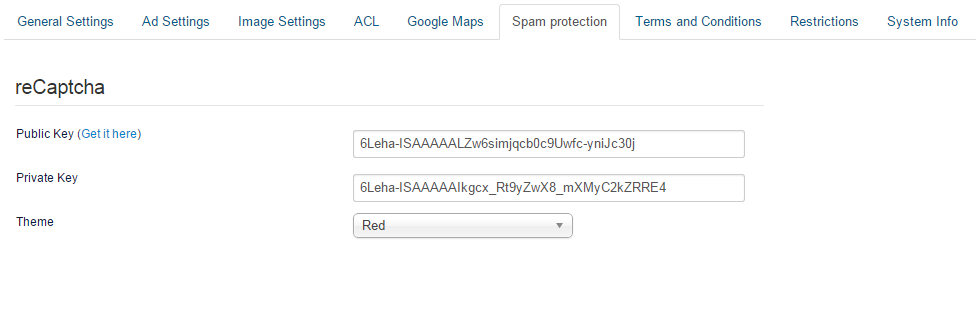
With ReCaptcha you can avoid unwanted bot spam, this will require the user to enter certain letters or numbers that a computer can not read, thus preventing automated spam messages.
In case you enabled this feature from the General Settings tab, you will have to acquire a public and a private key for it to work. Click on Get it here link provided which will redirect you to ReCaptcha's website. Follow the instructions found there and copy/paste the public and private keys.
Furthermore you can choose one of the four available Themes for ReCaptcha: Red, White, Backglass or Clean.
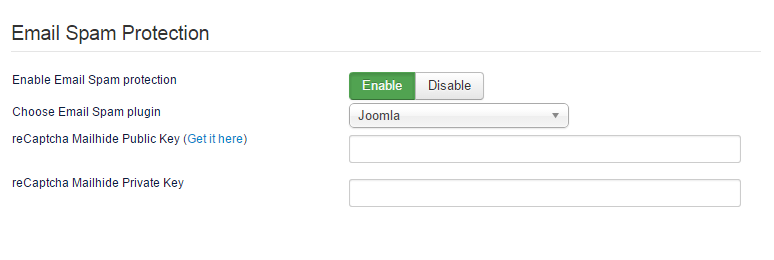
From the Email Spam Protection area you can enable the email protection and select which type of plugin you wish to be used.
Recaptcha Mailhide plugin works the same way as regular ReCaptcha, but it is used when users want to see email addresses. Other email protection methods are Smarty and Joomla. Smarty obfuscates the source code with Javascript, while Joomla simply hides the email address.
In case you choose ReCaptcha Mailhide, you have to add a public and a private key, clicking on Get it here will take you to ReCaptcha's website to obtain the public and private keys, copy/paste them on the provided fields and click on Save when you are done.
Terms and Conditions
This tab comes with a simple WYSIWYG editor where you can add your website's Terms and Conditions.
When a user creates an ad, he must agree to the Terms and Conditions, such as: Privacy, Confidentiality, Limitations or Payment method.
However, by leaving the text field empty this will no longer be required on the frontend, hiding the field completely.

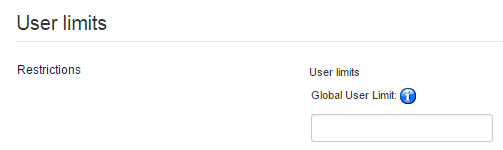
Restrictions
From the Restrictions tab you can set a limit of ads globally, per user groups or per user.
The priority of the limits is: User > Group > Global. This means that, for example, even if there is a global limit of 5 ads but the respective user has a custom user limit set for him of 10 ads, the later one will be prioritized, ignoring the global limit and allowing the user to add a maximum of 10 ads.
Add a value which will be applied as a Global User Limit for ads. In case there are no other custom limits added, this will be applied to all the users on your website. Leave blank for unlimited ads.
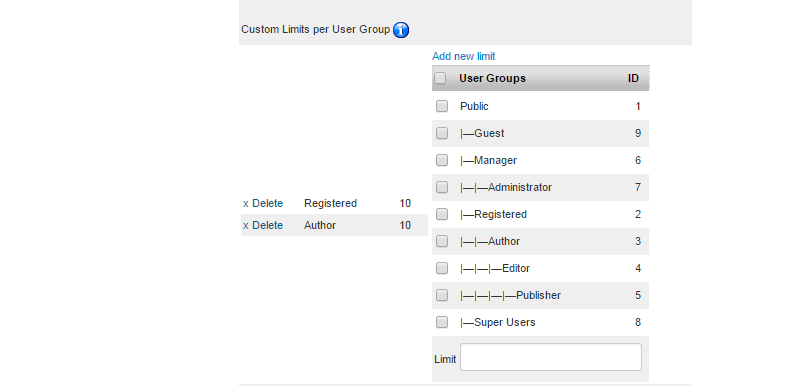
On the Custom Limits per User Group you can select various user groups and add the limit value in the text field below. Multiple limits for different groups can be added by clicking on Add new limit. This is more relevant then the global limit but less relevant than limits per user.
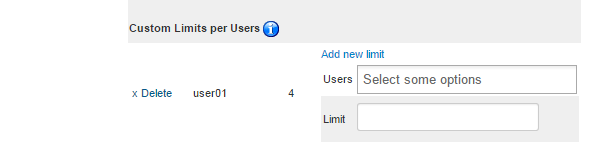
On the Custom Limits per Users area you can limit the amount of ads for certain users. Clicking on the Users field will display a dropdown menu where you can select one or more users, add the value below and click on Add new limit in case you wish to add a different limit to other users.
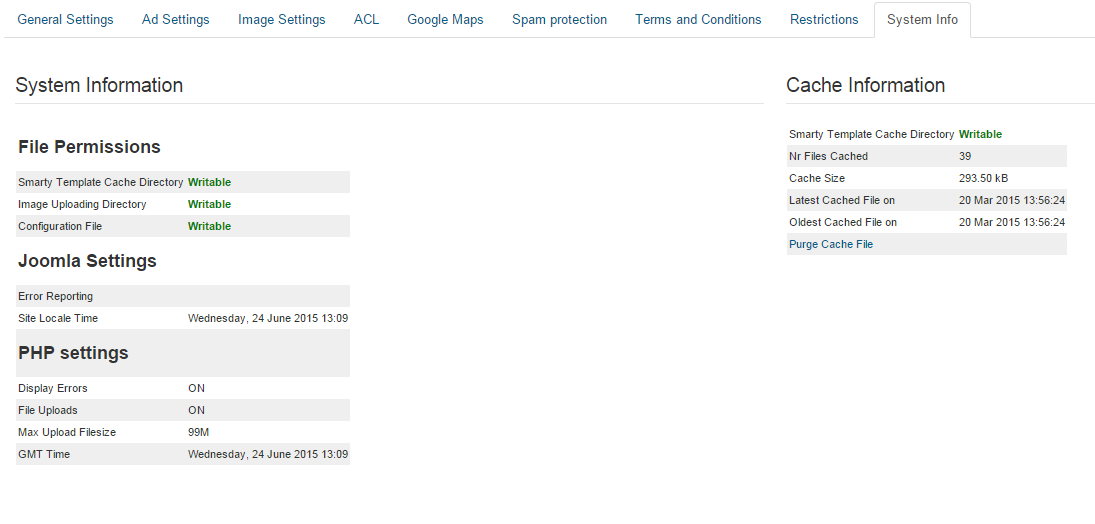
System Info
The System Info tab is implemented to provide basic information about the cache directory, upload directory or configuration file. These are useful for debugging if any issues arise. The component handles the configuration file permissions itself, even if the configuration file might be Unwritable, the component will still be able to save the configuration and restore previous permissions.
Currency Manager
Currency Manager page allows you to manage the currencies used for ad prices or for buying payment items.
You can select a default currency so that when payments are made for payment items with other currencies it will convert them and recalculate the prices.
Clicking on Refresh conversion will update the rates using Yahoo conversion.
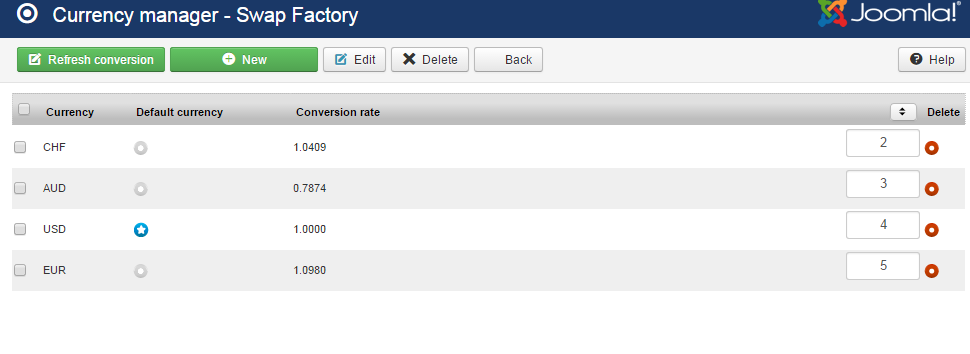
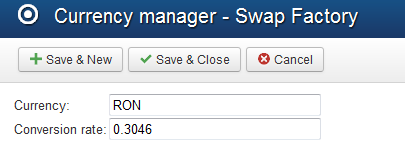
Clicking on New will allow you to add new currencies, simply add the currency abbreviation and a conversion rate. In case you don't know the conversion rate you can leave the field empty and click on Refresh conversion afterwards to update it. The CRON script also updates currency exchange rates according to Yahoo, check the CRON documentation for more information.
Manage Categories
Ads can be assigned by users to various categories depending on the backend configuration.
Category Management area allows you to create categories along with sub-categories or to sort the order of the already existing ones.
The component supports unlimited category levels.
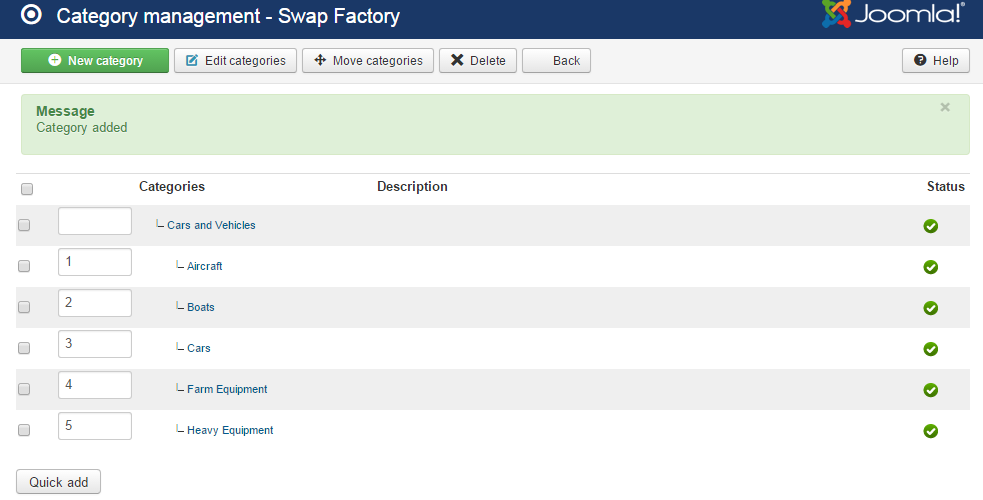
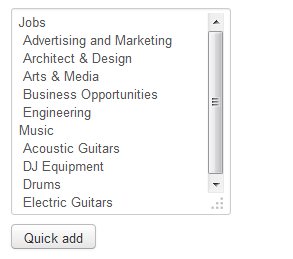
To add multiple categories at once use the Quick add button found at the bottom of the page. The Quick Add option allows you to add more categories along with their sub categories at once, they have to be written in a certain way to be properly arranged: write the main category first, on the next line leave one space and write a sub category, under it you can write another and so on. If you want to add another main category do not leave any space in front of it and then continue as you did with the others.
Component Menu
Swap Factory comes with many menu items that you can manage by adding or removing them from the user menu.
Here is a list of the items that are available on the Swap Factory menu upon the installation:
- Ads List - Shows lists containing all the active/expired/archived ads.
- Offers List - Shows lists of all the offers to trade goods that are either received, submitted or closed.
- Categories - Shows a list with all the available categories.
- Ads on map - Shows Google Maps with the location of all the ads.
- Search - Shows search forms that can look up after a certain keyword, price or user.
- New Ad - Shows a form for users to post new ads.
- My Ads - Shows a list with all the ads posted by the logged in user.
- Watchlist - Shows all the ads or categories added to favorites by the logged in user.
- Profile - Shows a page where the logged in user can view and edit his profile, check his payment balance, and more.

(!) Documentation based on Swap Factory version 1.5.2