Table of Contents
Payment Plugins
There is a number of possible revenue streams for Webmasters offered by Swap Factory: Pay per Listing, Pay per Contact, Pay per Image, Pay for featured ads.
To encourage people into buying all of the above, we also implemented 2 additional items, Buy Packages which upon buying can allow the user a defined number of listings, contacts or images, all in one, and also a Buy Credits item which can offer attractive discounts for users.
While Swap Factory provides ways for users to contact each other, transactions made between them are not handled by the extension or supported by it directly. The available payments gateways being used for the listing, images, or other payment plugins.
There are several Payment Gateways which are shipped with the standard version.
Payment Gateways
Swap Factory installs with multiple Payment Gateways which can be used to pay certain Payment Items.
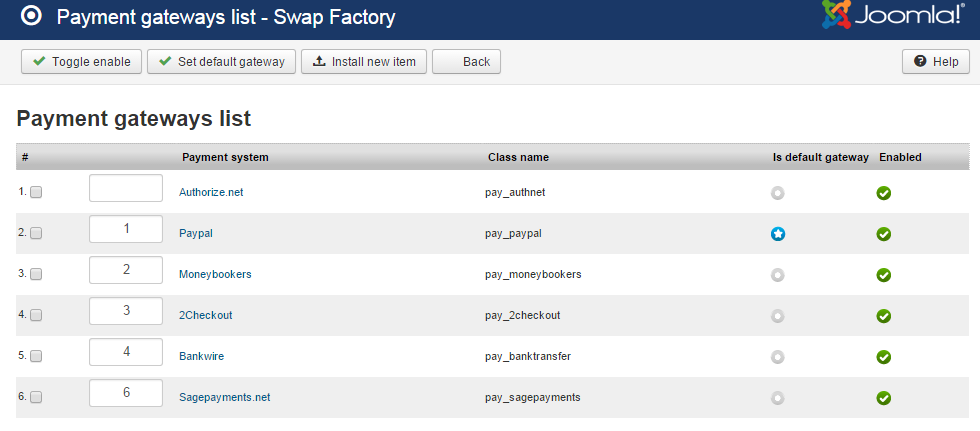
The following gateways are available by default, allowing you to enable or disable them when needed:
PayPal
You can enable PayPal Sandbox as a testing area during the development of your store. With sandbox enabled no payments will be taken.
Along this, you will need to add your PayPal Email address and to choose if you wish to autoaccept the valid payments.
Moneybookers
Requires you to set the Email address which will be used by the gateway.
2Checkout
For this you will need to add your 2Checkout email address on the X Login field.
Below you can enable the Test mode of the gateway, using this setting all sales will be treated as testing, regardless of any parameter value.
It is also important to know that 2Checkout does not support multiple currencies, you have to use the 2Checkout account currency as your default.
Bank Transfer
Provides a WYSIWYG text editor where you can add Bank Wire information.
This will require you to manually confirm payments in the system
SagePayments
Requires you to add the Terminal id, a 12 digit unique number that is assigned to your merchant number when you apply for a SagePayments account.
Add the merchant banner image to be displayed, you can upload your banner via the virtual terminal.
Optionally, you can customize the payment page by changing the color of various items.
Authorize.Net
Requires you to add a Login ID and Transaction Key, these are used by the payment gateway to authenticate that you are authorized to submit Web site transactions. Transactions that cannot be authenticated by the payment gateway using these values are rejected.
You can enable the Sandbox as a testing area during the development of your store. With sandbox enabled no payments will be processed.
Other Gateways can be added into the extension, refer to our API for 3rd party Payment Gateways integration.
Payment Items
Payment Items page allows you to manage all the available revenue streams of the component.
To enable or disable any of these items, click on the symbols in the upper right corner of each item, a pop-up should appear with "Click to disable" or "Click to enable" when hovering over the icon.
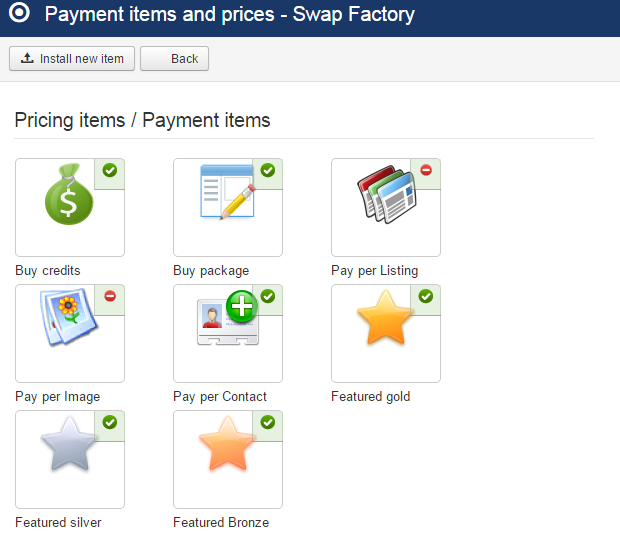
- Buy Credits - Defined admin discount for users in order to receive extra credit.
- Buy Package - Certain admin defined credit usage.
- Pay per Listing - Users pay to publish their ads.
- Pay per Image - Users pay to add extra images to published ads.
- Pay per Contact - Users pay to view publisher details.
- Featured Ads (Gold, Silver and Bronze) - Preferential ads listing.
Buy Credits
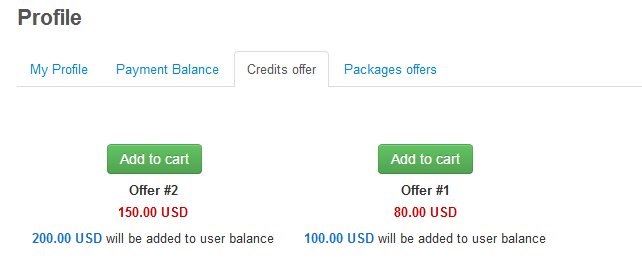
This item is available so that you can create Credit Offers giving your users a discount in order for them to receive a set amount of extra credit.
These offers can be seen on the frontend on the Profile page of the user menu under the Credits offer tab.
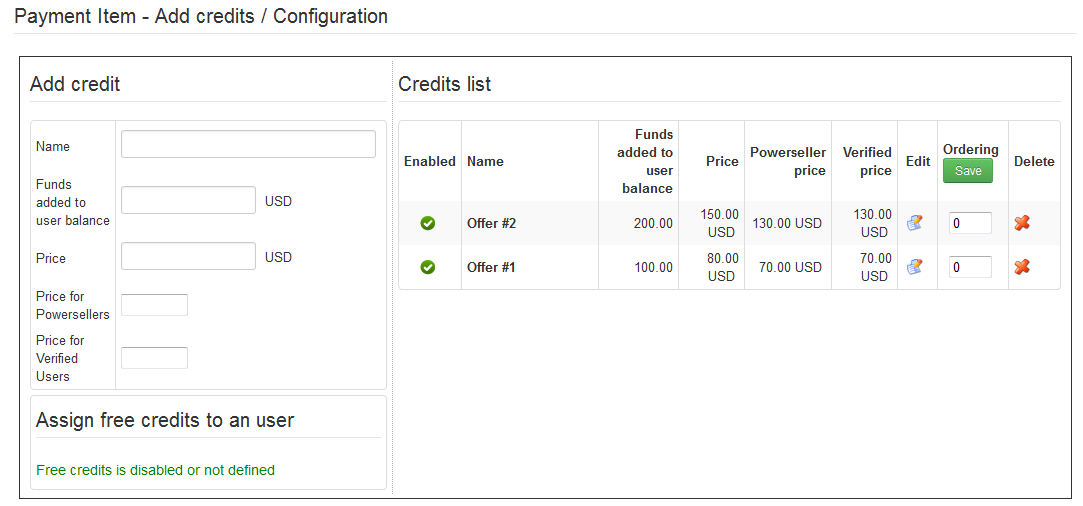
From backend you can create new credit offers one by one.
On the Add credit area you have to add a name for the new offer and how many funds will the user receive from it. Afterwards select the price that the user have to pay, preferential prices can be added for Powersellers and Verified Users. Click on the Save button found at the top of the page when you are done.
All the offers should be seen on the Credits list area, there you can edit, delete or change their order.
Buy Package
With Pay per Package you can compress more items such as Pay per Listing, Pay per Contact and Pay per Image into one single item having predefined values for each of them.
You can make advantageous offers giving users the chance with these "3 in 1" packages to pay less than if they would buy them separately.
All the packages can be seen on the Profile page of the user menu under the Packages offers tab.
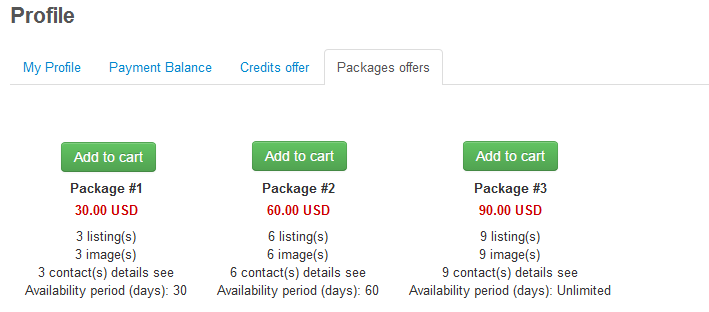
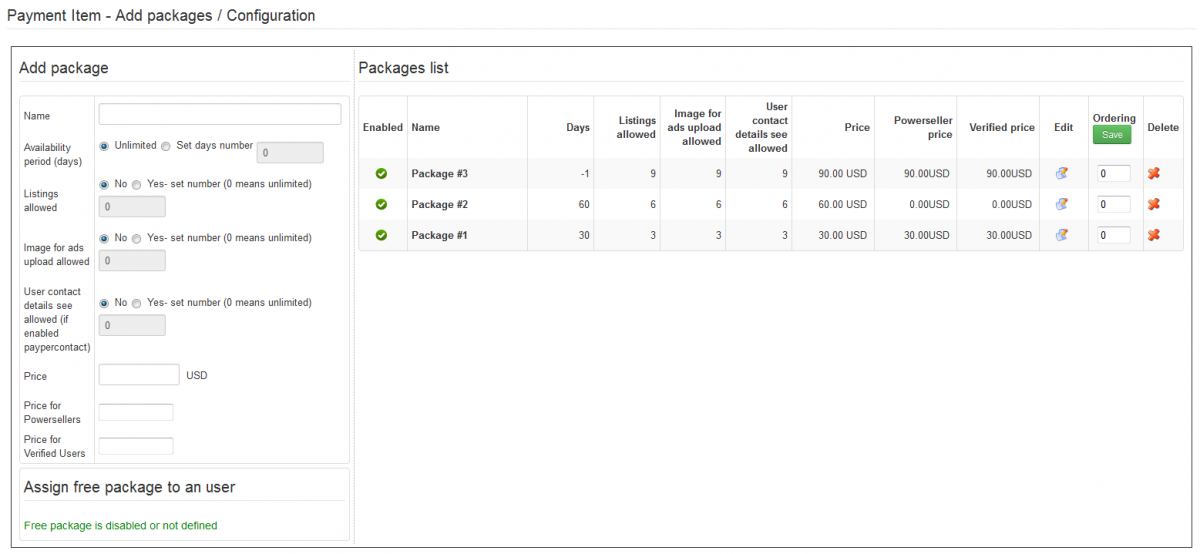
The configuration part of this item allows you to create new packages or manage the available ones.
On the left side of the page you will find a form where you can add details for the new package, firstly add a name and the availability period(in days) of it.
Add how many listings, images and contact details are allowed for the user who buys the package. You can select just some of them or add them with unlimited amounts.
Furthermore, add the price that the user have to pay, preferential prices can be added for Powersellers and Verified Users.
Click on the Save button found at the top of the page when you are done.
Pay per Listing
Pay per Listing item will allow you to request a defined price for every new posted ad.
In case the poster doesn't have the required amount in his balance, the ad will be set as Unpublished and a payment of that value will be added on pending with the user redirected to a payment form for buying the required credit for the ad in question. When the poster is charged and the payment is completed, his ad will become Published and accessible by other users.

In case you enabled and set availability periods for listings, users will get to choose instead of a starting and ending date, the availability period wanted for the new add, with information about the cost next to it.

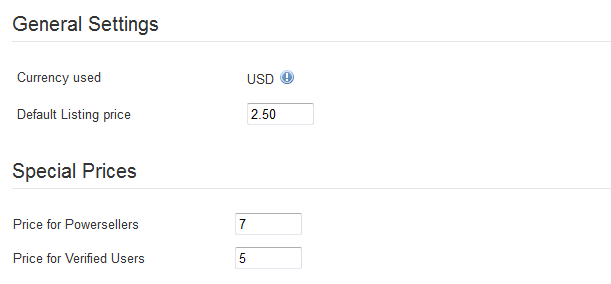
From backend you can set the Default Listing Price that users have to pay to have their ad published. The used currency will always be as default the one set on the Settings/Currency Manager page.
Preferential prices can also be added here for Powersellers and Verified Users.
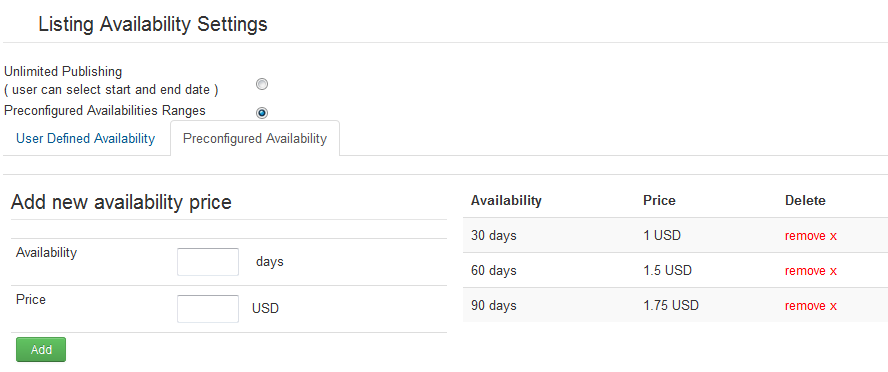
From the Listing Availability Settings area you can choose from 2 types of ads availability:
- Unlimited Publishing: users can select a starting and ending date for the ad. For this type of ad you can choose to either use the Default Listing price, or to use Categories Pricing, adding specific prices for each category
- Preconfigured Availabilities Ranges: allows you to add specific availability periods with different prices
Pay per Image
With Pay per Image you can charge users when they attach images to their ads.
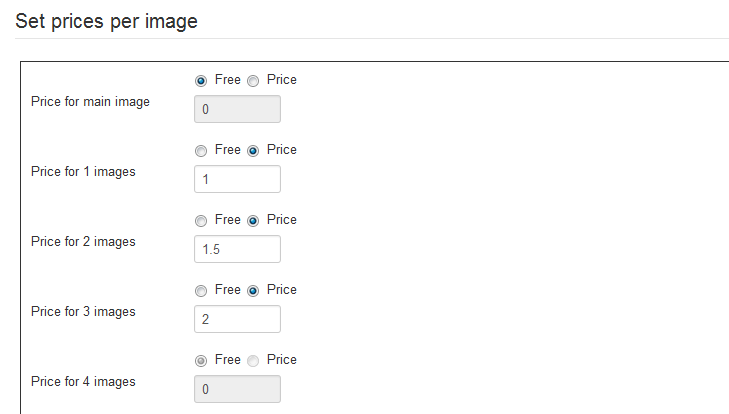
Set the Default image price for each uploaded image. To set all images free, you simply have to disable the image payment item.
Preferential prices can be added for Powersellers and Verified Users.

The pricing can also be set individually for the main image, 1st image, 2nd image and so on.
This will overwrite the default pricing or the preferential pricing for special ranks of users that can be set above.
Pay per Contact
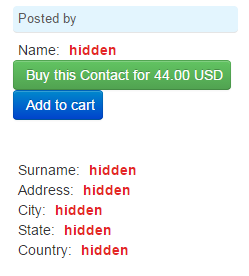
Enabling Pay per Contact you will hide users' details from each other making them to pay a defined price to reveal those details.
Contact buying is the same as for every credit buying, in case you don't have the required amount of funds in balance, you will be redirected to the buying form where you choose to buy credits to view hidden profile info.
Contact info is bought when the user is charged and the payment is completed as for every payment pricing.
As a new feature for Swap Factory, users can place multiple payment items on cart (Credits offers, Packages, Pay per Featured, Pay per Contact and Add Balance) with the Add to cart button, allowing them to buy all of them at once.
This feature is not available in CB because Community Builder displays by itself the profile of an user and only setting up restrictions of privacy directly in CB can prevent hiding the user details in case of an active CB.
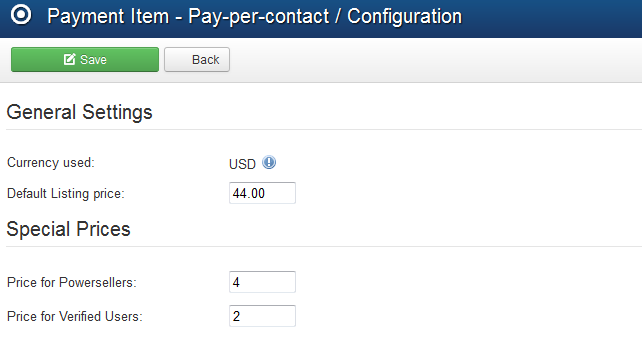
From backend, you can set up for this feature the Default price for showing up the contact info. The used currency will always be as default the one set on the Settings/Currency Manager page.
Preferential prices for Verified Users and Powersellers can also be set here.
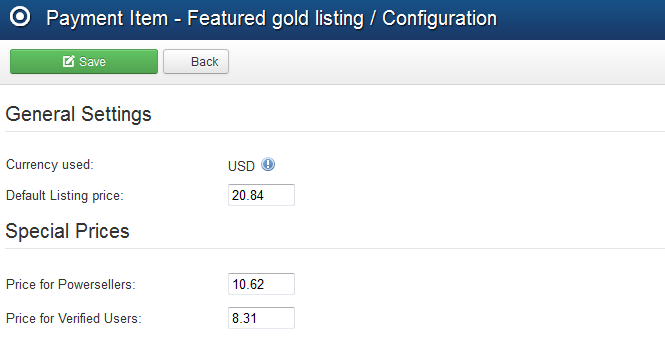
Pay for Featured
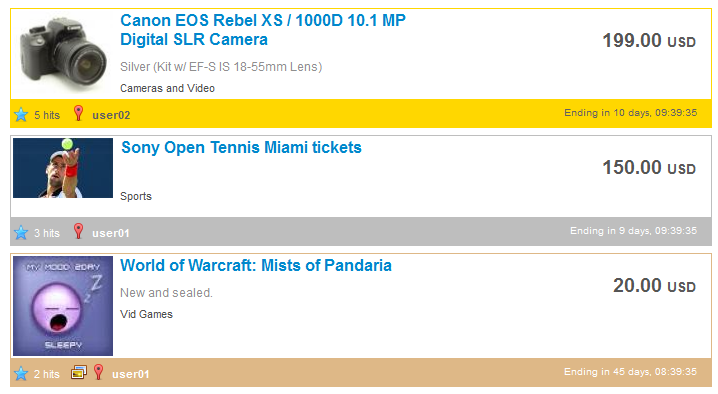
The Featured Gold, Silver and Bronze items adds ads on top of the lists and with different, more visible templating. Sorting order with these items enabled will be Featured Gold > Featured Silver > Featured Bronze > Normal ads. Amongst the same type of featured, regular sorting applies.
When promoting your ad to Featured, the amount of credit needed will be "consumed". Else you will be redirected to a payment form for buying the required credit for the ad in question. When the user part of the payment is done, PayPal will send an IPN notification to the site with the payment information and status. The IPN will arrive if the payment is valid, directly accepted if the buyers Paypal account is trusted or manual accepted. In the latter case the payment must be approved by the webmaster and only after this, the credit will be available to the buyers account.
As a new feature for Swap Factory, users can place multiple payment items on cart (Credits offers, Packages, Pay per Featured, Pay per Contact and Add Balance) with the Add to cart button, allowing them to buy all of them at once.

You can set specific prices for each of these 3 items by going to their pages. Add the Default listing price that users will have to pay when they promote their listing to the featured gold, silver or bronze lists and also to set preferential prices for Powersellers and Verified Users.
A module that can display these featured ads is also available from the Module Manager allowing you to enable and configure it accordingly.
(!) Documentation based on Swap Factory version 1.5.2