Custom Fields in Reverse Auctions Factory and Auction Factory
Custom fields can be added and configured without any PHP or HTML knowledge. The extension features an easy to use interface to create fields, add field values, insert and position fields into the template and also delete or unpublish them later.

The first step is creating the specific fields you require.
The Field Label is the name that will show to the users, the Database Name will be used in the code and database. There are numerous field types you can choose from; like: Checkbox, Radio Button, Text Area, Date Picker…and more.
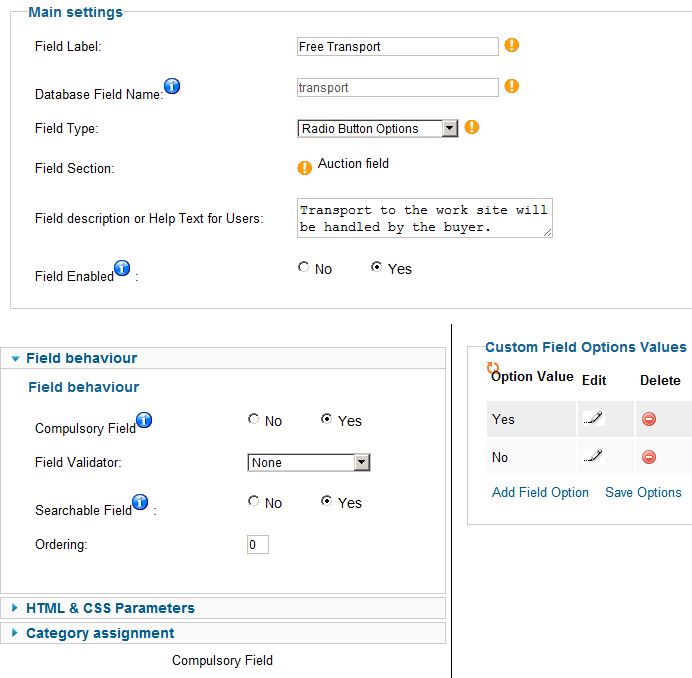
After setting relevant field data, save the field and then add Options Values if the field requires them.
Field behaviour settings allow you to make fields compulsory, impose valid data, use the field in searches and set an ordering(ordered amongst other custom fields) in the forms they show in.
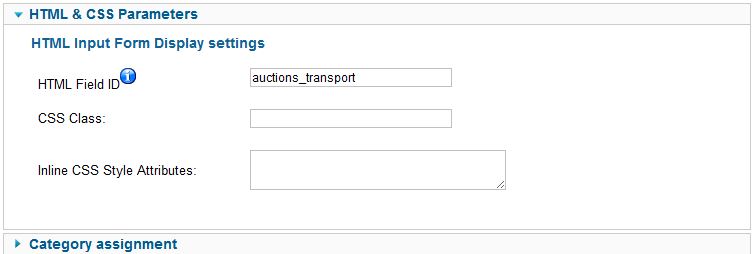
If desired, HTML & CSS Parameters can be set; like a HTML Field ID, CSS Class and CSS style attributes.
Another great feature is the possibility to publish certain fields in chosen categories.

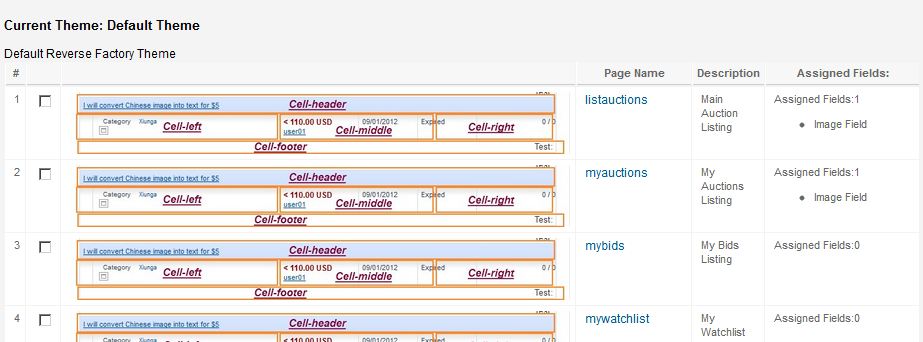
After saving a field, it will be displayed by default in the section you saved it in (Auction field or Profile field). The section can't be changed after. If you want the field to display in other areas of the component aswel, you have to publish it in other templates.
The Pages list can be used for guidance as to where to position your fields.
After you know where to publish the field, go to Field assignments and choose the Page and Position you wish to publish in.

You can also delete assignments from here. Clicking on a field will take you to the edit field page.
Then click on Assign Fields to select which fields to publish in that position.
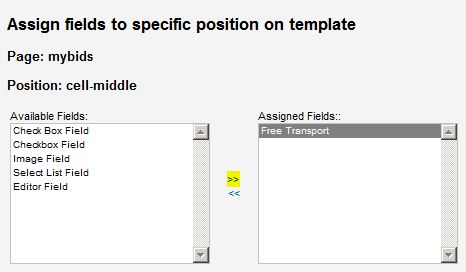
Select one or more fields from the Available Fields are and move them into the Assigned Fields area by using the highlighted arrows.

(!) Some differences may exist between Reverse and Auction Factory, documentation is provided for reference and guidance.