Table of Contents
User Guide
Media Mall Factory provides a powerful solution for managing media files online distribution that can handle third party sellers or artists publishing their media or downloadable goods.
Having a built-in Credit System, authors can earn money from their sales and the website can keep a certain percent.
You can easily build Tutorial Websites, Video and Picture packs selling sites or Music selling website in just a few clicks.
The built-in player will allow just the users that have bought the media to watch/listen - the webmaster can set up a limited or unlimited number of views.
Here is a preview of the user menu displayed to a user with author rights:
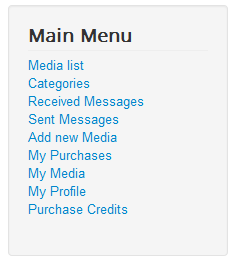
(!) It is important to know that depending on your user type, various restrictions might be set from the backend for different actions. (E.g. your user type not being labeled as author).
My Profile
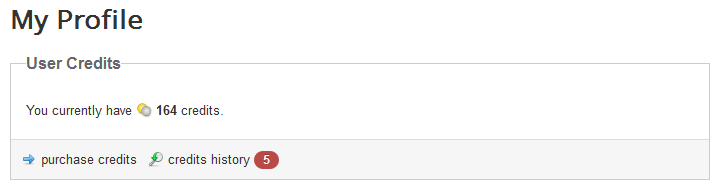
After creating an account go to My Profile, where you can purchase credits, edit your profile and author details, manage your balance and more.
User Credits
For most of the media files on the website, you will need to pay credits. Clicking on Purchase credits will redirect you to the page where you can buy them.
Enter the number of Credits you wish to purchase and select one of the payment gateways enabled by the administrator.
After you entered the amount of credits, the conversion rate will be made from credits into the default currency so you can see how much you have to pay.
Credit bonuses can be set by the administrator so that, when a purchase equals or exceeds a defined value, you will get an extra amount of credits.
Click on Purchase Credits to continue.
After the payment was confirmed and processed by the gateway you should be able to see it on the Credits History section.

User Details
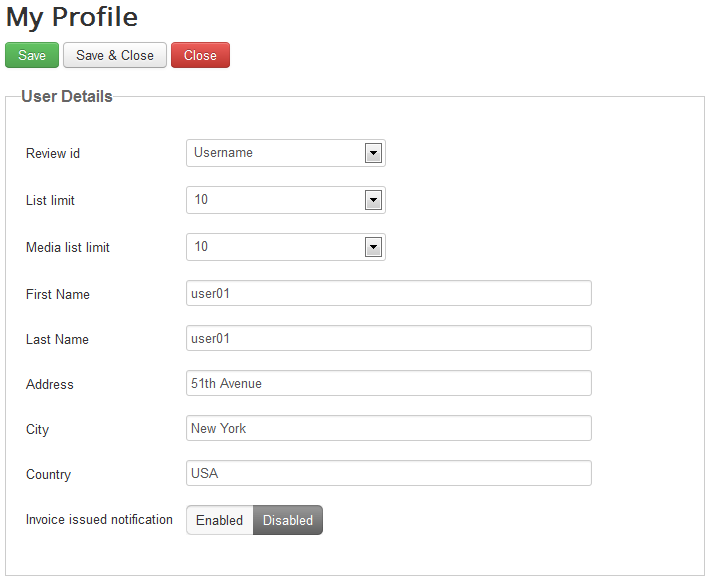
From this section, you can manage your user details and preferences by clicking on Edit profile.
You can choose how your id will be displayed when writing reviews, by name or by username.
With List limit and Media list limit you can define how many listings will be displayed for your user specifically. If there are more listings than the set amount, pagination will be created.
Your user details can be changed from here by modifying your name and address.
Enable "Invoice issued" notification if you want to receive an email notification when a new invoice has been issued.
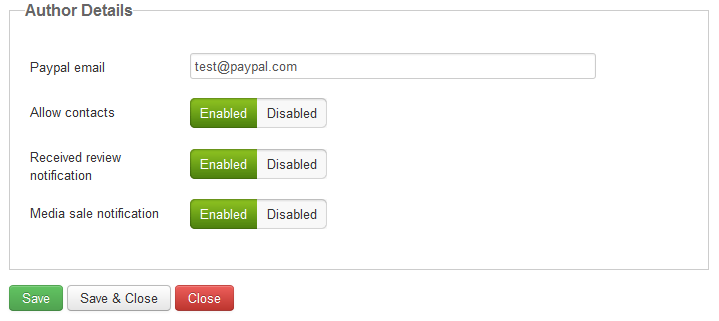
On this page you can also have additional settings as an author, for instance, you must set a PayPal email address and also if you want other users to be able to contact you.
Notifications can be enabled here, by enabling Received review notification you will be contacted when a new review has been added, while with Media sale notification you will receive an email notification when a media has been sold.
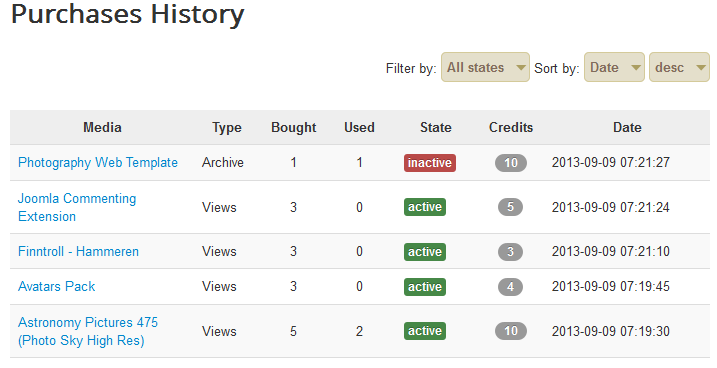
Accessing the Media Purchases History page you can view all the purchases made by you along with useful information such as: how many times you have used the item, for how many times you can still use it, the type of the file and more.
In case you want further details about a file you can pay an amount which is set by the administrator to contact and send messages to the seller. It is important to know that some sellers might have this option disabled.
To send a message at any given time you can go to Contacts from My Profile and click on the respective item from which you bought it.

Author Balance
In case your user group is set as an Author group you will find additional details and settings on My Profile.
From here you can not only view your balance but you can also manage it by withdrawing funds or converting them to credits.

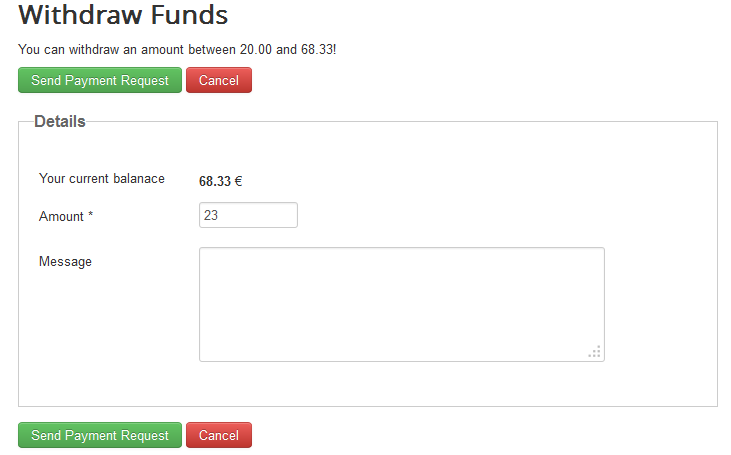
From Withdraw funds you will see your current balance and the minimum value that you can retrieve, this being set by the administrator in the backend.
Add the amount, and, optionally, a message which can be viewed by the administrator. Then click on Send Payment Request.
Convert Funds allows you to change a specific amount of funds into credits. How many credits you will receive depends on what the administrator had set for the Credits/Currency rate.
Enter the amount and below you should see how many credits you will receive for it. Click on the Convert Funds button to finish the procedure.

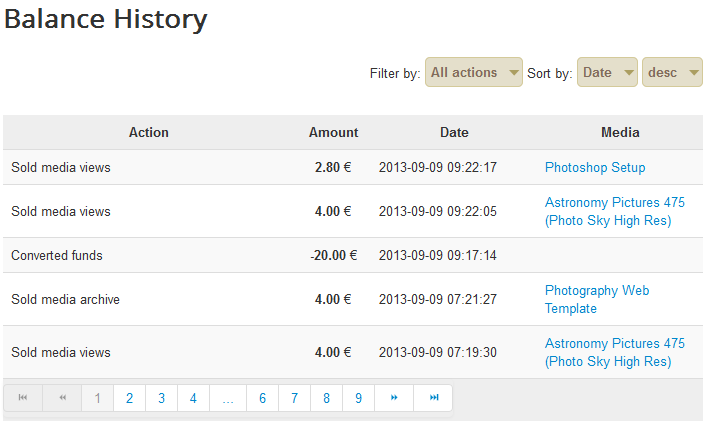
With the Balance history and Sales history sections you can verify all your transactions and see how much you gained or lost and for which actions.
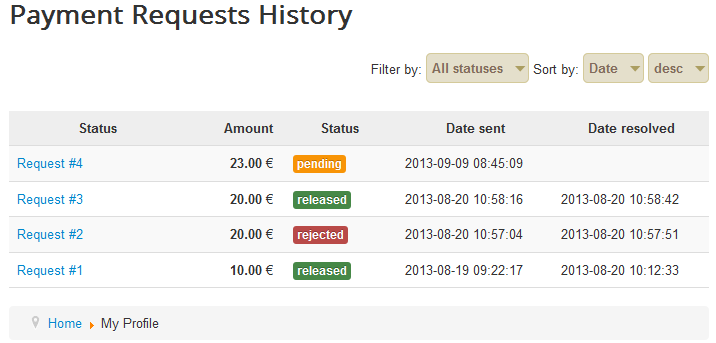
The Payment requests history page is where you can see all your funds withdrawal requests and their statuses.
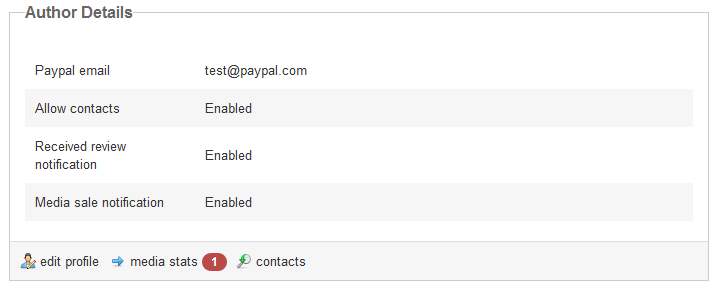
Author Details
From this area, you can view the author-only settings and edit them using the Edit profile link. Here you will also find stats of your media items and contacts.
The number displayed in the red part means how many unchecked items you have in the respective section.
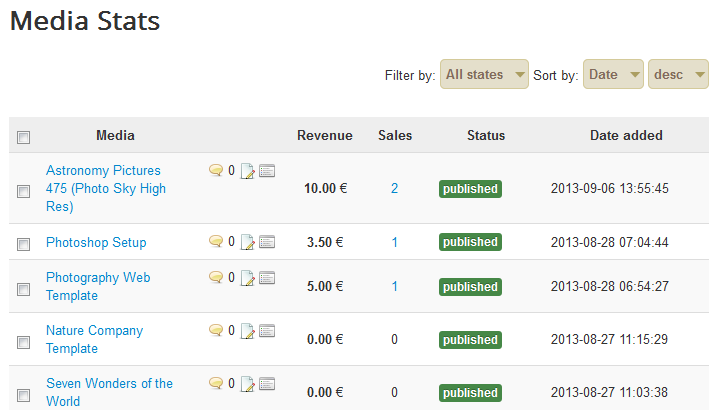
Media Stats is the place where you can view all of the files that you are selling and also other various stats regarding them.
By clicking on any of them will redirect you to the sale page of the respective file.
Next to the name of the media items you have shortcuts to edit them, view the messages or media logs.
Here you can also check how many funds you gained for the respective items, number of sales or their status.
From the Contacts page you will be able to see a list of the items for which other users paid to contact you.
By clicking on any of them will display, if the case, the messages received for the respective file.
Adding new media
In case you have author rights, you will be able to add new media files. Click on Add new media and add a Title for your new media file.
Select the Type of the file (image, video, archive or tune) and a Category which fits the file. Categories can vary depending on what the administrator has added on the backend.
To add some info about your file, write a Description and upload a Thumbnail. In case the media file is an image and you don't upload a thumbnail, one can be generated from it, depending on the backend configuration.
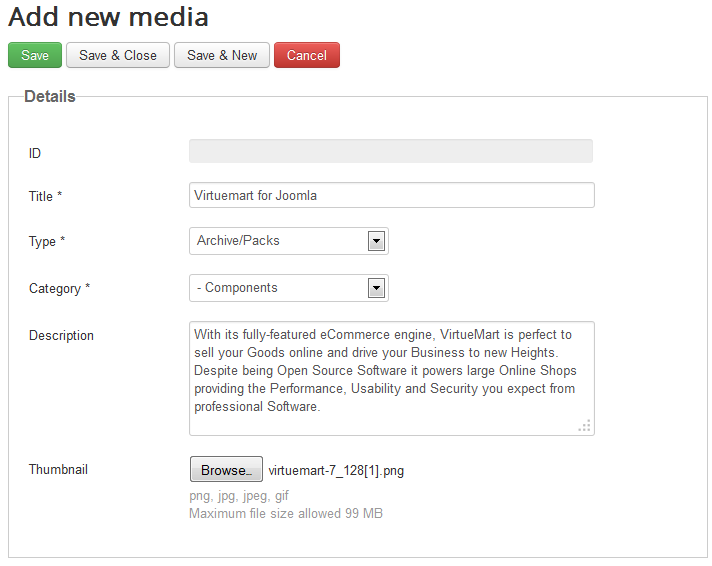
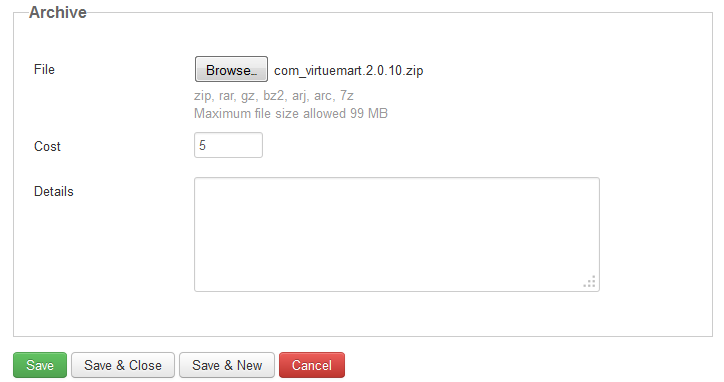
Depending on the type of the item you can complete either the Media area, Archive area or both of them. You can, for example, upload a screenshot and set it free as a preview of the files you wish to sell, adding them on the archive section with a defined price.
To select which item to upload click on Browse.. and select it from your local drive.
Enter the amount of credits the archive file will cost and some details regarding it. The option to add a price can be disabled from the backend for different types of users and, in that case, your item will have a default price value for the selected media type.
Buying media
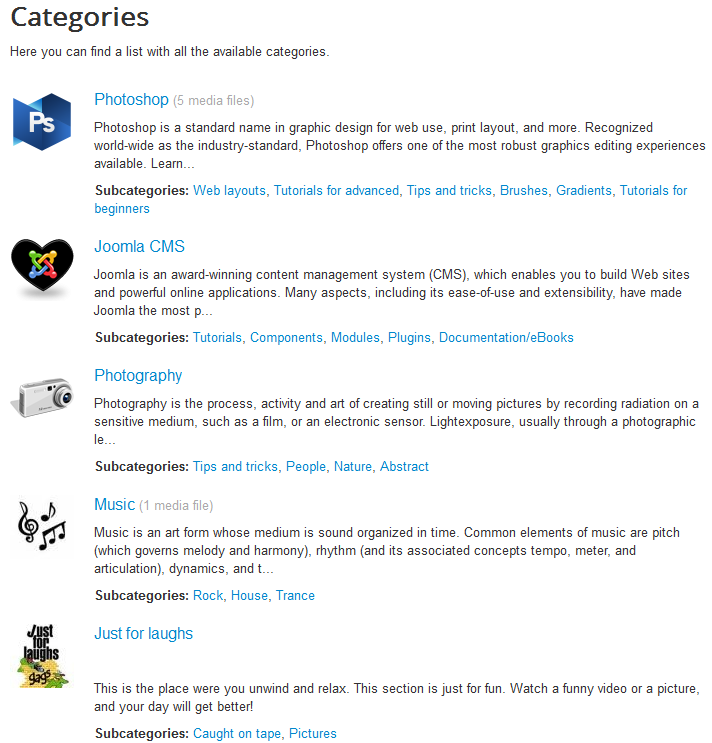
To search for a specific media file you can go to the Categories page and locate the file by navigating through the available categories and subcategories.
Depending on the backend configuration, by clicking on a category you might be allowed to buy media views for all the remaining files from that category at once.
By accessing the Media List page you can browse all media files which will be displayed together on a list. In case you search for a specific file, you can customize the listings by filtering them by cost, category, type or if the items contain archives or not.
You can also sort them by title, rating, reviews, or added date.
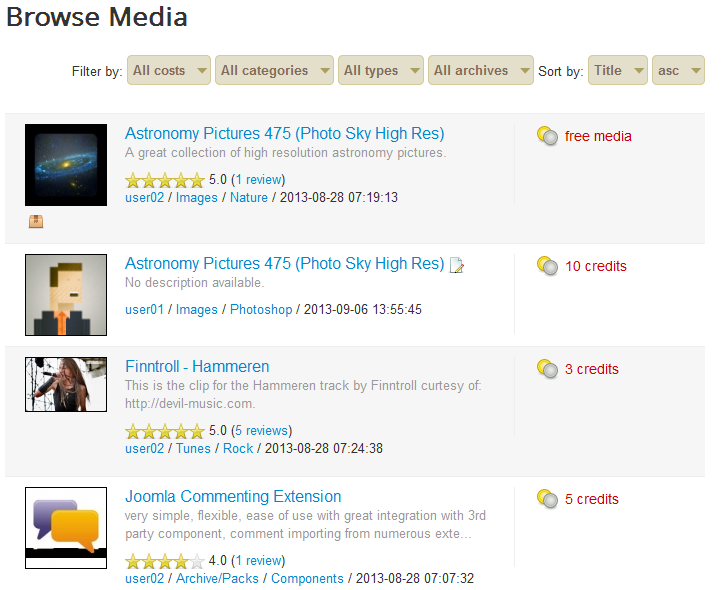
To purchase an item you can click on Purchase download or Purchase media views, by case, and, therefore, download or view it for the allowed number of times.
Some authors might only allow you to see the media file a few times from the View media area after purchasing, without the option to download the archive.
While the number of times you can view or download a file is set from the backend, the price of the files can be either default or set by each author upon creating the deal.
In case you want to send a message to the author, click on Purchase contact and then on Contact author.
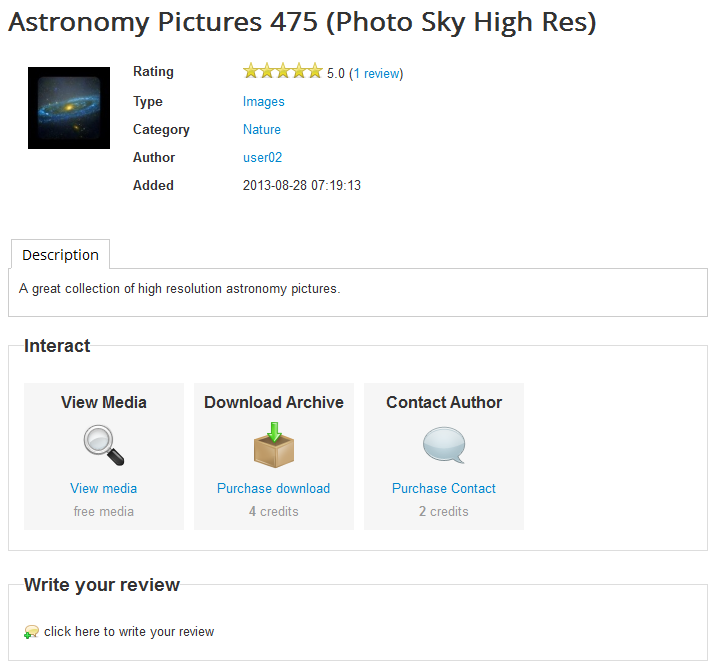
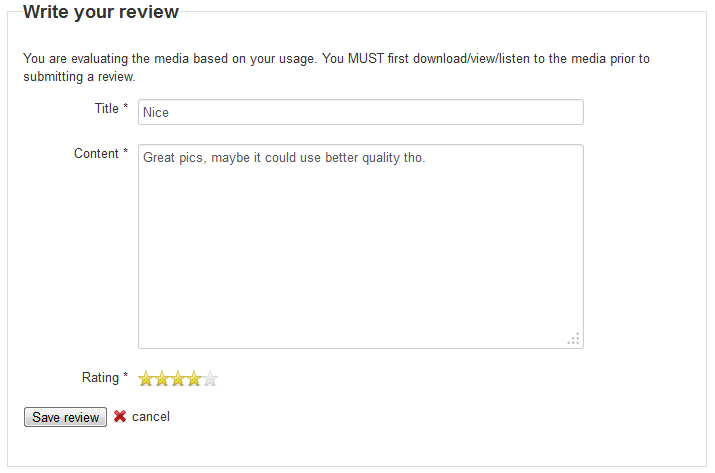
After you have interacted in any way with the media file (downloaded, viewed or listened) you will be able to write a review about it and give a rating, accordingly.
All the reviews and ratings will be displayed on the respective media's page. All users are limited to only one review per media file, thus preventing having false reviews.
(!) Documentation based on Media Mall Factory version 4.2.2