Table of Contents
Payment Plugins
There is a number of possible revenue streams for Webmasters offered by Auction Factory: Pay per Listing, Featured Auctions, Commissions (seller and bidder can be charged), Pay per Contact and Pay per Bid. You also have several Payment Gateways shipped with the standard version.
There are two payment types used in the auctioning platform, one is between the Bidder and the Auctioneer, which is not handled by the component. Auction Factory only provides the users with means to contact each other and with a PayPal link which passes the payment details onto the payment processor. The auctioneer must have a PayPal address saved in his profile as the payment must have a destination.
The other payment type is between users and website. These are Payment Item related payments which require at least one payment gateway enabled and configured for internal site payments.
Payment Gateways
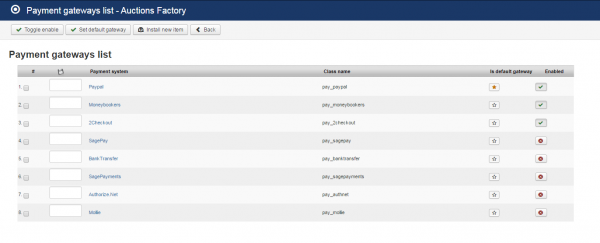
Auction Factory installs with multiple Payment Gateways which can be used to pay certain Payment Items.
The following gateways are available by default, allowing you to enable or disable them when needed:
PayPal
For payments towards the site: You can enable PayPal Sandbox as a testing area during the development of your store. With sandbox enabled no payments will be taken.
Along this, you will need to add your PayPal Email address and to choose if you wish to autoaccept the valid payments.
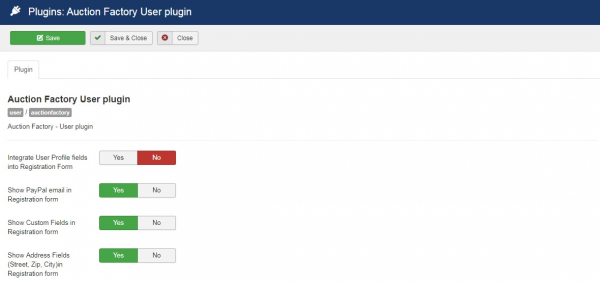
For payments between Buyer and Seller: In order for the Bidder and the Auctioneer to conduct a transaction strictly between them, make sure that the Auction Factory User plugin is enabled and the option Show PayPal email in Registration form is set. You can find that under Extensions > Plugins. If you wish to deactivate this option from your website, simply use the plugin's 'Edit' option and disable the option to Show PayPal email in Registration form. Please note that this option is only a redirect to Paypal and it will work only if both users have entered their Paypal address in the user profile.
Skrill (Moneybookers)
Requires you to set the Email address which will be used by the gateway.
2Checkout
For this you will need to add your 2Checkout email address on the X Login field.
Below you can enable the Test mode of the gateway, using this setting all sales will be treated as testing, regardless of any parameter value.
It is also important to know that 2Checkout does not support multiple currencies, you have to use the 2Checkout account currency as your default.
SagePay
Sage Pay requires that you make one test transaction and one test refund before enabling your live payment processing server.
When you have completed your testing on the Test Server, you will need to test your Live account to make sure that you are able to process transactions with the banks.
The Test and Live Accounts are identical, the only difference being that the Live account is connected to the banks and thus transactions will be settled.
Bank Transfer
Provides a WYSIWYG text editor where you can add Bank Wire information.
This will require you to manually confirm payments in the system
SagePayments
Requires you to add the Terminal id, a 12 digit unique number that is assigned to your merchant number when you apply for a SagePayments account.
Add the merchant banner image to be displayed, you can upload your banner via the virtual terminal.
Optionally, you can customize the payment page by changing the color of various items.
Authorize.Net
Requires you to add a Login ID and Transaction Key, these are used by the payment gateway to authenticate that you are authorized to submit Web site transactions. Transactions that cannot be authenticated by the payment gateway using these values are rejected.
You can enable the Sandbox as a testing area during the development of your store. With sandbox enabled no payments will be processed.
Mollie
Requires you to add an API key in order to use this gateway.
Other Gateways can be added into the extension, refer to our API for 3rd party Payment Gateways integration.
Payment Items
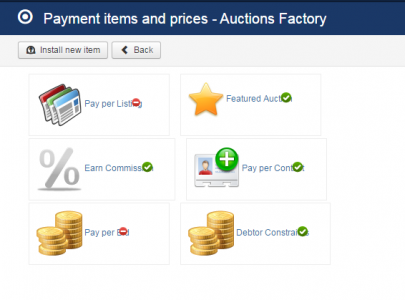
By going to Payment Items from the Settings page you can manage various revenue streams available for your website.
To enable or disable any of these items, click on the symbols in the upper right corner of each item, a pop-up should appear with "Click to disable" or "Click to enable" when hovering over the icon.
- Pay per Listing - Users pay to publish their auctions.
- Featured Auction - Preferential Auction Listing.
- Earn Commission - Commission paid by auctioneer or bidder.
- Pay per Contact - Users pay for contact details of other users.
- Pay per Bid - Users pay to bid.
- Debtor Constraints - Blocks certain tasks for users that have a negative balance.
Pay per Listing
Pay per Listing will charge users a defined price when they add new auctions.
In case the respective user doesn't have the required amount in his balance, the auction will be set as Unpublished and a payment of that value will be added on pending, the user being redirected to a payment form, where he can buy the required credit for the auction in question. When the owner is charged and the payment is completed, his auction will become Published and accessible by other users.
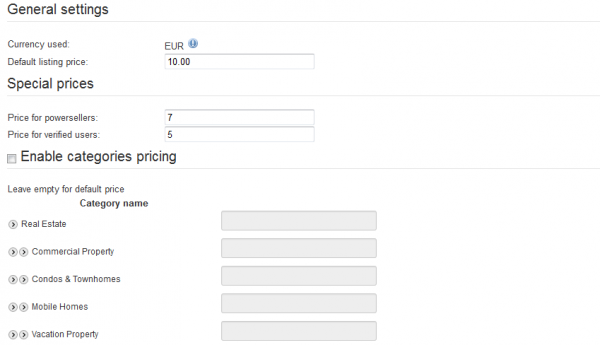
Configuration area of this feature will let you set the default price for listings.
(!) The used currency will be the one set on the Settings/Currency Manager page. However, in case the payment item is disabled it will not update to a new default currency, so be sure the payment items which you wish to use are enabled before switching to another currency.
You can add preferential prices for special user ranks, and also add custom prices for specific categories by checking Enable categories pricing checkbox and adding the prices next to their names. Leaving the fields empty means that those categories will use the default price, while adding "0" means the respective categories are free.
Featured Auction
The Featured Auction item lists auctions on top of lists and with different, more visible templating, regardless of sorting. Amongst Featured Auctions, the regular sorting applies.
When promoting your auction to Featured, the amount of credit needed will be "consumed" from your balance. Otherwise, you will be redirected to a payment form, where you'll be able to buy the required credit for the auction in question.
When the user part of the payment is done, PayPal will send an IPN notification to the website with the payment information and status. The IPN will arrive if the payment is valid, directly accepted if the buyer's PayPal account is trusted or accepted manually. In the latter case, the payment must be approved by the webmaster and only after this, the credit will be available to the buyers account.
As a new feature for Auction Factory, users are now able to place multiple payment items on cart (Pay per Featured, Pay per Contact and Add Balance) with the Add to cart button, allowing them to buy all of them at once.
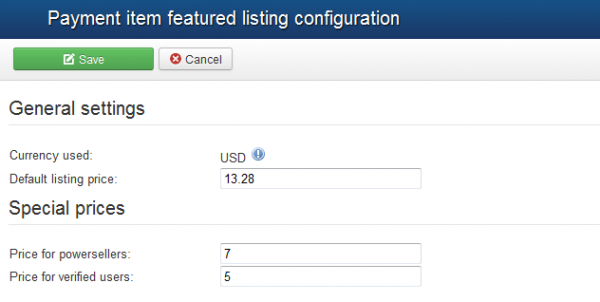
On the backend, you can set the Default listing price that users will have to pay in order to promote their auction to the featured status, and also set preferential prices for special user ranks.
(!) The used currency will be, as default, the one set on the Settings/Currency Manager page. However, in case the payment item is disabled it will not update to a new default currency, so be sure the payment items which you wish to use are enabled before switching to another currency.
Note that a module displaying these auctions is also available from the Module Manager, allowing you to enable and configure it accordingly.
Commissions
Commissions allows you, if enabled, to earn a defined percent or a fixed sum as a requested fee based on the winning bid, taxing the buyers and/or the auctioneers in the process. The users are directed to a payment form, where they will pay the commission after the bid is accepted, according to the auction type, or they can check their payment history in the user profile to initiate or resume payments at any time.
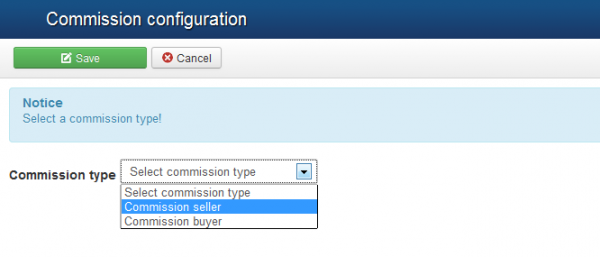
By going to the backend, you have the possibility to set the commissions for each type of users, buyers and sellers alike, by selecting from a drop-down menu before adjusting the settings for each of them, accordingly.
As seen in the picture above, the buyer fee is otherwise known as a "Buyer's Premium" in the auctions industry.
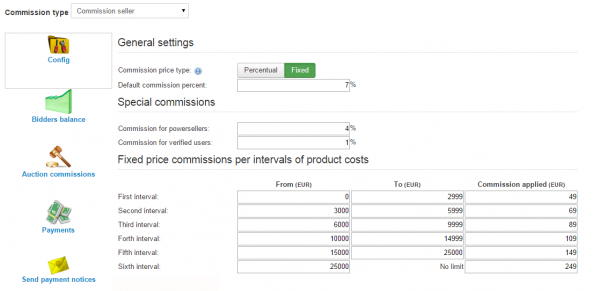
The commission price has 2 types you can choose from:
- a Percentual type which will retrieve a percent from the total value of the item (the more expensive the item, the more you retrieve).
- a Fixed type, which retrieves that amount regardless of the price of the item.
The user on which the commission will be applied will be notified upon bidding/choosing a winning bid about the exact amount which will be retrieved by the website.
If you want to use the Percentual type you will need to define the Default commission percent that will be used if no other commission rules apply.
Set special commissions for Powersellers and Verified Users as a preferential price for users that deserve this. These will override the default commission percent.
Selecting Fixed commission will ignore any special commission and all categories commission.
Using this type of commission, you will need to set the limits for items value (product value) and related commission for each one
of the six intervals of item values.
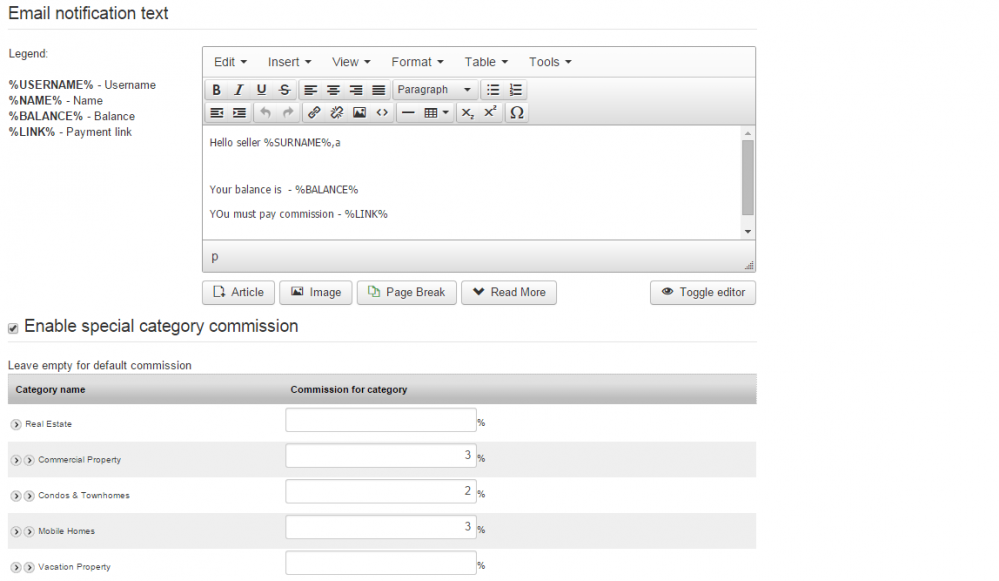
The Email notification text is sent to the users' email addresses when they have a commission due, you can edit this text using the available WYSIWYG editor.
In case you are using the percentual type you can add custom commissions for different categories available for listings or only specified categories to be commissioned by checking the Enable special category commission checkbox and adding the values on the fields found there. Leave empty for default commission or put 0 for no commission in that category.
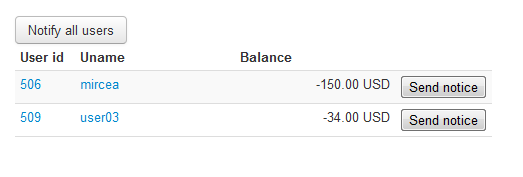
On the left side of the page you will find various pages with lists where you can verify for instance Bidders Balance which displays all the users that currently have a negative or positive balance and when their last payment was made, a Auction commissions page where there will be displayed the auctions that gained you funds via commission, and a Payments page which provides a list of all the payments made, including the ones for commissions.
You can notify users about their negative balance from the Send payment notices page. You can either notify each of them or, in case there are many users in debt, you can use the Notify all users button.
Remember that you can customize the notification message from the Config page.
Pay Per Contact
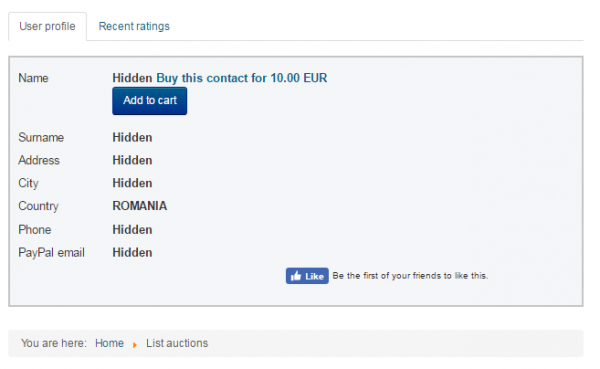
With Pay per Contact you can hide users details from each other, having them pay a defined price to reveal those details.
Contact buying is the same as for every credit buying: in case you don't have the required amount of funds in balance, you will be redirected to the buying form, where you choose to buy credits to view hidden profile info. Contact info is bought when the user is charged and the payment is completed, as for every payment pricing.
This feature is not available in CB because Community Builder displays , by itself, the profile of a user and only setting up restrictions of privacy directly in CB can prevent hiding the user details in case of an active CB.
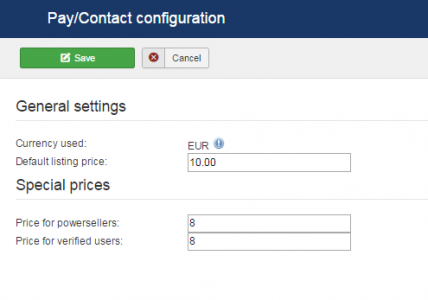
From the backend, you can set the price that users will have to pay to view hidden profile info of other users.
(!) The Currency used can be set from Settings/Currency Manager. However, it is very important to have the payment item enabled when switching to another currency. If the item is disabled, the currency used for it will remain unchanged.
Preferential prices for Verified Users and Powersellers can also be set here.
Pay per Bid
With Pay per Bid feature enabled, users will have to pay a certain amount when they place new bids. The system is the same as for other items, if the user has enough funds in his account, the bidding will be done instantly and the account charged. If the bidding user has insufficient funds, he will be sent to a payment form page to pay the respective amount before the bid is placed by the system.
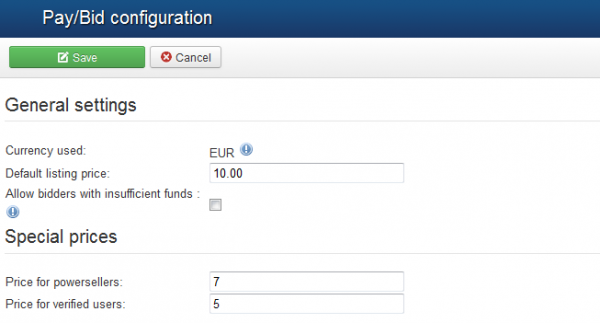
The configuration area of this feature allows you to set up the Default price for placing bids.
(!) The used currency will be as default the one set on the Settings/Currency Manager page. However, in case the payment item is disabled it will not update to a new default currency, so be sure the payment items which you wish to use are enabled before switching to another currency.
With the option Allow bidders with insufficient funds enabled, the bids will be registered and the balance of the respective users will become negative. In case this is disabled, they will be redirected to the payment form page immediately, before the bids can be placed by the system.
Preferential prices for Verified Users and Powersellers can also be set here.
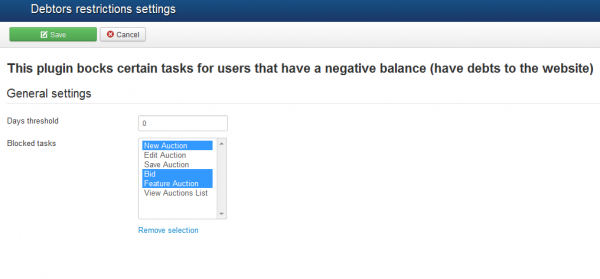
Debtor Constraints
This feature allows you to set restrictions on various auctions for users that are in debt to your website.
When an user with negative balance tries to do one of these restricted tasks he will get notified about his negative balance and will be redirected to the add funds page.
On the backend, the Days threshold option represents the number of days users are allowed to have negative balance before the selected restrictions are applied.
With Blocked tasks you can select multiple tasks which will be added to the restriction list for the users in debt. To easily clear all the restrictions, you can press on Remove selection.
(!) Documentation based on Auction Factory version 4.5.1.
