Table of Contents
Administrator Guide
Upon installing Chat Factory you will see a banner with information on what you need to do to have the component fully operational.
You will need to enable the 2 available plug-ins by going to Extensions/Plug-in Manager and enable the module from the Extensions/Module Manager section which allows users to easily switch the Chat on or off.
Settings
By going to the Settings section of the component you can enable/disable features. Select which groups of users can use the chat and more.
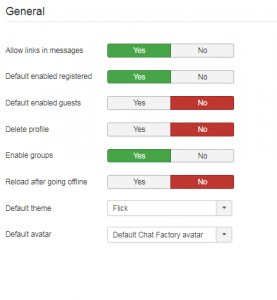
On the General area you can allow users to send links via chat by transforming them into HTML anchors.
From here you can also choose to enable the chat by default for registered users and guests when they visit the site, if they have the permission to utilize the component.
Delete profile, if enabled, will delete the Chat Factory profile when deleting the Joomla profile. The user plugin must be enabled for this option.
You can now select the default chat theme that will be used. Users can also choose their preferred theme after, if the default one is not suitable for their site. You can choose from 5 different themes: Blitzer, Flick, Le-frog, Smoothness and Ui-Lightness.
Select the default avatar for new users. The avatar can be changed later by the user from the settings section. This option is useful when there are multiple avatar sources available (ex: Love factory Integration).
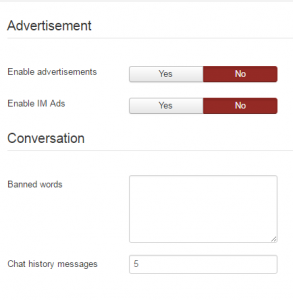
On the Conversation tab, you can type in the words that will be censored within your website. This is good for removing offensive language from your website.
Chat History Messages - Enter the number of messages to display when reloading the page. This applies only to chat conversations and not to groups.
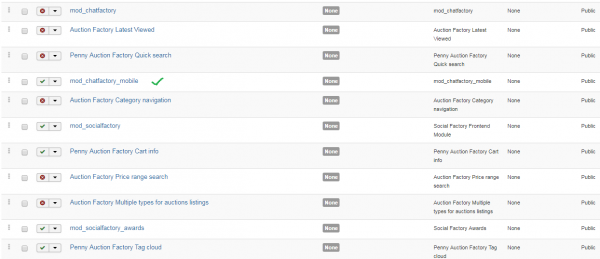
For mobile module: Chat Factory comes with an innovative module which has the purpose of facilitating communication via mobile gadgets. It can easily be set up for any tablets or smartphones by simply accessing Extensions > Plugins. You will be able to see it on the list of available modules that come with each installed extension.
To activate it, simply enable the module and refresh your mobile frontend view.
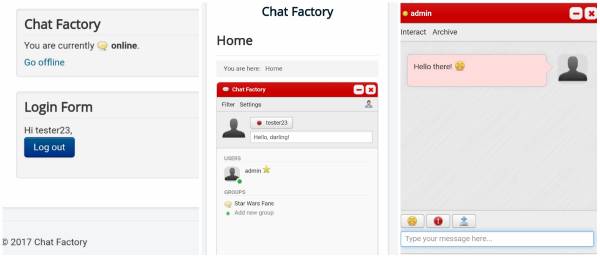
Once you have enabled the module (see settings above), you should be able to see it like this in the frontend view:
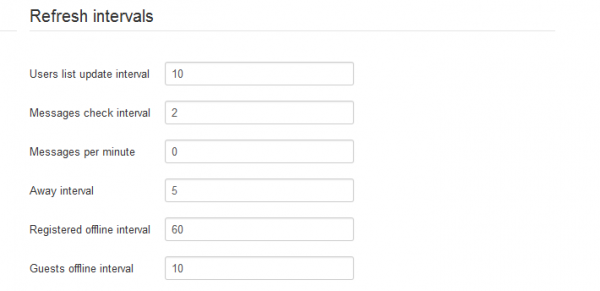
Refresh Intervals area allows you to change the timers for different actions such as the interval at which the software checks for new messages or to set an interval at which the user or guest will be regarded as offline.
The extensions checks for new messages on the server every x seconds.
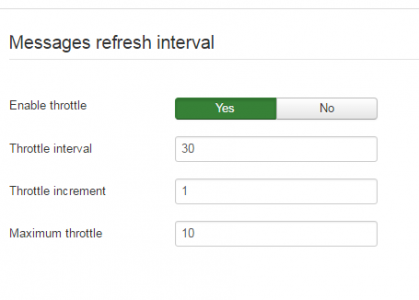
To reduce server load you can enable this feature and after a number of seconds of inactivity, the extension will check for new messages every x+y seconds.
The Sounds tab allows you to enable/disable the sounds for notifications like "Received message", "Buzz" and "Friend Login".
To change the sounds, upload them onto the "[Joomla dir]/media/com_chatfactory/sounds/" folder with the proper file name and extension.
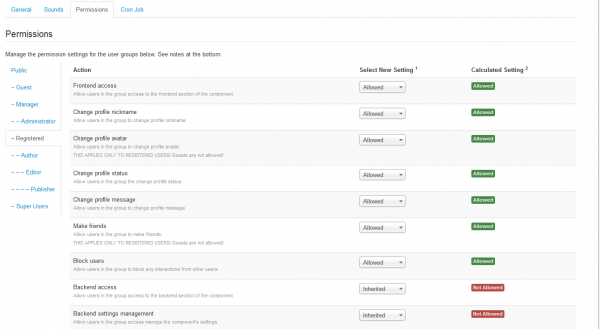
Manage the permission settings for all user groups by allowing or denying different actions regarding the component.
Note that changing the settings will apply to the respective user group and all child groups. To refresh the calculated settings, you will need to click on Save.
The CRON Jobs tab allows you to set after how many days old messages are deleted from the database. The CRON script is protected by a password to prevent unauthorised usage. Below these you will find a clickable link for CRON Jobs.
Emoticons
In the Emoticons section you can view all the emoticons available. Chat Factory allows you to add an unlimited number of emoticons. You can also edit the available emoticons from here by clicking on their name or the Edit button after checking the box next to the emoticon you want to edit.
By clicking on New will take you to the page where you can create any desired emoticon.
Write the appropriate Title for the icon, then add a Text. This is what users have to write for the desired emoticon to be inserted on chat. This is like the "code" for the emoticon.(ex: :) )
Upload an Image from your computer that will show when the respective text is typed.
The Status drop-box from the right side lets you choose if the emoticon will be available for use.
Advertisements & IM Ads
Chat Factory allows you to advertise on your website, without any extra work, with the use of Advertisements and IM Ads, that will appear when using the chat.
On the Advertisements and IM Ads sections you can see all the ads on your website and their current state, published or unpublished, number of times they got served and the impressions.
Advertisements are permanently visible at the bottom of the chat.
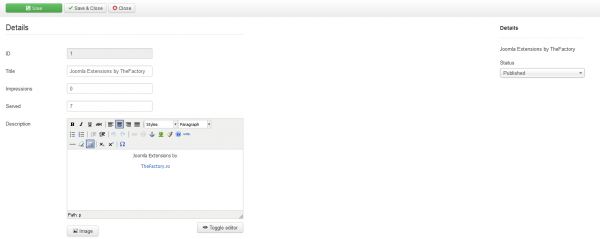
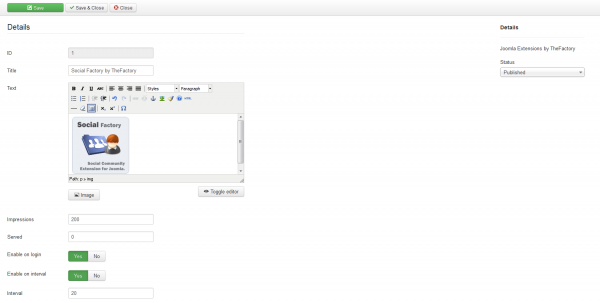
When adding a new one you can set for how many Impressions (views) the advertisement will be available for. You can also edit the Served (viewed) field, if desired.
Add the content of the advertisement and a Title related to it.
The Status drop-box from the right side lets you choose if the advertisement will be published.
IM Ads are displayed at a defined interval of time to all chat users.
They are similar to Advertisements: you enter a Title, Text and a number of Impressions.
Since this type of ad appears as a pop-up, the users can close it. From here you can set the Interval, in minutes, at which the ad will be displayed and to toggle if you wish to display it when users log in.
Users
The component keeps track of all messages written on the chat. By going to the Users section you can see all the users and guests (if allowed) who utilized the chat and their conversation history by clicking on each of them.
Conversation archives are grouped by users and then by date of when the respective conversation occurred.

