Submitting a New Article
Before adding a new article from the frontend you must login as a registered user. To register you must provide your username and a valid email. The Email is important since you will receive your communications regarding your articles through email. After you login you should see the Article Factory Manager menu, which can be similar to this, depending on your user group:
To start adding details about your article click on New Article from the user menu or on the New button from other sections of the Article Factory Manager.
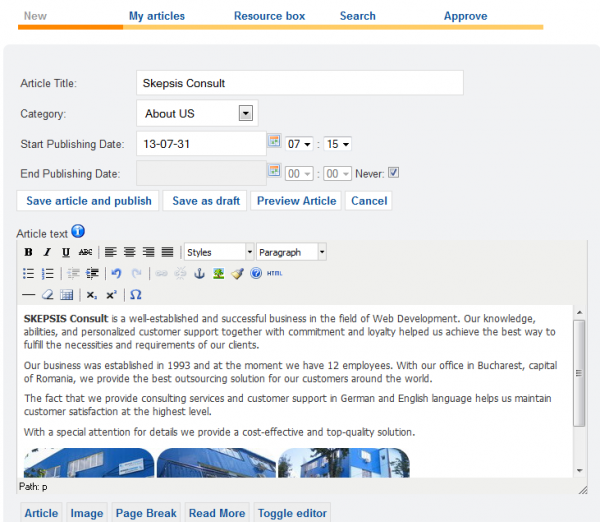
First you will need an Article Title which matches your article's content.
Select the Category that is the most accurate for your article. This will increase the chances in search engines like Google, and also will help your article not being rejected.
The Start Publishing Date comes set as the current day but you can choose a date in the near future for your article to be published (useful for products not lauchend yet). Below it you can set the End Publishing Date which will unpublish the article when that moment arrives or check the Never checkbox for unlimited publishing. For both of these you can also set the hour and minute of the occurrence.
Furthermore you will find a WYSIWYG text field where you can add your Article text. Depending on the backend configuration you can use various tags, add images to it and more. Use the Resource box for your signature, do not repeat it in the main article.
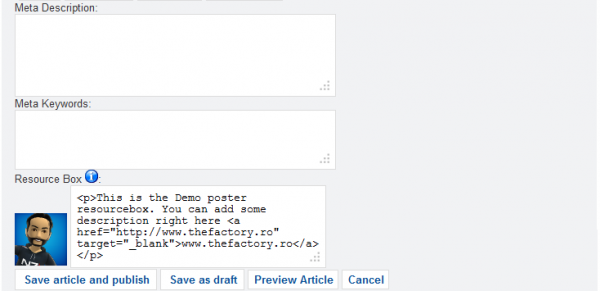
If enabled from the backend, you may add your own meta info to the article. Meta Description and Meta Keywords will appear in the header of the article page.
You may change your Resource box for any article, but its recommended to save the most used in your resource box section in order to have it always at hand. There are no HTML tags allowed besides link and paragraph tags (<a> and <p>). Depending on the backend configuration, the number of links allowed on resource box can be limited or even disabled.
There are 4 buttons that are available for you to conclude the submitting process, you can click on the Preview button which will display a popup window with a preview of your article, the Save article and Publish button (or Post for Pending if not an approver) to save all your changes and input, the Save as Draft button which will save the article but set it as unpublished, and a Cancel button that will undo all you input.
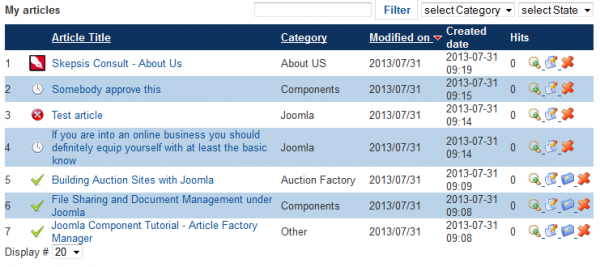
All the articles submitted by you can be seen on My Articles page allowing you to manage them accordingly. Here you can check various information related to them such as the status (Published, Unpublished, Pending, Rejected, Draft) of the article, the title, category, number of viewers and more.
On the right side of the page you can click on the Preview button for each article to view their content on a pop-up window.
In case you want to modify the content of it you can click on the Edit button.
If you want to make an article unavailable, simply click on the Unpublish button or on the Remove button. It is important to know however that once you unpublish your article or edit it, to publish it back up it will need to go through the approval process once again.


