Table of Contents
Manage eBooks
The purpose of eBook Factory is to facilitate the creation of PDF eBooks directly out of Content items in your Joomla installation. PDF files seem to be loved by Google, and that is always good news. Also you can include PDFs as Attachments to your newsletters, allowing users with Text Email clients to view a colorful content of your newsletter.
Also you can use your content as a valuable asset and market it in the form of an eBook, further distributing it for everyone to use or even buy.
Front end
Having set the My eBooks menu item and the frontend access for your group allows you to manage the eBooks from front end.
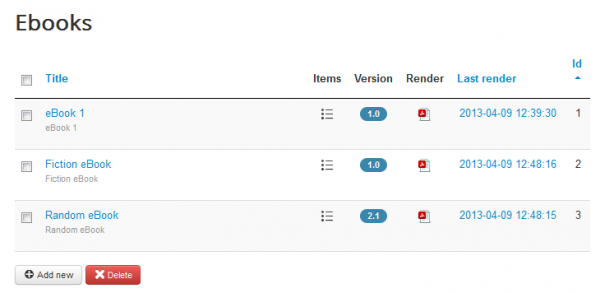
On the main page of the component you will see your list of available eBooks. To add a new eBook click on the Add new button.
eBook Settings
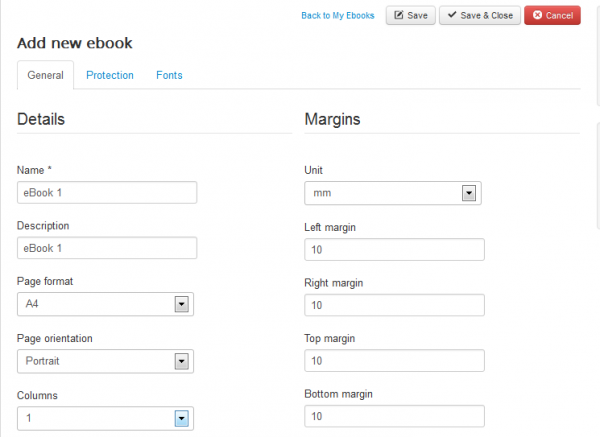
Now you will have to add the details of your eBook, you can set up all the global settings regarding it here.
The Name of the eBook will be the FILENAME under which the PDF will be stored (of course with a PDF extension). You are able to use spaces, and upper and lowercase. Special characters we would not recommend if your filesystem does not like them.
Add a Description of your PDF file, this will appear below the name on the eBooks list.
You can change the Page format or Page Orientation, to either Portrait or Landscape.
Here you can also select from the drop-down menu how many Columns the content page will have, this is an important setting, since this is what gives a nice look to your content.
From the Margins area you can set distances between page borders and content and the measurement unit in which they will be calculated.
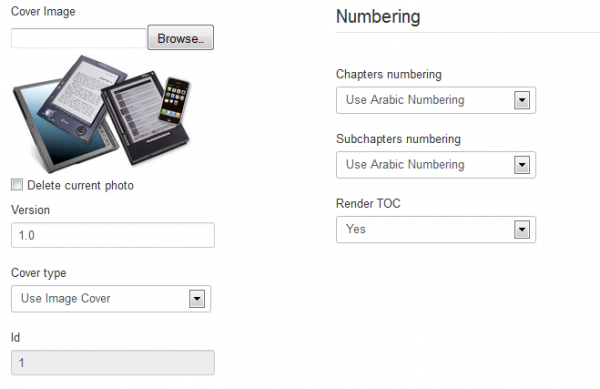
For the Version field you can insert any text, there is no verification of any format, this will be a PDF internal setting that also helps you keep track of your eBooks.
Your eBook Cover can be either a image or HTML code; or both. An Image cover makes a nice impression allowing you to include some nice logos, while the HTML code will allow you to use relevant keywords for Google to crawl on and more.
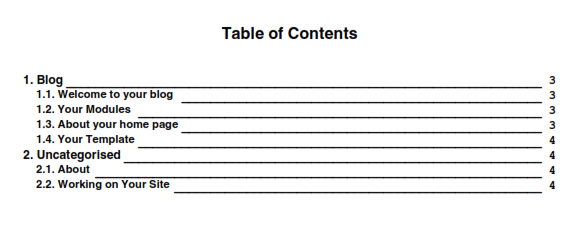
Chapter and subchapter numbering are used to set the way you need your chapters to be numbered, with Roman numbers (I, II, III, IV, …), Arabic numbers (1,2,3,4, …) or Letters (A,B,C,D, …). This option makes your eBook layout very flexible. You can also enable the Table of Content that is generated on the 2nd page by selecting Yes on the Render TOC scroll-down menu.
Here is how the Table of Content will be displayed on the PDF file:
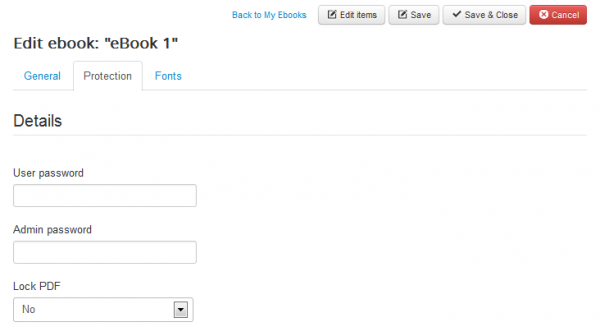
Protection tab allows you to set a user and admin password for a better protection of your PDF.
Lock PDF option will block any attempt of editing the file without a password.
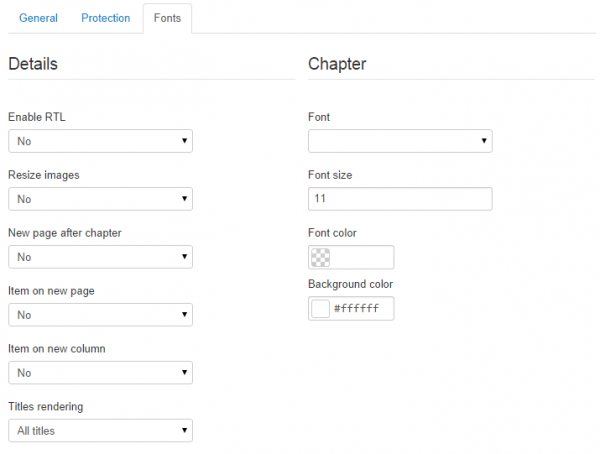
Enable RTL helps you format the text Right-to-left in case you are using scripts such as arabic, syriac, and more.
With Resize images you can choose to either keep the original size of the image or to resize it to fit better on the PDF layout.
Toggling New page after chapter will either leave the rest of the page empty and start from a new one or continue from where the chapter ends.
Enabling Item on new page and Item on new column will always add items at the start of a new page/column instead of doing it below a previous item.
Titles rendering allows you to choose from the drop-down menu which types of titles to be rendered, all titles, just item title, item and chapter or item, chapter and first subchapter.
Chapter area is where you can define the settings used for fonts on chapters, you can choose the font style, size, color and a background color.
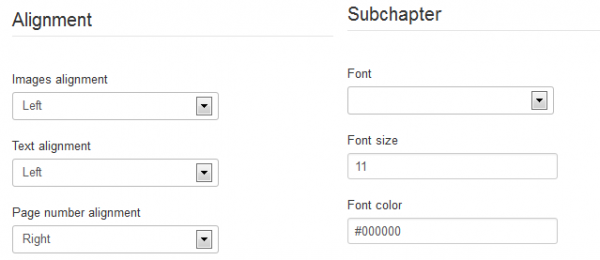
You can set the Alignment for images, texts and page numbers as well as choosing font style, size and color for Subchapters.
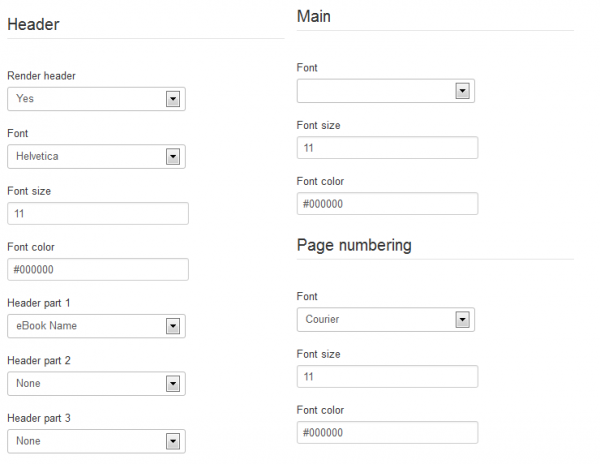
For the Header part of the PDF you can choose the font style, size and color along with the option to render the header or not.
Headers have 3 parts on which you can assign different things to them like the chapter title, item title or eBook name.
Here is a preview of how the header will be displayed on the PDF file:
On the Main and Page numbering areas you can choose the font format by selecting a font style, size and color.
After all these settings are according to your wishes, you must save the eBook, click on Save & Close to create it.
Adding Items
After you configured the settings you must add content to your eBook. The eBook has meaning only after this step!
Click on your eBook title and then on the Edit Items button which is at the top of the page, there you will find a list of items already added, if the case, click on Add new Item to add a new one.
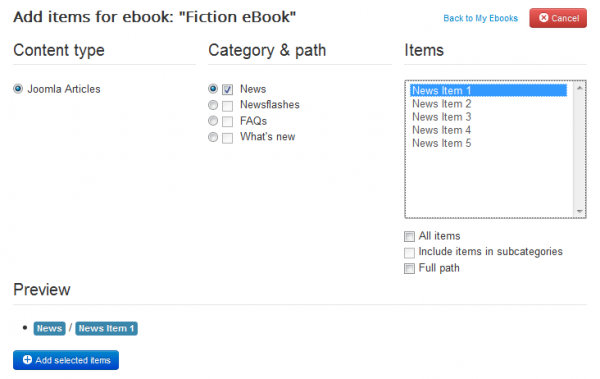
Here you have to select the type, category and which items you wish to add. You can check All Items checkbox to add all the items from the selected category. This feature is very useful since you can re-render fast changing content without having to manually add items.
After choosing some items you must press Add selected items, and then on Back to My eBooks.
Now your first eBook is completed. You just have to click on the Render icon, and you will have the PDF file directly on your server!
Back end
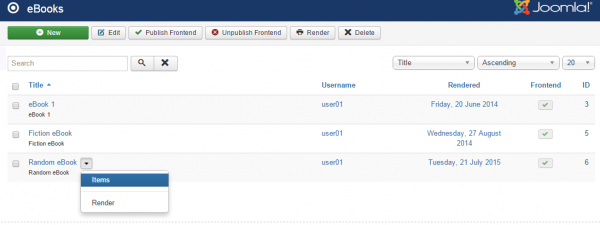
In case you wish to manage the eBooks from back end, you will need to go to Components/eBook Factory/eBooks.
On this page you will find the list of available eBooks. To add a new eBook click on the New button.
In order to edit the items of an eBook simply hover it and a menu will appear at the end of the click. Click on the menu and select Items.
The settings available for eBooks found here are exactly the same as the ones from frontend which were explained above.
(!) Documentation based on eBook Factory version 4.2.0


