Table of Contents
Custom Fields & Pages
Fields
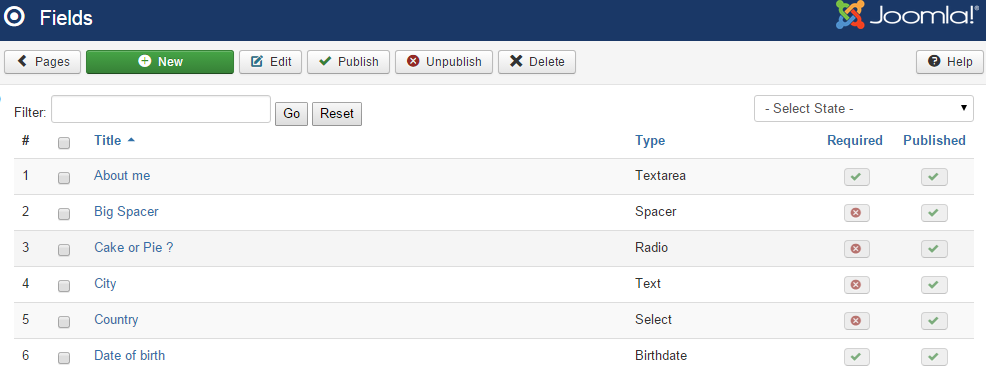
On the Fields page you can create new custom fields which fit your needs that you can later assign to certain pages, but you can also edit, publish or delete existing fields from here when needed.
Click on the New button to add details of a new field.
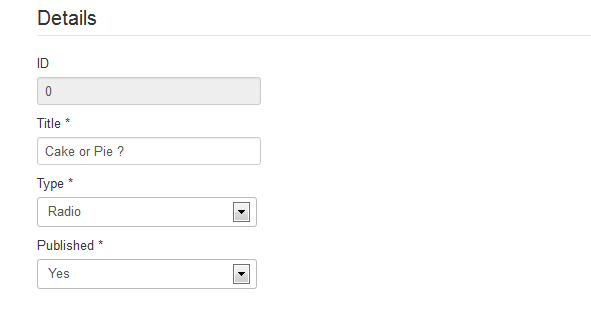
When creating a new field, you will find many editable details regarding it. For start, you will have to add the desired title and the initial status (published/unpublished) of the field.
One of the most important aspects of your new field will be the options it provides and its behavior; choose one of the multiple types of fields available on the drop-down list:
- Birthday
- Checkbox
- Distance
- Email
- Friends
- Gateway
- Gender
- GoogleMapsLocation
- Height
- LastSeen
- Looking
- Membership
- Online
- Password
- Photos
- Price
- ProfilePhoto
- Radio
- Radius
- Rating
- ReCaptcha
- Relationship
- SearchMultiple
- Select
- SelectMultiple
- Slider
- Spacer
- Terms
- Text
- Textarea
- Username
- Weight
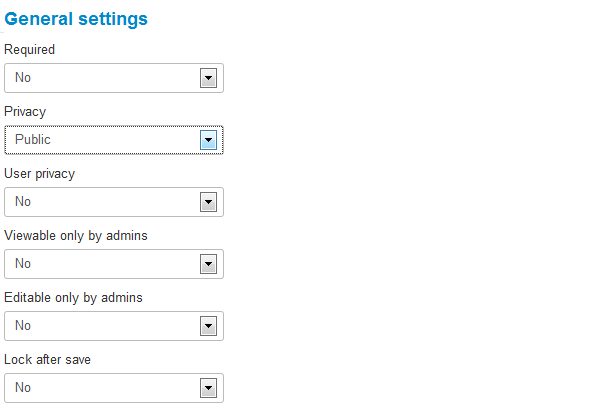
On the right side of the page, you will find the General Settings of the new field.
Setting Required to Yes will make the field mandatory, notifying the users that they need to add/select something on it.
You can select its Privacy to either "Private", "Public" or just for "Friends", meaning that it can be seen only by certain people and also to allow users to change the privacy status by themselves.
Additionally, you can make the field Editable or Viewable only by admins, if necessary.
Enabling Lock after save will prevent further editing of the field after the first save.
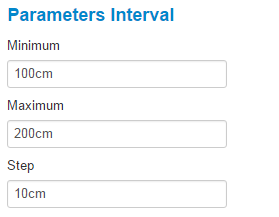
If you set a Slider type of field, you will need to choose between Interval and Values as a parameter.
You use Interval to allow users to select a numeric value from a range (min - max). You can use this, for example, for height. You set as min 100cm, as max 200cm as as Step 10 cm. Now users will be able to select their height from 100cm to 200cm in 10cm increments (100cm, 110cm, 120cm, 130cm…)
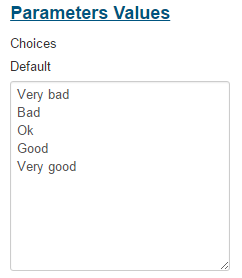
You use values to allow users to select from ordered labeled values. For example, if you want users to rate an experience, you can use the following ordered labels:
- Very bad
- Bad
- Ok
- Good
- Very good
Now users will be able to choose their response by sliding from the worst value (Very bad) to the best value (Very good).
Terms and Conditions
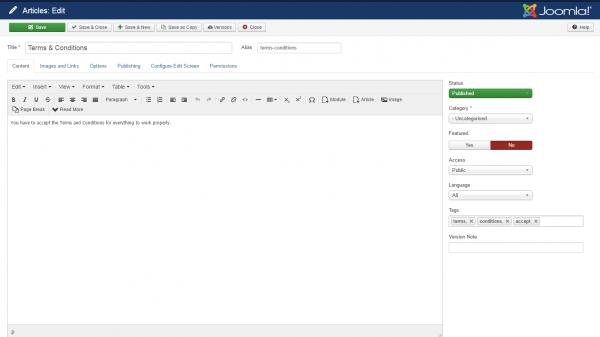
On the User Registration page you will see a link at the bottom of the page, called Read the Terms and Conditions. You can set up the link, by going to the backend and first create an article called "Terms and Conditions", providing your own terms and conditions.
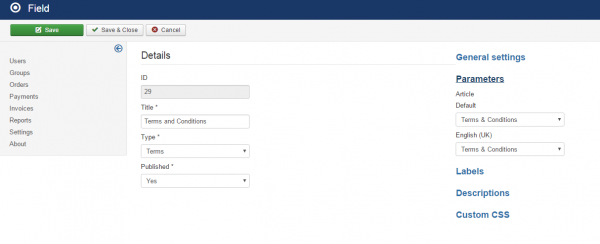
Then go to Settings/Fields and search for the Terms and Conditions field. Press the Parameters button and choose your article. Press Save and you are ready to go.
Translating Custom Fields
If you need help configuring multiple languages for your Joomla installation please follow this LINK.
In case you already have a multi-language website, you can configure your custom fields for each installed language, modifying their parameters, labels or description.
All of these can be done from the backend, without editing the language files.
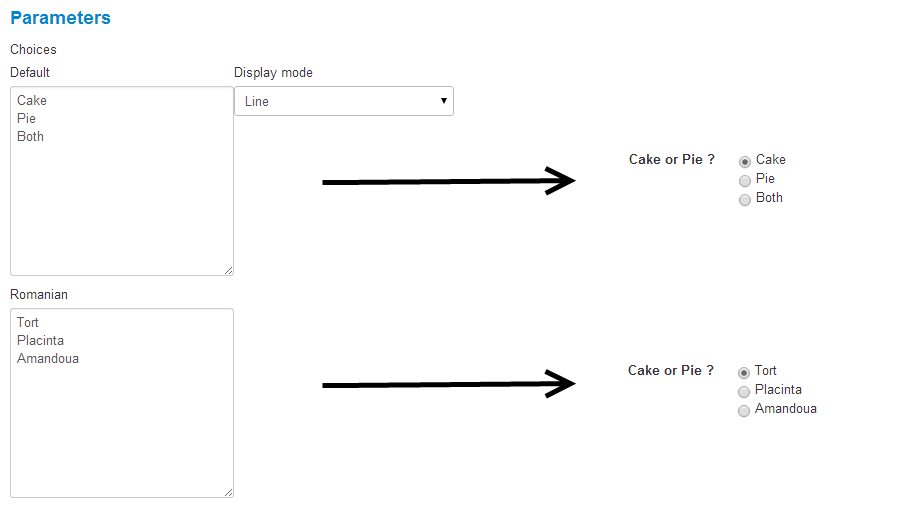
Using the slider on the right side of the page, Parameters can be defined for fields depending on their type. In case of a "Radio" type of field, you will need to add a list of available choices.
These choices need to be added one per line on the textarea. You can add values on the Default textarea. These will be used if no translation is available for the current language.
For additional languages (in this example, Romanian) you will need to translate those options and enter them in the respective language textarea.
Options can be displayed on frontend in a row or line.
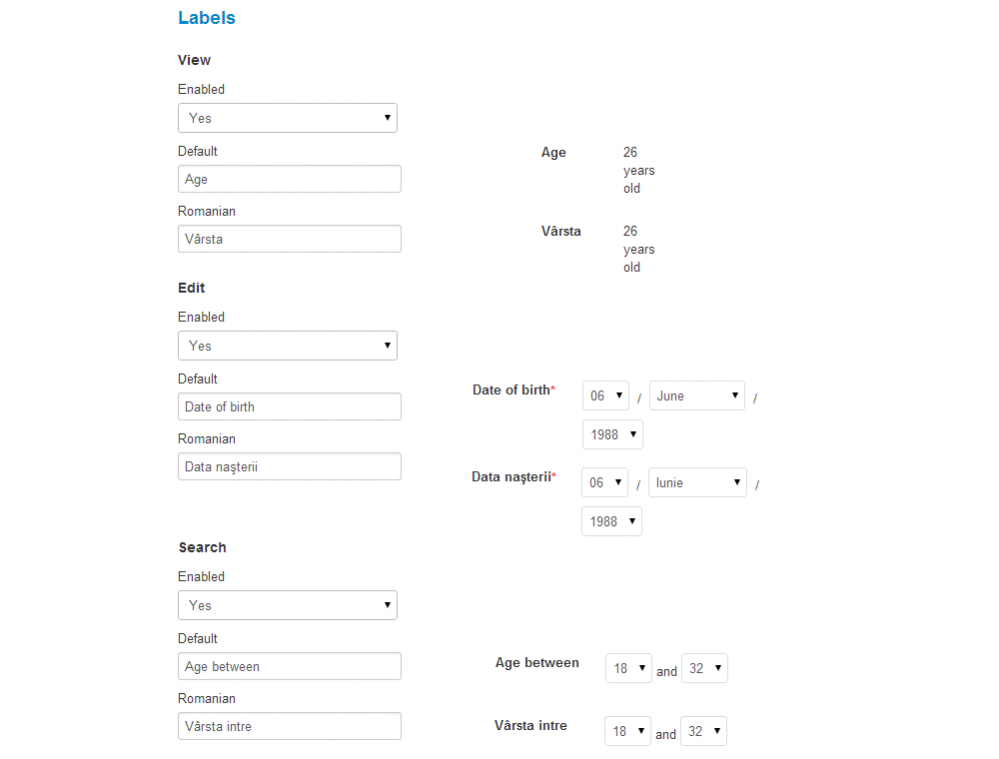
The Labels slider allows you to rename the title of the field for 3 different actions: on viewing, editing, and searching. As an example for the field "date of birth", you can label it on the edit page as "date of birth", on the view page to label it as "age" and on the search page as "age between".
You can translate the labels of these 3 actions for all your installed languages.
Same as for labels, various Descriptions can be added to your field when viewing, editing and searching.
Translations of the description can be added for all your installed languages.
Gender based Custom Field assignment
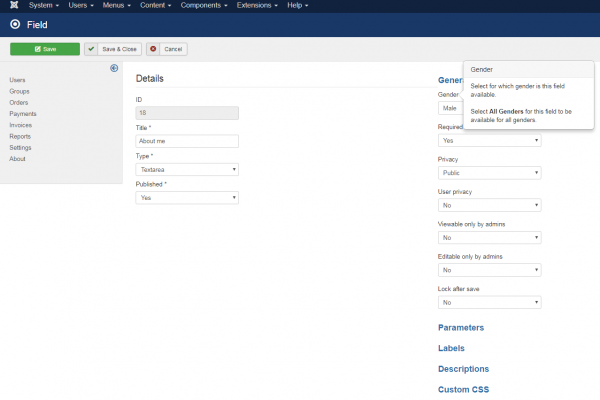
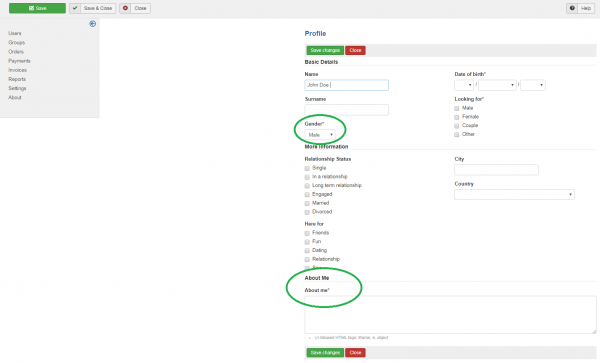
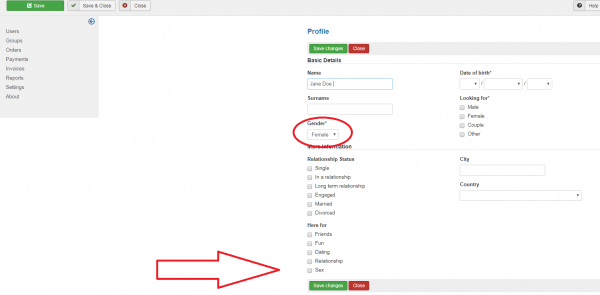
Love Factory also comes with a feature that allows webmasters to assign specific custom fields to a gender. In other words, profiles pertaining to a certain gender get different field views, depending on the website's policies and the administrator's overall design and business strategy.
You can access and edit this feature to best fit your needs by going to Components > Love Factory > Settings > Fields category.
Pages
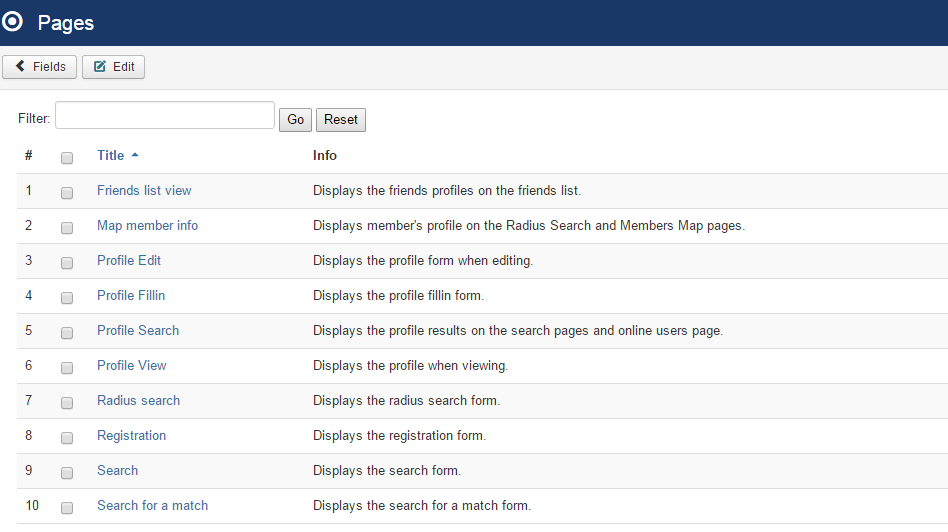
Fields need to be placed on pages in order to be visible. Pages allows you to change the layout of the frontend pages of Love Factory. From here, you can assign the newly made custom fields.
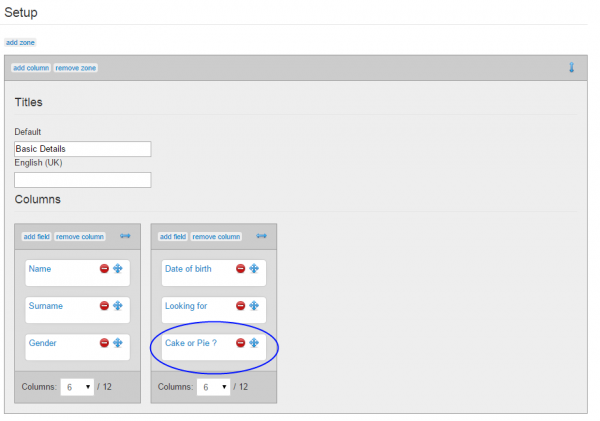
By clicking on a page you can edit it by using the simple drag and drop system. Here you can add or remove fields or simply rearrange them.
To add a new field click on "Add field" and select the one you wish to add.
Being responsive, Love Factory allows for each fields column assigned to your page to also set the maximum number of Bootstrap columns it utilizes.
The responsive grid system appropriately scales up to 12 columns as the device or viewport size increases. To have multiple fields on the same row you must set so that their values won't exceed 12.
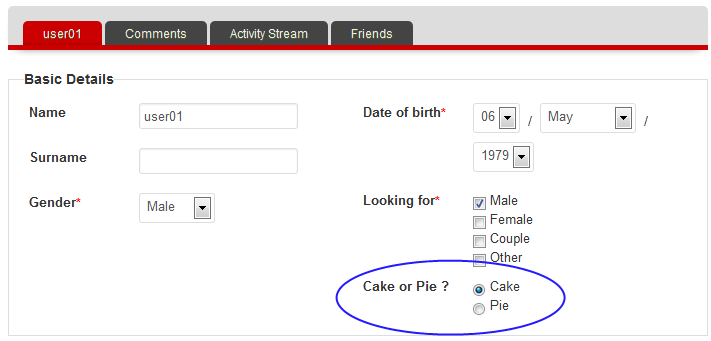
Here is how the field we created earlier is displayed after it has been added on the "Profile Edit" page.
Click on "Save & Close" when you are done adding the new field to that specific page and check it out on the frontend.
Making a Searchable Field
Custom fields can be made searchable. We will use the field we made earlier in order to do that.
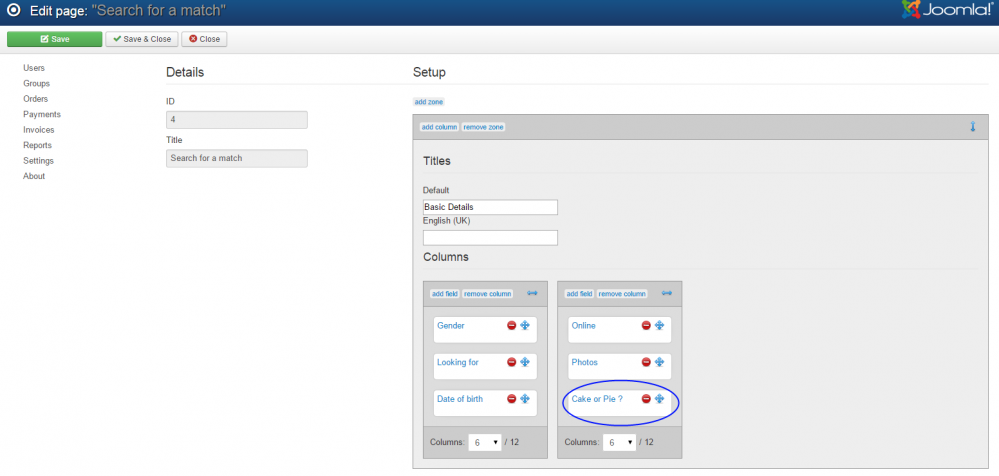
Go to the Pages area and select one of the search pages, for example, the detailed search form, Search for a match.
Add the field either on the Basic Details zone or on the More Information zone by clicking on the Add field button and selecting the one we made from the popup window.
Click on Save & Close when you are done.
Considering the field is also added on the Profile Edit and to Search for a match pages, you could also assign it the same way to the Profile Search page so that the field will be displayed when displaying the search results.
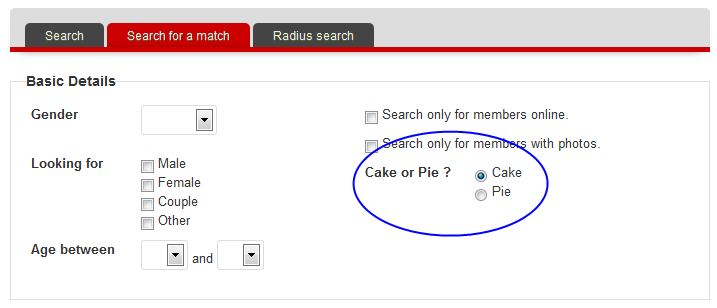
This is how the field will be displayed on frontend on the Search for a match page.
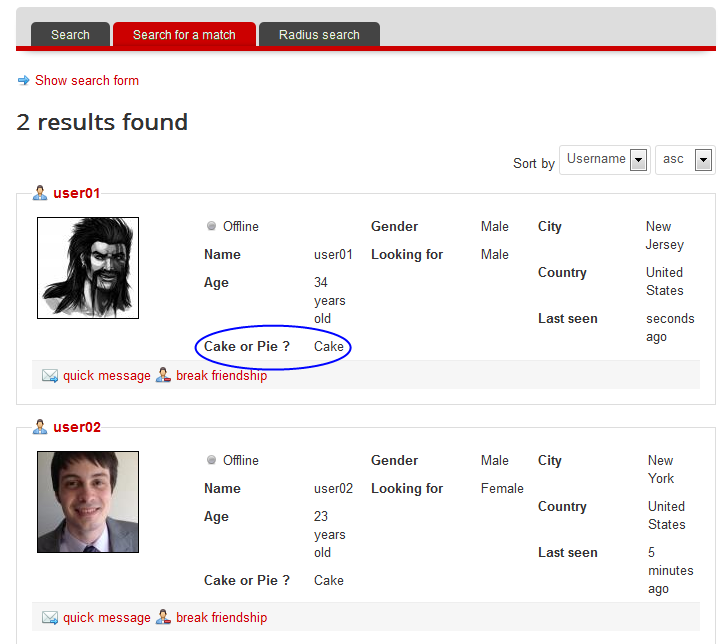
Here are the search results that match, containing the profile detail field we created.
Add images to checkbox and radio fields
With Love Factory's new feature, you can add photos next to the options that you choose. This can only be done for the Ckeckbox and Radio fields.
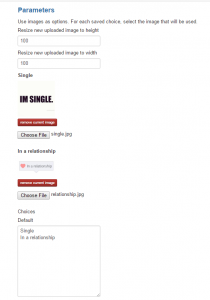
You can do this by selecting the fields type to either Checkbox or Radio. To insert images, go to the Parameters tab and select, for each option, the images from your local drive. Resize your images height and width, by choosing the parameters that will define the images upon being displayed on page.
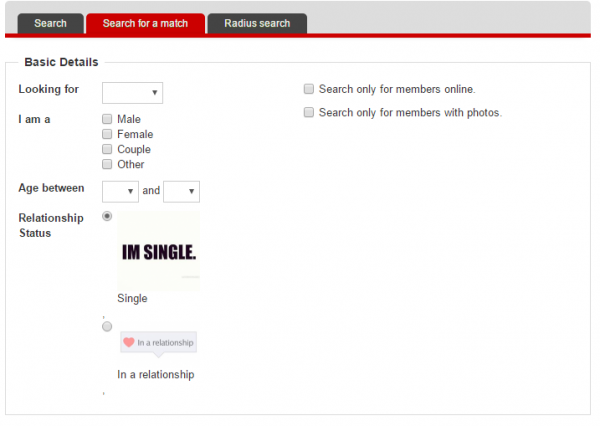
This is how the images are displayed for the Radio field types:
(!) Documentation based on Love Factory version 4.4.9


