Table of Contents
Configuration
Auction Factory is an unique Joomla extension that allows you to create your own professional auction website.
The component supports all common auction types, which can be enabled or disabled from the backend - Public Auctions, Private Auctions (Sealed Envelope), Buy-it-Now Auctions, all of the above including Proxy Bidding (Automatic Bidding). Winner selection can be done automatically (best bid wins) or manually (by the auctioneer).
Keep in mind that, in order for the Proxy bidding option to work, you will need to activate Cron. For more details visit this page:
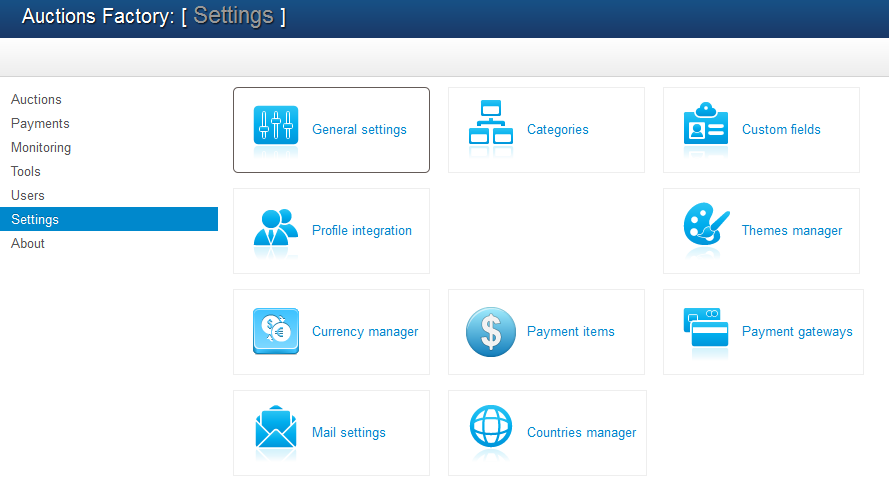
To set the above and many other options, go to Components/Auction Factory/Settings and click on General Settings.
General
Display settings
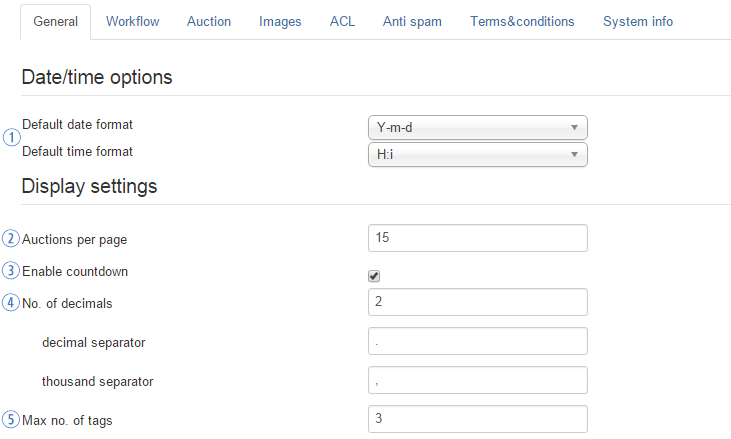
1. Choose the desired Date and Time format for auctions: “d” stands for Day, “m” for Month and “Y” for year. “H:i” is for a 24 hour format, while “h:iA” is for a 12 hour format.
2. Auctions per page will set how many auctions will be displayed on listings. If the respective number is exceeded, pagination will be created.
3. Enable countdown adds a timer for each auction displayed on the listings, which represents the amount of time left until that auction closes.
4. Define how the prices will be displayed by setting up the Number of decimals and the separators for decimals and thousands.
5. From this section you can also set the Max Number of Tags allowed per auction. Tags are an excellent way for auctions to be filtered in a search, but if users put too many tag words, their auctions will pop up in every search. Some people may find this annoying. To avoid this, you should leave a decent limit on your tags, allowing the poster to choose only the tags that are suited for his auction.
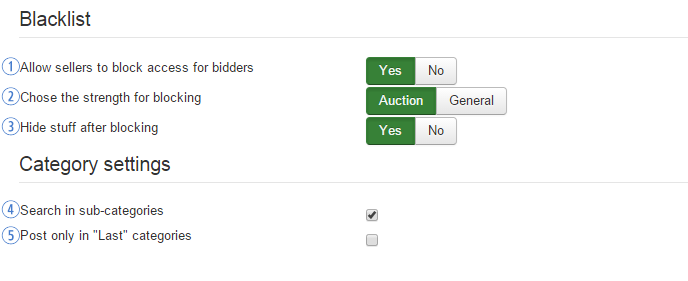
Blacklist and Category Settings
1. If Allow sellers to block access for bidders option is enabled, it gives the seller the ability to add specific bidders on his personal Blacklist. These bidders won't be able to access the respective seller auctions, send him messages or any additional actions.
2. For Choose the strength for blocking option you can select how the blocking works. You can block a user just on a certain auction, or generally block him.
3. Since blocking a user will render him unable to bid or send messages to the respective seller, you can also enable Hide stuff after blocking, this will hide the messages and bids.
4. With Search in sub-categories you can allow the searches to also look for results in sub-categories of the selected category.
5. Enabling Post only in "Last" categories will restrict you from posting auction in categories which have sub-categories.
Messaging, RSS and CRON Settings
1. A messaging system can be used, which will allow bidders to interact with the auctioneers and vice versa.
2. You can also enable Allow guest messages, which will allow guests to write messages on auctions. However, it is highly recommended that you enable and set up ReCaptcha for this, to avoid any unwanted bot spam.
An RSS Feed is also available with our component. You can set it up from the RSS settings area.
3. Define Nr items in RSS to set how many auctions to be displayed on the feed.
4. Select the RSS feed type you wish to be used. You can choose between RSS2.0, RSS1.0, OPML, ATOM and more).
5. Customize your RSS feed according to your website by adding a Title and a Description.
6. Set a CRON Password which will be used to safely call the CRON script.

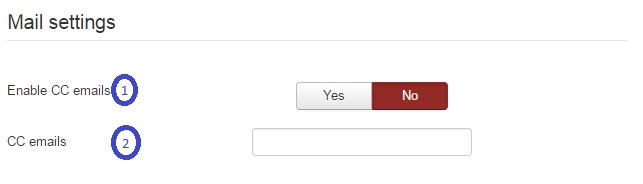
Mail Settings
1. By enabling this option, the component will send a copy of each e-mail sent by Auction Factory to CC adresses.
2. Write down the e-mails which will receive the CC e-mails. Keep in mind that the adresses need to be comma separated!
Workflow
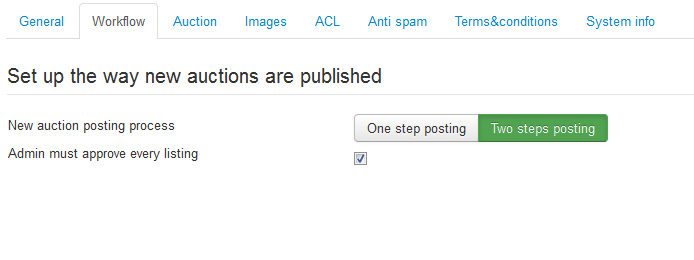
From the Workflow tab you can set up a couple of things regarding certain processes of the component related to the auction workflow.
You can choose from 2 different ways of which users can post their auctions:
- a one-step posting, where all the auction information is entered in one page.
- a two-step posting, which will require users to set the category first, and then the rest of the details.
- Auto Refresh Bids without reloading the page.
Besides ACL, the auctions can also be actively moderated. By enabling the Admin must approve every Listing option, all auctions will need to be manually approved by an admin on the backend before publishing them.
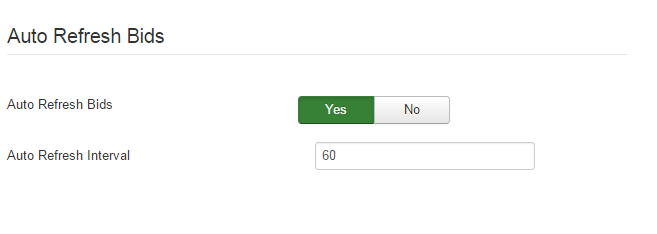
Next, we have the Auto Refresh Bids section. This feature refreshes the bids on auctions without needing to reload the page and takes effect in the Auctions List, Auction Details, and Auction Factory Module.
For users that are updating from an older version, note that a template overwrite is mandatory upon update for this to work.
There are two settings:
- Auto Refresh Bids - Yes/No (enables or disables the auto refresh)
- Auto Refresh Interval - numeric input (the interval at which the bids refresh, in seconds).
Note that the Auto Refresh Interval requires a page refresh from the user before it takes effect, since it is browser based. Disabling the Auto Refresh will stop any refresh attempt server-side.
Attention! This feature can have a significant impact on the server performance, so depending on the server hardware, either keep it disabled in order to avoid any server load or set the interval at higher values unless you know your host can handle frequent requests!
Auction
1. There are 3 auction types available for Auction Factory, as mentioned before: Public, Private and BIN Only.
Default auction type allows you to choose one of them and build your auctioning website around it, making it the one used for every new auction. Selecting None will let the auctioneers choose the desired one for each auction.
2. You can allow users to make Private auctions, which hides bids and messages from other users except the owner of the auction with the Enable private auctions option and the users invited to participate in the auction.
3. With Enable reserve price for auctions enabled, the auctioneer is allowed to not choose a winner if the respective price is not reached. When creating a new auction, the auctioneer can also choose to display the reserve price for bidders or keep it hidden.
Proxy bidding, Manual, and Automatic auction types
1. Enabling the Allow proxy bidding allows the bidder to set a hidden proxy bid which will automatically bid up to the maximum value set every time someone else outbids him. This occurs until the proxy bid value (the maximum value a bidder is willing to bid for a certain auction) is reached. When the next bid required is higher than the proxy value, it will stop at the latest bid placed. Each subsequent bid is increased by the "minimum increase value" as with regular bids, making the lowest possible bid at all times. When first placing the proxy, an initial bid is made according to the current bid.
This is like sending someone with your money to a real auction to bid in your place. That person will dispose of a limited amount to attempt obtaining the best possible price for an item.
Note that paid bids have a major effect in this workflow, limiting the potential benefits of proxy bidding and increasing bid costs - Use with caution and make sure your users are informed of the financial outcome when both these features are enabled.
2. You can choose to enable Automatic Auctions and allow sellers to choose on their own, if they want the auction to choose its winner automatically, or choose the winner manually after the auction ends.
In automatic auctions the seller will not be able to choose a bid before the auction ends (after the end timer is reached and the CRON script runs). Then the auction will be closed and a winner will be automatically picked. The Reserve Price is taken into account when selecting the winner. If there is a situation where 2 users may have the same bid (private auctions), the selection process will be passed to the auctioneer, so he can take the best decision.
3. In case of non-automatic public and private auction, you can enable Allow seller to accept bids before auction ends to give bidders the option to interfere before the auction closes and CRON steps in to pick the highest bid.

BIN - Buy it now
1. The BIN price can be enabled for public auctions to facilitate a faster process of the auction, for both the seller and the buyer. The seller can even choose the option to auto-accept BIN bids.
2. Besides Public and Private auctions, you can enable the BIN Only auction type which will be a simple click-to-buy auction. If no quantity is set or a user buys all the items, and the BIN is accepted, the auction will instantly close .
3. For this type of auction, you can enable Price Suggestion, which allows users to suggest other prices for BIN listings. This is helpful in case the seller sets the BIN price too high and he is not getting any bids. You can also set a maximum number of suggestions allowed per listing on the Suggestion Limit field.
4. Enable number of items for BIN Only Auctions will allow sellers to set the quantity of items they wish to sell for this type of auction.
When both suggestions and quantities are enabled, these features work together to allow bidders to suggest quantity prices. Bidders input a price per item and a desired quantity, this suggestion is then sent to the seller which can accept, reject, or reply with another suggestion. The bidder can also accept suggestion replies, which results in the items being sold to him.
The "Minimum suggestion allowed" set by the seller when creating the auction is taken into account when a suggestion is placed. If this price per item is not met, the suggestion will auto reject.

Minimum Increases
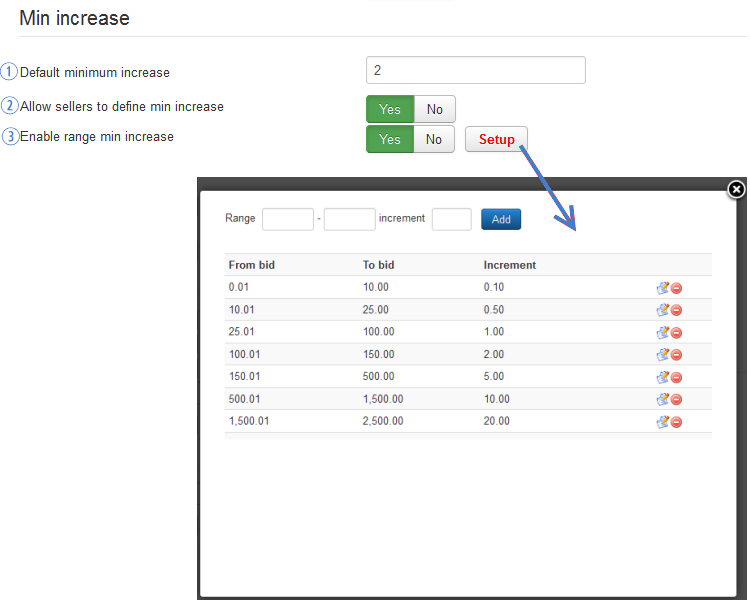
In order to force bidders to consistently bid higher and increase the item's value, you can enable Minimum Increases.
1. The next bidder will have to bid by at least the current maximum bid plus the minimum increase. From this section, we can set the Default Minimum Increase. Notice that the first bid on an auction will not be subject to increases, because this is the original price set by the seller and would serve no purpose to increase the original price when no bids are placed, since it could be the first and only bid for that auction.
2. You can also allow sellers to define this value by themselves for each individual auction they make.
3. Since the default minimum increase value is static by design, it does not scale and can be either too low (at high prices) or vice versa. To boost the functionality of the increases, you can add various price ranges to which various minimum increase values will be applied. Clicking on the Setup button will pop-up a window where you can manage these values.
User Options
1. Allow Users to Save auctions as default will enable a feature that will record values from certain fields when creating an auction. Those fields will be auto-filled on the respective user's future auctions. A special tab will also be available on his profile, where he can edit these values. In order to change those default values, the seller can also check or uncheck a box in the auction form.
2. Enabling Allow users to import from CSV will add a button on the My Auctions page, on which users can click to bulk import auctions. The users will do so by uploading a CSV file with the proper structure and an image archive that corresponds to the uploaded CSV. A proper structure has to be followed in the CSV in order for the import to work as intended. CSV file structure can be seen at: Auction Factory - Import from CSV
3. You can choose to display a Facebook "Like" button on all auction detail pages and user profile pages by enabling the Facebook "Like" button option.
4. Allow PayPal linking will allow the auctions' winner to use the sellers' PayPal address to pay. When the seller has the PayPal field completed in his profile, a button will be displayed, for the winner, on the auction with the winning bid. This button will redirect the bidder to PayPal for payment with the value of the bid towards the seller.
5. With Display auctioneer details only for winner you can either display the contact details of sellers to all the users or hide and make them available only for the winner bidders and only of the auctioneer whom auction they've won. This is available for privacy purpose.

Auto extend
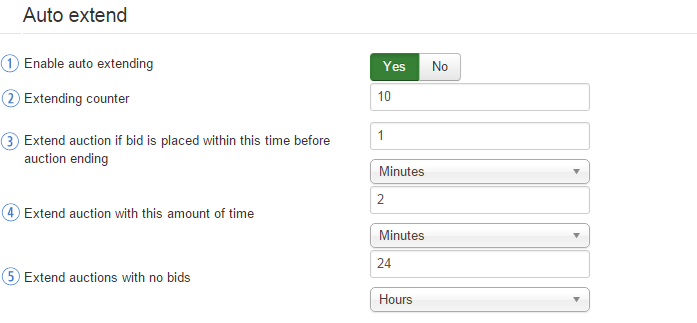
1. With the Auto Extend feature enabled, if a bid is received in the set limit of time until expiring, it will automatically extend the expiration with the set amount. From this area you can define both these values.
2. Extending counter will limit the number of times the auctions can be extended. Users will be informed for each auction on how many times it can still be extended.
3. Set the time window before the auctions expires. A new bid will automatically extend them. This can be set from seconds or minutes to even months or years.
4. From Extend auction with this amount of time you can set the exact amount of time the auction will be extended with.
5. In the case of auctions without bids, you can also choose to automatically extend their the ending date from the Extend auctions with no bids option. When the CRON runs, instead of closing the auction it will extend it with the set value.
Availability Options
1. Checking Define auction Time will allow users to also set the starting and ending time (in hours and minutes) of their new auctions, besides setting the dates.
2. Set the maximum period of time accepted for new auctions with the Max. months of availability for an auction option. Sellers will not be able to post auctions for a longer period than this and will be informed promptly to set a lower availability period.
3. Allow users to specify auction end date enabled will let users set the exact date when their auctions will end. Otherwise, a default availability value will be used. Below this option, you can set the default values (in days) for each type of auction: default auction (public, private), proxy auctions, BIN auctions, auctions with reserve price.
4. Auto republish auctions is a feature based on CRON service, which republishes the expired and closed auctions that have turned on the option 'Auto republish' at first listing time.
5. In order to republish all the auctions, including the ones which have a winner, enable the Include won auctions for auto-republish option.
6. Set default days before auto-republish will define the standard number of days before auto-republishing the auction. Users can change this when they add new auctions. If the field is left empty, set value will also apply.
7. The active period for all auto-republished auctions is set from the current time, for start date, and the end date is calculated on a future date based on Default auction availability period (days) setting found above.
8. Each auction will be archived when it gets closed. Set Time before archived auction to be deleted to define the period of time auctions will be kept in archive before being permanently deleted.

Shipping
When creating new auctions, users can add details regarding the shipment pricing. By enabling Multiple shipping prices and saving the change, a Setup button will be displayed, which allows you to add an unlimited amount of cities/regions/countries as shipping zones.
The shipping zones added on the backend will be visible for sellers when creating new auctions. They will be able to add these zones and specific prices for each of them.
Bidders can check the shipping costs for each zone, but they will be able to select a zone only after they have won the auction.

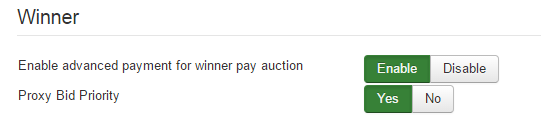
Winner
Advanced payment for winner pay auction allows you to choose how payments will be made by the winner of the auction:
If Disabled: The winner can pay directly to the sellers PayPal address without any record on the present site. For this, only the PayPal addresses have to be filled on each of the user profiles involved in the transaction.
If Enabled: The winner of the auction can choose between available payment gateways, in order to pay for the won auction. Then, his payment will be registered in Auction Factory payments history.
The Proxy Bid Priority option defines the method of choosing between the latest bids placed with the same value:
If Yes: when a bid is placed with the same value as an existing proxy, the proxy will still remain as the latest bid.
If No: the last bid placed will have priority when choosing a winner over any existing proxies.
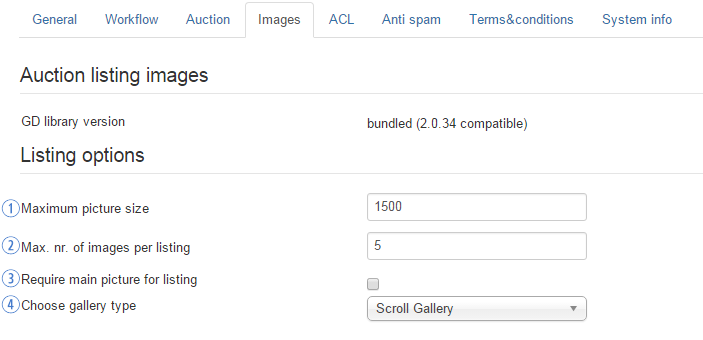
Images
On the Auction Listing Images fieldset you can check the current version of the graphic library.
1. Set a Maximum picture size: if a picture of a bigger size is being uploaded, it will cancel the upload and inform the user about the maximum allowed size.
2. To prevent any over-flood on your website, you can limit the Max. nr. of images per listing.
3. Require main picture for listing will make the main picture required for all the new listings. This is very useful, since an auction which has at least one main picture can be seen as more trustworthy.
4. There are three different Gallery Types you can choose from: Scroll Gallery, Lytebox and Picture Slider. Be sure to check them one by one to see which one of them suits your website better (also depending on the used Joomla template). .
Scroll Gallery
By using this type of gallery, you can switch between images by clicking on them. You have the images displayed one after another (scroll the images horizontally by moving the mouse cursor inside the box) and you can select a photo to be displayed below the gallery; you can move to the next picture by clicking on the displayed image.
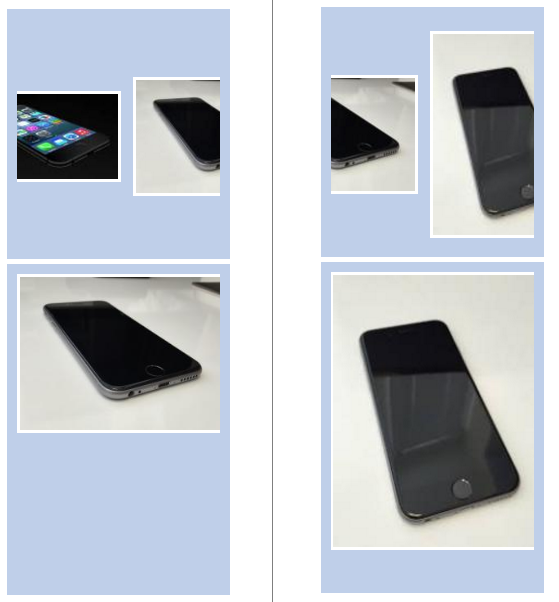
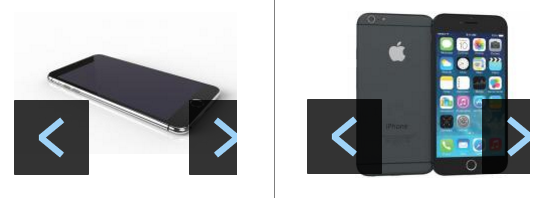
If you choose Lytebox or Picture Slider, you can see all the images one by one, using the previous and next buttons to change the image.
A click on the selected image opens the full picture in a pop-out window.
Lytebox
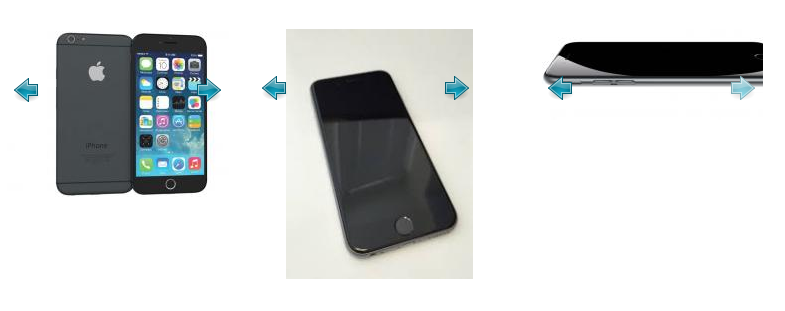
Picture Slider
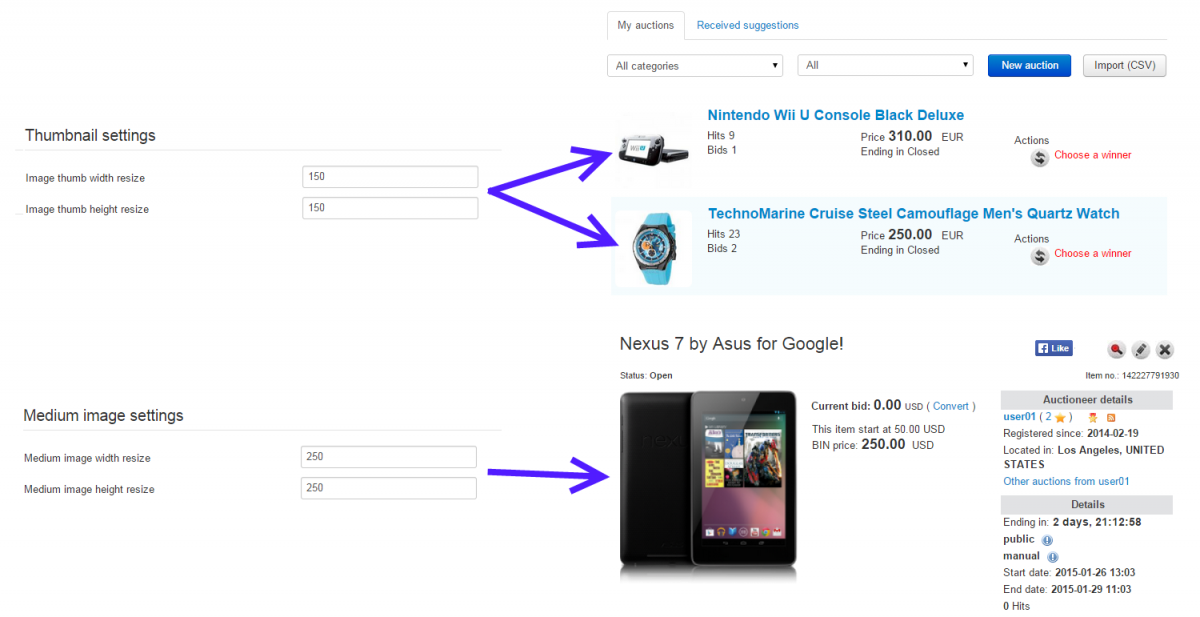
There are two image sizes that you can set on this page. These are not for the full sized versions, but for their thumbnails displayed on the listings and auction details pages.
Thumbnail settings allow you to change the width and height of the images found on the listing pages such as My Auctions and List Auctions. Medium image settings refers to the images which are displayed in the detailed view of each auction page. Medium image settings has been assigned for the images found in the detailed view of auctions.
(!) The full-size modal box which appears when clicking on the image is resized dynamically in Javascript according to the clients' resolution.
That means that for any resolution the browser has, the image is always centered and about 90% of the height or width available on screen.
Access Control List
From this tab you can enable the ACL function of the component, that will allow you to select which specific groups of users are allowed to post auctions or place bids on them.
It is recommended that you create 2 new groups for both, and set proper access levels before setting this up.
For more information regarding the ACL please visit our Auction Factory - Access Control List Guide.

Anti Spam
To protect your website against unwanted spam you can use reCaptcha and email protection features such as reCaptcha Mailhide This tab allows you to set them up. The reCaptcha form will appear when guests attempt to post comments on auctions.
Check the Enable Captcha checkbox and then press on the Get it here link which will redirect you to ReCaptcha's website. Follow the instructions found there and copy/paste the public and private keys.
Optionally, you can change the reCaptcha theme to either Red, White, Backglass or Clean.

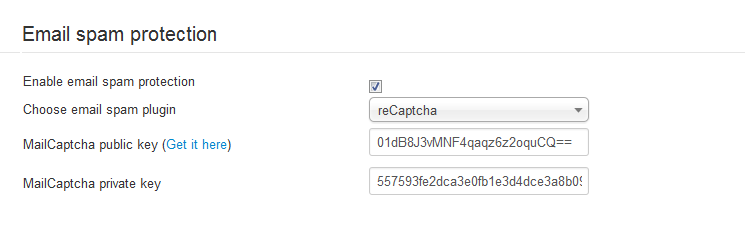
From the Email Spam Protection area you can enable one of the available email protection features by checking the checkbox and selecting which type you wish to be used.
The reCaptcha Mailhide works the same way as a regular reCaptcha, but it is used when users want to see email addresses. Other mail protection methods are Smarty and Joomla. Smarty obfuscates the source code with Javascript, while Joomla simply hides the email.
In case you choose reCaptcha Mailhide, you have to add a public and a private key, clicking on Get it here will take you to the ReCaptcha's website in order to obtain the public and private keys.
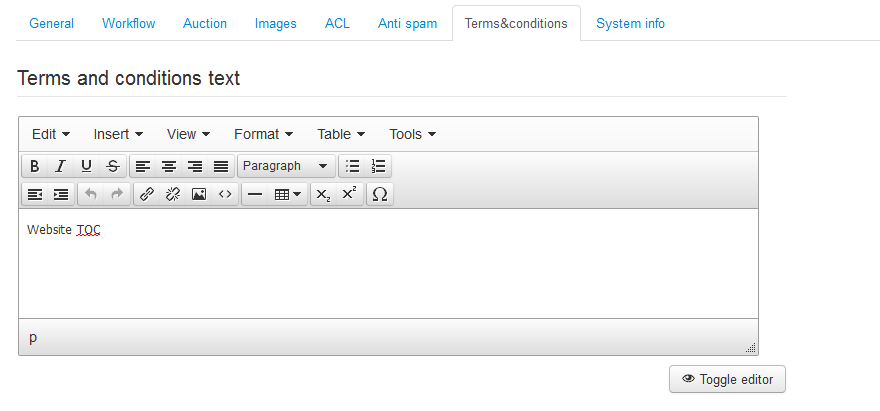
Terms & Conditions
This tab comes with a simple WYSIWYG editor where you can add your websites' Terms and Conditions.
Users will have to read and agree with your Terms and Conditions in order to create new auctions or place bids.
System Info
The System Info tab is implemented to provide basic information about the cache directory, upload directory or configuration file. These are useful for debugging if any issues arise. The component handles the configuration file permissions itself, even if the configuration file might be Unwritable, the component will still be able to save the configuration and restore previous permissions.
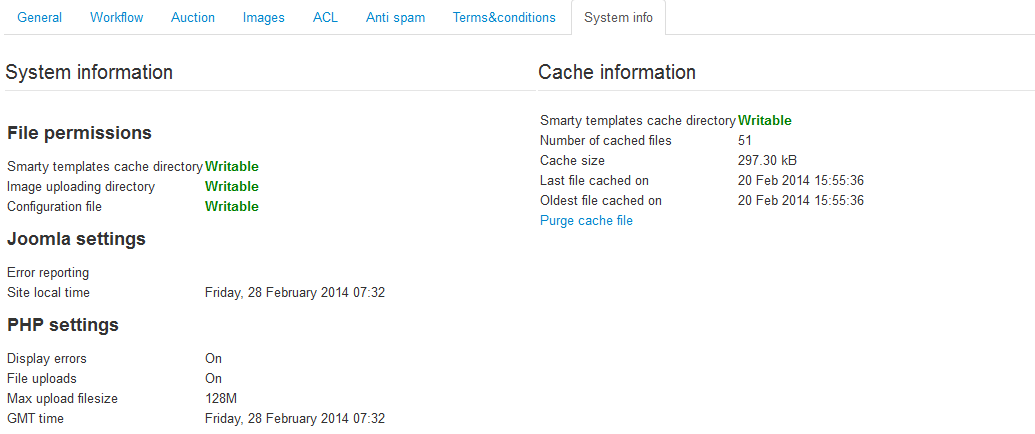
(!) After working on the smarty .tpl files, it is recommended to purge the cache so the changes can take effect right away. Remember that browser caching can also affect how changes are updated.
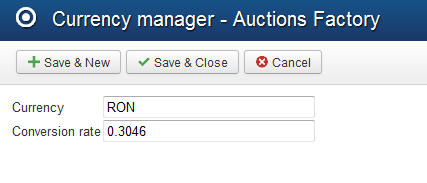
Currency Manager
The Currency Manager area, accessible from the Control Panel seen above, allows you to manage the list of currencies used on your website.
You can select a default currency so that, when payments are made with other currencies, it will convert them and recalculate the commission.
These payments also include the payment items offered by our extension which can be seen here.
In case a payment item is disabled, it will not update to a new default currency, so be sure the payment items which you wish to use are enabled before switching to another currency.
In case you wish to have a certain currency used as default when adding a new auction, you can order the respective currency as the first one on the list.
Clicking on Refresh Conversion will update the rates using Yahoo conversion. When changing the default currency, the currencies and prices for payment items will also be updated.

Clicking on New will allow you to add new currencies. Simply add the currency abbreviation and optionally the conversion rate. In case you don't know the conversion rate of the respective currency, you can leave the field empty and click on the Refresh Conversion button afterward to update it. The CRON script also updates currency exchange rates according to Yahoo, check the CRON documentation for more.
It is required that you use the valid ISO currency codes in order for the conversion to work properly.
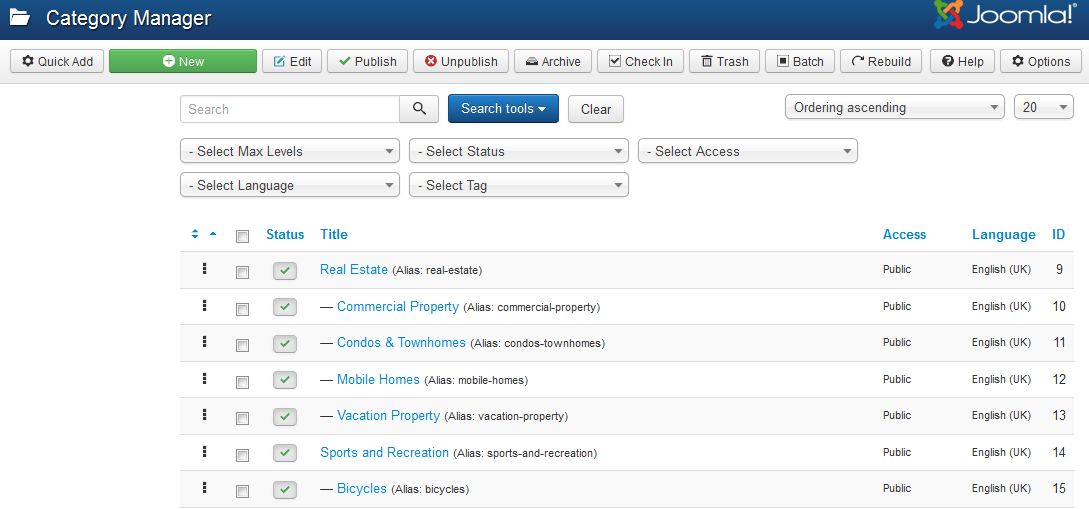
Categories
Auctions can be assigned to different categories, representing the type of item which is sold. These categories can be added and managed from the backend.
Category Manager page found on the Control Panel of the Auction Factory component allows you to add new categories, edit, or sort the order of the already existing ones.
The component supports unlimited category levels.
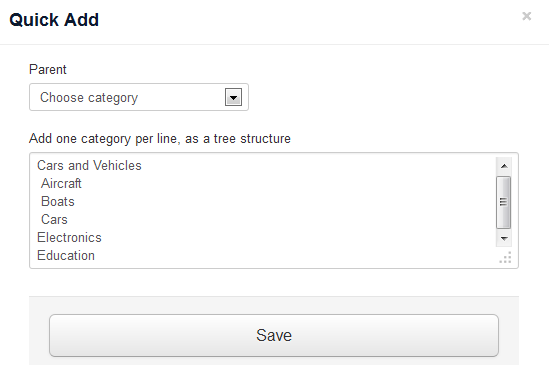
With version 4.0.0 of the component, you can also use a Quick Add feature which allows you to add multiple categories in one run. To use this, you will need to make sure the Auction Factory System plugin is enabled. You can verify this by going to "Extensions/Plugin Manager".
Once the plugin is enabled, clicking on the Quick Add button will open a modal window, where you can choose a parent category and write multiple categories on the text field. Be sure to add them one per line. To add subcategories, leave a space before text. Leaving the parent as "Choose Category" will create main categories.
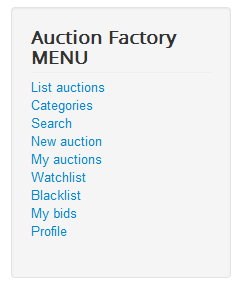
Component Menu
Auction Factory comes with many menu items that you can manage by adding, removing or sorting them on the user menu.
Here is a list of the items available on the user menu for registered users upon installing the component:
- List Auctions - Displays lists containing all the active auctions from the website with various filters and sorting options.
- Categories - Displays a list of all the available categories and subcategories in multiple layouts.
- Search - Displays a search form for auctions or users.
- New Auction - Displays a form for sellers where they can create new auctions by adding the necessary details.
- My Auctions - Displays a list with all the auctions posted by the logged in seller, and also the received suggestions.
- Watchlist - Displays a list containing auctions added as favorites by the logged in user.
- Blacklist - Displays all the blocked users of the seller.
- My Bids - Displays a list of all the bids, won bids, and suggestions made by the user.
- Profile - Displays the page where the logged in user can check and edit his profile, check his balance, payments, ratings and more - if Community Builder is enabled this will redirect to that profile.
(!) Documentation based on Auction Factory version 4.5.1