Table of Contents
User Guide
Blog Factory is an user friendly, webmaster friendly blogging extension for Joomla. Full of features, it is a well thought alternative to Wordpress blogging, allowing you to use Joomla versatility and well known blogging conventions - like RSS Syndication, Bookmarking Sites (like Digg, Twitter, Facebook, etc). Featuring a Web 2.0 Dashboard with draggable panes and all-in-reach controls, your blogging experience is truly comfortable and in a luxuriant environment.
Some of the features offered by Blog Factory are:
- Frontpage with all posts listed, paged and sorted.
- Individual per blog listings - every user gets his own blog front page.
- Possibility to import Blog posts into regular Joomla content.
- Easy to add any Bookmarking for social sites.
- RSS feeds and syndication.
- Pings and Tags, pingback and bookmarking.
- SEF urls.
- Avatars with Community Builder integration.
- Built in Commenting system.
- Built in Media uploader with per user Disk Quota.
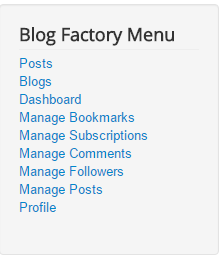
This is how the Blog Factory Menu looks like upon installing the component:
Creating a Blog
1. To create your own blog you will need to register a Joomla account. You can do this from frontend by clicking on Create an account from Joomlas' Login Form and by filling in the required fields, depending on the website settings the account will be activated instantly, or by email.
If needed, the administrator can also create an account for you from backend by going to Users/User Manager/Add new user.
You will use the registered username in order to log in on the website.
(!) It is very important to know that blogs can be created only from Frontend and each user can create his own blog if he has the permission to do it.
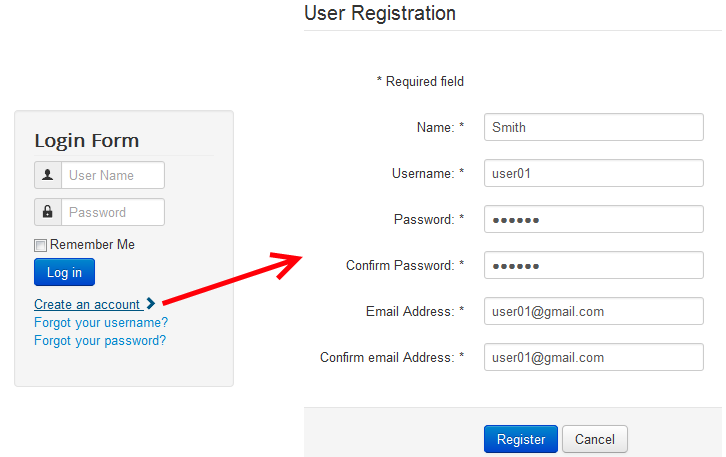
2. Now you can log in with your newly created username by using the same Login Form shown above.
Upon logging in on frontend, as a registered user you will be able to access all the pages available on the Blog Factory Menu.
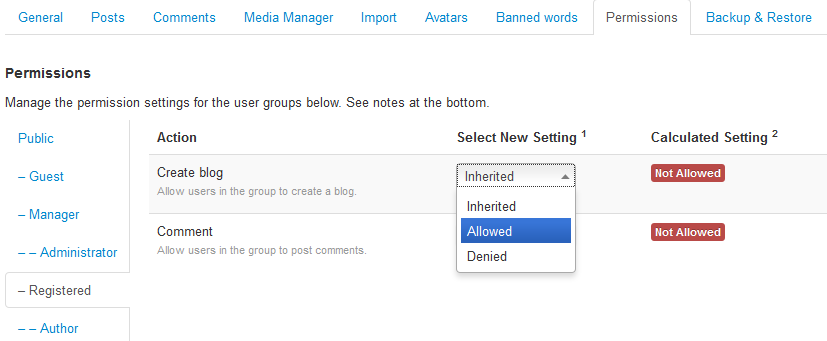
(!) In case you get the same message as shown on the image below it means that your user group does not have the permission to create blogs. This will require the administrator to grant permission to your user group from backend.

On backend, by going to Components/Blog Factory/Settings and clicking on Permissions tab, the administrator can manage the permission settings for the available user groups.
From here he can toggle to Allowed/Denied the permission to Create blogs or Post Comments for the selected user group.
3. Being logged in on frontend and with the permission to create blogs granted you can click on Dashboard from the Blog Factory Menu to create and configure your blog.
Add a Title to your blog and additionally a Description and a Photo for it.
Optionally you can set up the default sizes of the images inserted on your posts, you can set the sizes for Thumbnails, Medium and Large images.

4. After registering your blog, from the Dashboard page you will be able to see the content of it, comments, followers and more. The Blog Factory component has a Web 2.0 Dashboard that allows you to drag and arrange the panels as you wish only by clicking and dragging with your mouse. You can hide any panel by clicking on the ^ sign found in the right corner of each panel while hovering on it. The newest comments which you haven't seen yet will be displayed with a yellow color on the background.
Using the Quick Update panel will allow you to add a new post to your blog in a quick and simple way by adding its title and the content. This is a very limited way of adding new posts without features like adding media files, choosing the category, adding tags and more. To add a new post with all the features available for you click on the New Post button.

Adding New Posts
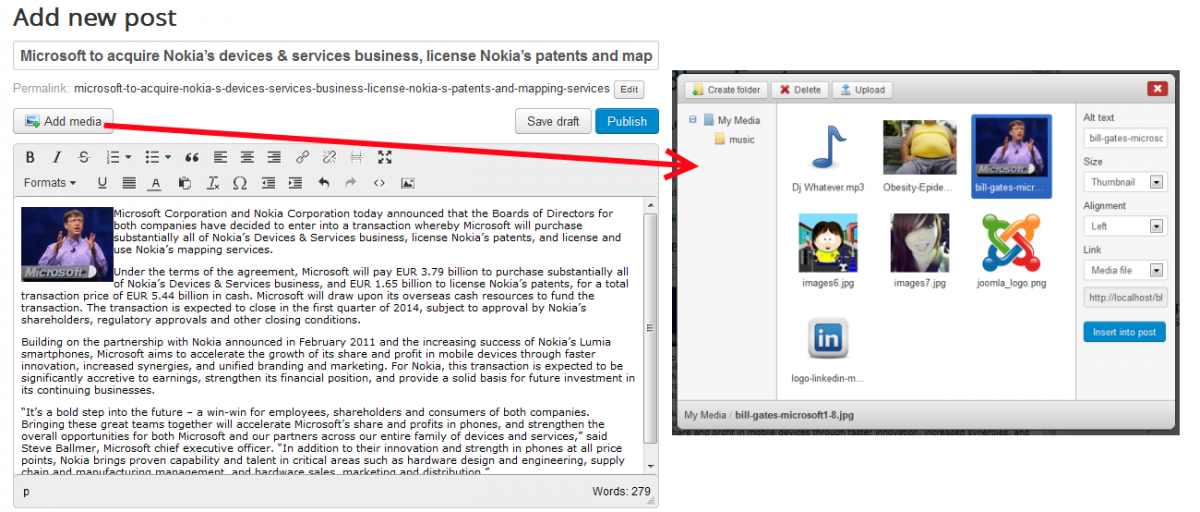
First thing you will have to fill in when creating a new post is the Title and the Main body of the post, where you write the actual article using an WYSIWYG editor. Right between these 2
fields you will find an Add Media button which will pop up the user folder. On this folder, depending on the backend configuration, you might be allowed to upload files and create as many folders as you want for a better sorting, the amount of space each user has is set by the administrator and can vary depending on user class. When you upload files they will be stored in the folder you are browsing at that time.
Clicking on one of the uploaded files will display on the right side of the window various settings on how it will be displayed on the post, for an image as example, you can choose from 4 different sizes, the alignment of it on the article, alt text and link. When all these are set, press on Insert into post to add it into the article.
Permalink will be created according to the title of the article but you can also change it to a custom one by clicking on the Edit button next to it.
Furthermore, you can select the Status of the post and to define the availability of it. Start publishing will be set as Immediately as default but you can press on the Edit button and set an exact date and time when the post will become published. Stop publishing will be set as Never as default but by pressing on Edit it will allow you to choose an exact date and time when the post will become unpublished.
Optionally you can add on the right panel Metadata information like a description and content.

You can select in which Category should your post be included into, this feature is defined by the administrator so the categories may vary depending on the configuration or even the feature to be completely disabled.
Select if you want to allow other users to write Comments on your posts or to disable this feature.
Here you can also enable Pingbacks, these can inform other bloggers whenever they cite this article in their own articles or vice-versa.
Add various Tags related to your post, this will make it easier to be found on the search engines. Write them separated by commas and click on the Add button.
Now that you have covered all the sections regarding your new post, click on Save Draft or on Publish to save your article. You can edit posts from the Dashboard or from the Manage Posts page.

Posts
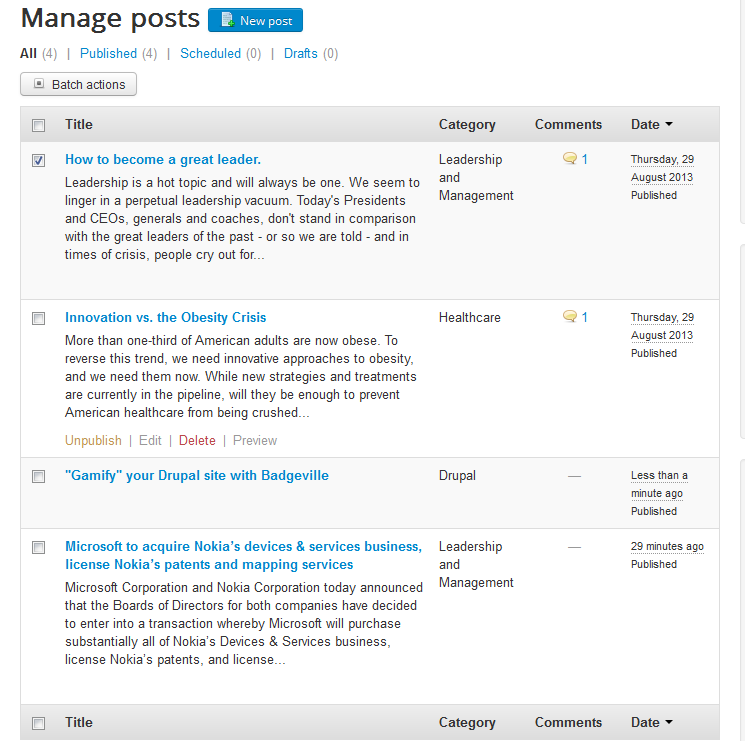
By going to the Manage Posts page you will see a list with all the posts made by you, the dates when they have been created, their assigned categories and comments. The posts are also sorted by their status and you can choose to view only the Published/Scheduled/Drafts posts if needed. When hovering over a post the option to Publish/Unpublish, Edit, Delete and Preview will appear.
If you want to modify the status of a post select the checkbox of the respective post and click on the Batch actions, there you will be able to choose to Publish, Unpublish or Delete it.
You can also see and manage full listings of bookmarks, comments and followers as well by going to their designated pages or by clicking on the All buttons found on Dashboard.
By clicking on the name of a post it will open the detailed view of it.
Here you will be able to see the whole post along with its tags, assigned category, comments, ratings, and a list of available bookmarks.
Each user can rate a post by clicking on the "thumbs up" or "thumbs down" buttons, depending on the rating of each post they might be shown on the Top Rated Posts module, if enabled from backend.
The Blog Factory component allows you to submit every post on a social news website like Digg or Facebook, just click on the respective bookmark and you will be directed to its homepage from where you can share it.

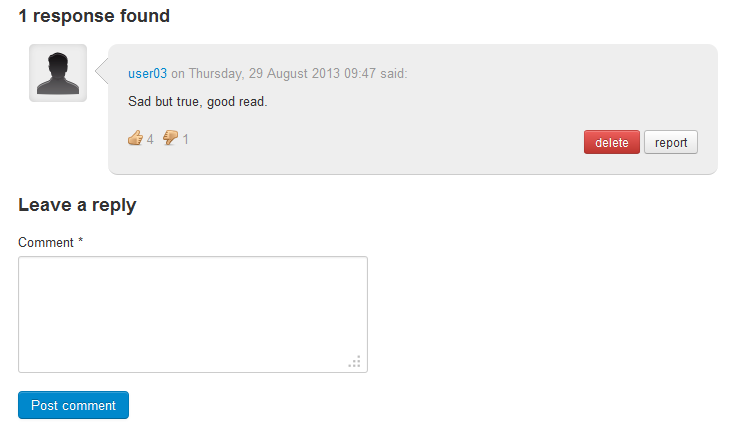
Below all these you will find the comments section where you can see a list of all the replies made on this post or to write one yourself.
The ratings system is available for comments as well so you can rate it accordingly or even report it if necessary. Note that you can report only the comments of other users.
Being the writer of the article will also allow you to delete comments.
If you want to submit a comment just fill in the field on the Leave a reply section and click on Post Comment, being a guest user might require you to enter the correct Captcha word. Comments may have to be approved by the blog owner or the administrator of the website, depending on backend configuration.
Blogs
Viewing a list of all the blogs on the website can be done by going to the Blogs page.
If you choose to you can view only the blogs you are currently following or the ones you are not following by using the Filter feature. Ordering and Sorting is also available here.
For each blog you can choose to Bookmark/Unbookmark it or to view all the posts made by it by clicking on the posts amount or on last activity. By bookmarking a blog you will be announced if the owner of it posts anything new, the notification is sent via email.
RSS is also implemented for each blog and can be viewed by clicking on the RSS Feed link.
In case there are too many blogs and you can't find a specific one, you can use the Search field by adding the name of it.

Profile
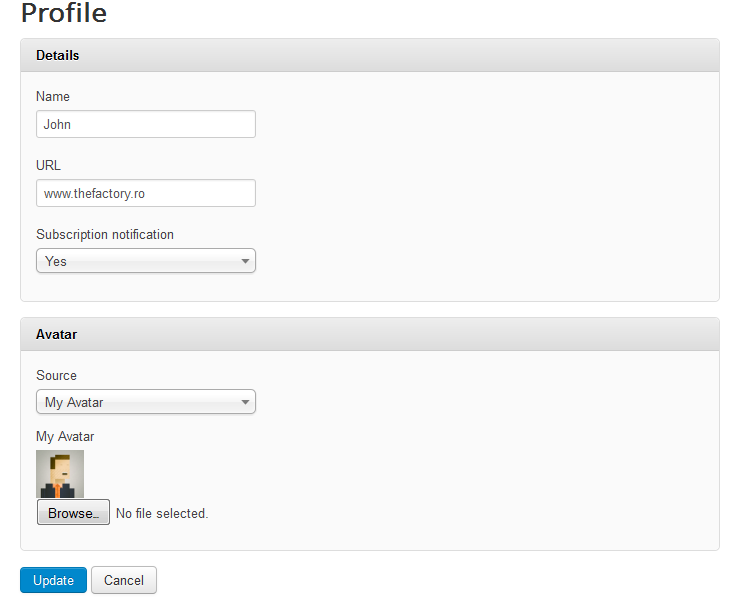
Profile page allows you to change your user details, add a Name and an URL of your website, these will be shown when posting comments on the website.
With Subscription notification enabled you will receive email notifications whenever new content is added to the blogs you've bookmarked and subscribed to.
In the Avatar section you can either upload an avatar or use your Gravatar or Community Builder avatar, if available on the website. To upload an avatar click on Browse… and select it from your hard drive. After making your desired changes click on Update.
(!) Documentation based on Blog Factory version 4.3.3