Table of Contents
User Guide
Here is how Events Factory menu is displayed for registered users:
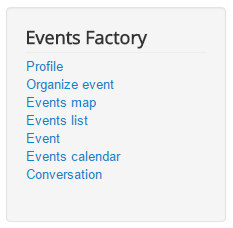
You can set up these menus as you need - using Joomla's standard menu management.
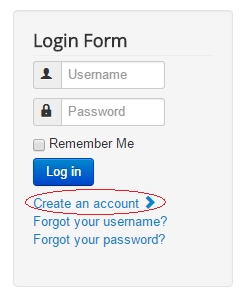
Create an Account
Before you start using Events Factory you will have to create a new account: click on Create an account on the login page or module, and add the required details.
The following page will be opened:
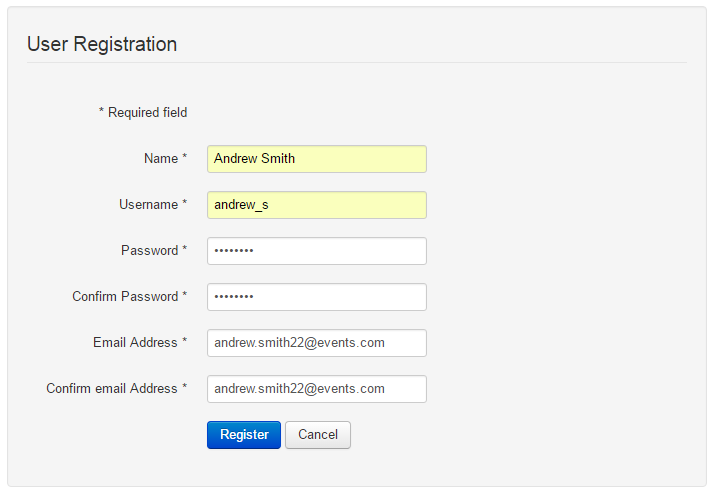
Here you will need to enter your account details like name, username, password and a valid email address.
Click on Register when you are done and verify your email for the activation link.
Your account must be approved before being able to login. This is either done by you via email or the admin, according to the Joomla configuration.
Profile
By clicking on Profile you can view your account details and your managed and booked events.
User Profile
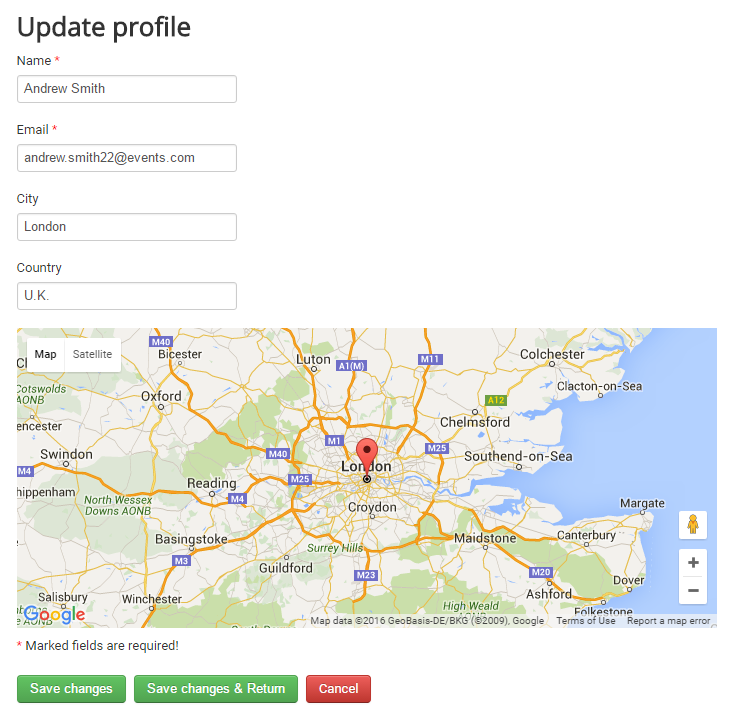
On the User Profile tab you can add/ update your profile avatar by clicking on the image area and choose the new photo.
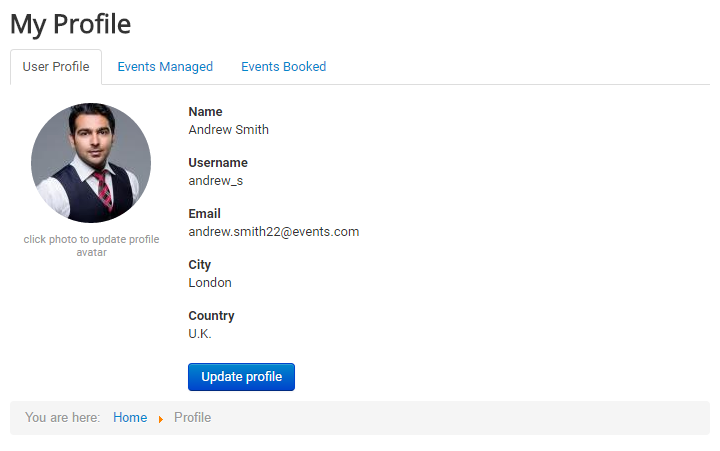
Also here you can update your information such as name, e-mail, city and country (and the Google Maps to place your location on the map). After doing so, you need to click Save changes or Save changes & Return and your details will be updated. If you change your mind, just click Cancel to discard the entered data and you will return to the previous page.
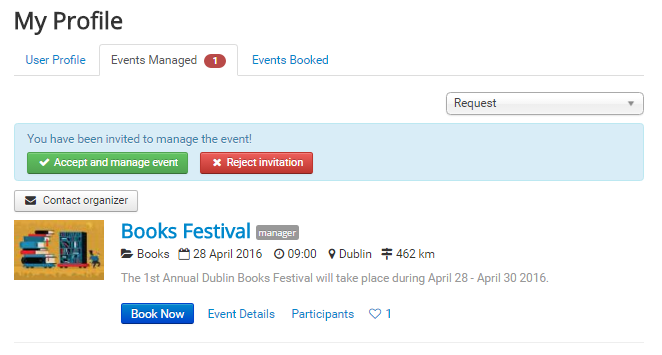
Events Managed
In this section you can see all the events in which you are involved in the management staff.
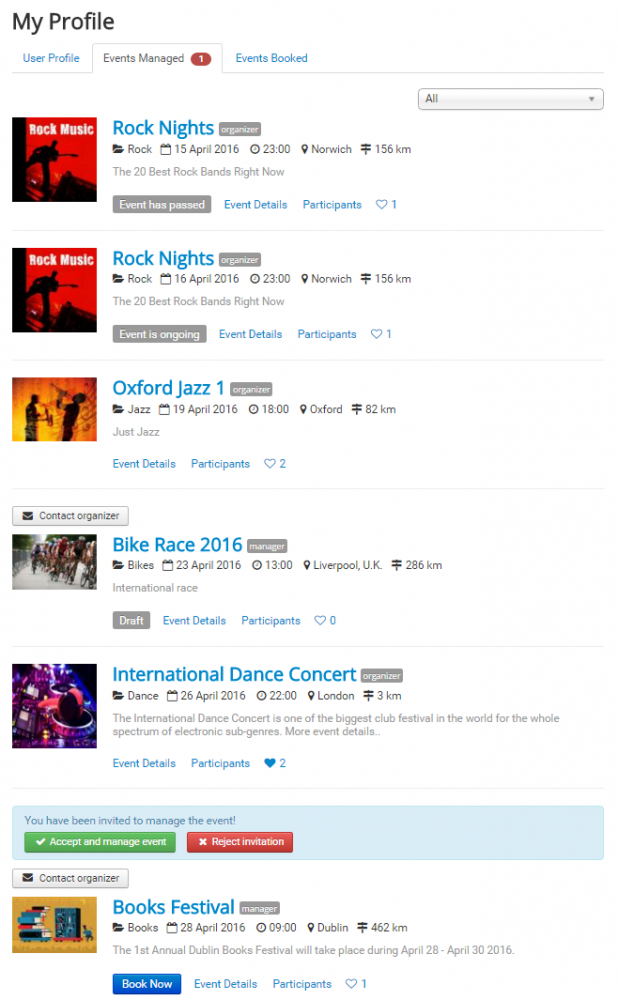
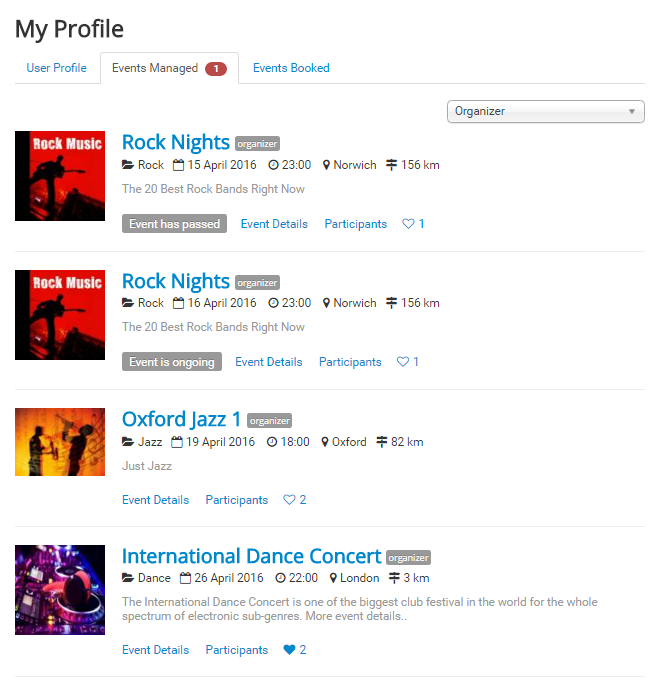
You have the option to display only the wanted events by selecting the option from the drop-down list.

If you choose Organizer, then you will see the events that you created (as organizer). You can see the main details of the events and you can select an event to update information.
If you select Manager, then you will see only the events that you have agreed to manage and weren’t created by you. Like the Organizers section, you can also see the main details, you can select an event to update, but the difference is that you haven’t access to all the information.

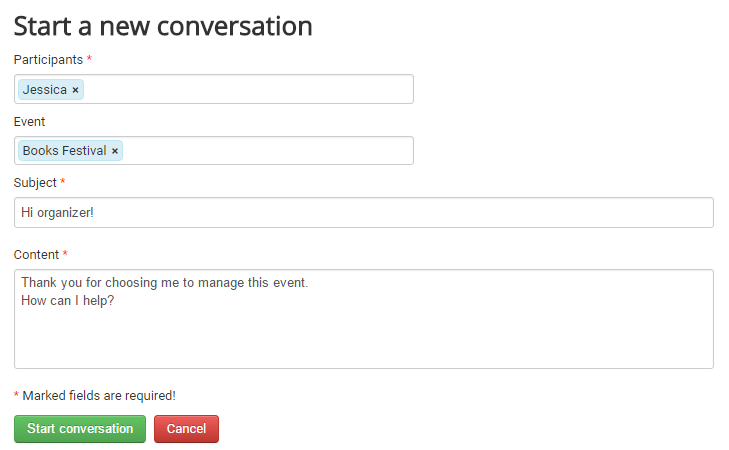
From this tab, you have the opportunity to contact directly the organizer. Click on the Contact organizer button and a form will be opened where you can write your message. The organizer’s name and the event are automatically added in this form, but you can also add/ delete details from these sections.
If you choose Request, you can see all the invitations received to manage events from other organizers.
If you agree with the request, then click Accept and manage event and you will receive the rights of a manager. If you disagree, just click on Reject invitation button.
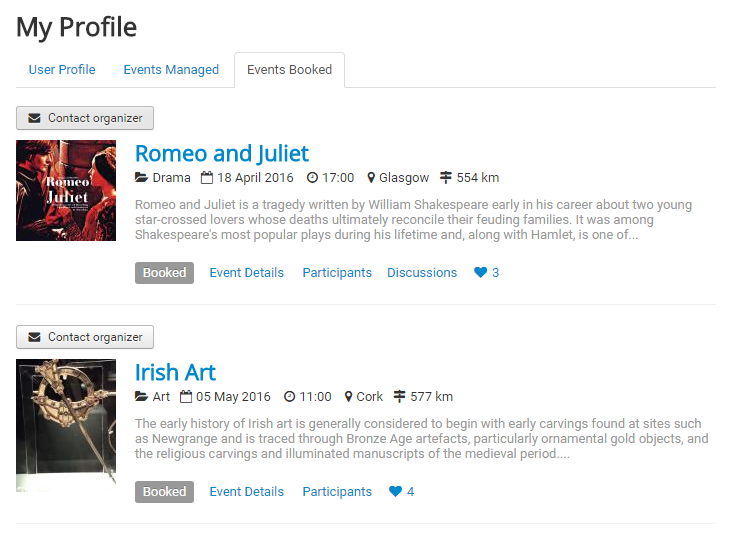
Events Booked
Here you can find the events for which you have registered, sorted by starting date. You will view the event as a participant, you can see the event details, but you cannot modify anything.
Like the previous sections, the Contact organizer button is present.
Create an Event
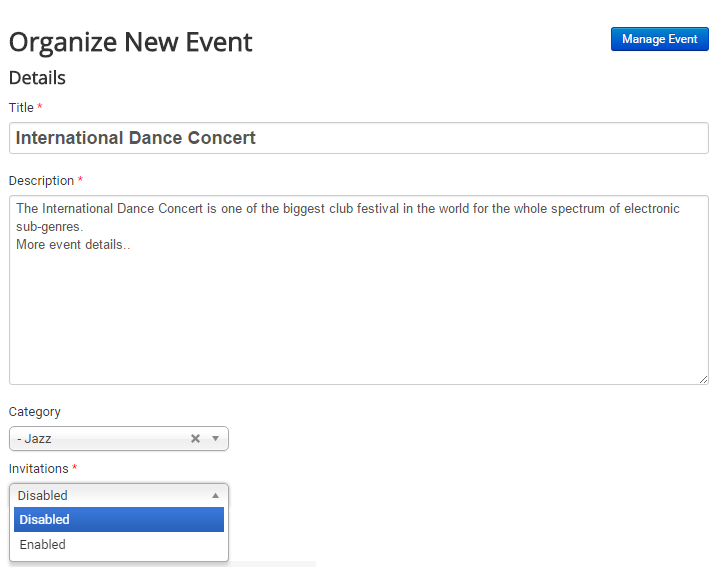
Organize new Event
To add a new event, click on Organize event from the user menu. It will open a form where you can add your new event details.
Below you have some screenshots with the information that can be entered:
-In the first part, you will enter the Title and the Description of the event, which are mandatory fields. Here you can write the full description of the event, which it will be displayed on event details page.
-You can select a Category type from the drop-down list. The categories are created by the site administrator and you can't create new ones - you will choose from the existing categories.
-By choosing "Enable" at Invitations, the users will be able to send invitations between them for the event. If you don't want this option, just choose "Disable" and the Invitations section won't appear.
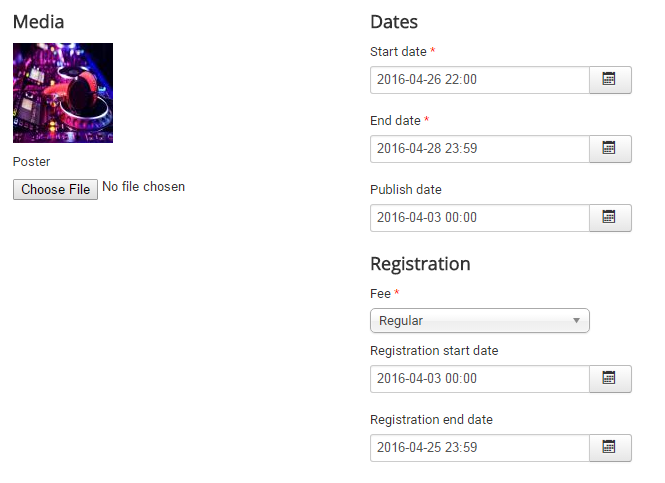
-On Media section you can add the event's poster, by clicking on Choose File and selecting the image.
-On the right size you will set the following dates:
* Start Date: The date and hour of the event. After this date, users will no longer be able to register for this event.
* End date: The date and hour when event ends.
* Publish date: The date and hour when the event will be available on the site.
* Registration start date: The users will be able to register to the event starting with this date and hour.
* Registration end date: From this moment, the registration ends for this event.
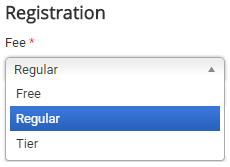
-On the registration section you have the option to select the fee type: Free, Regular, Tier.
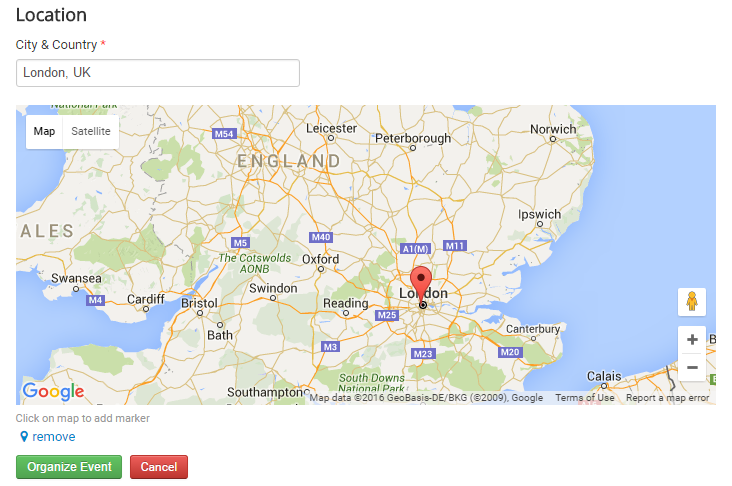
Finally, enter the City & Country and mark the location on Google Maps. Click on Organize Event button and the new event will be created.
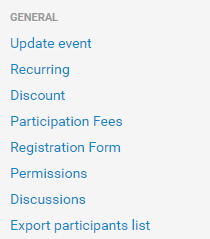
Manage Event
After you created the event, click Manage Event from the top right of the form or access your Profile page and select the event from the Events Managed.

Now click on the Manage button to edit more features for your event:
On the right side of this menu, you will see the current event status.
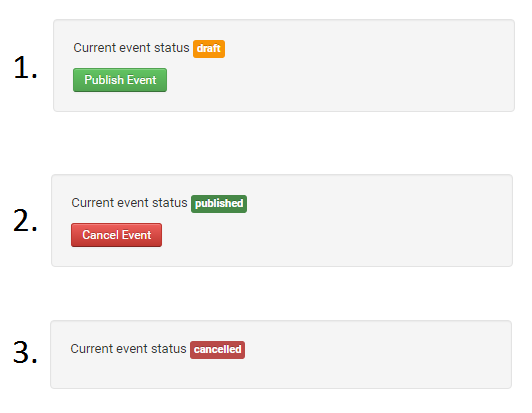
An event can have one of the following status:
1. Draft: When an event is in Draft status, you can work at your event and edit all the necessary details before anyone sees it. If you want to publish it, just click on Publish Event.
2. Published: When you change the event's status to Published, then the event will be visible on the site.
3. Cancelled: If you want to cancel a published event, click on Cancel Event.
Update Event
Here you can update event's details like Title, Description, Category, Invitations, Media, Dates, Registration and Location. The form is the same with the one when you initially created the event.
Once you finished the updates, click on Update Event and the changes will be displayed immediately on the site.
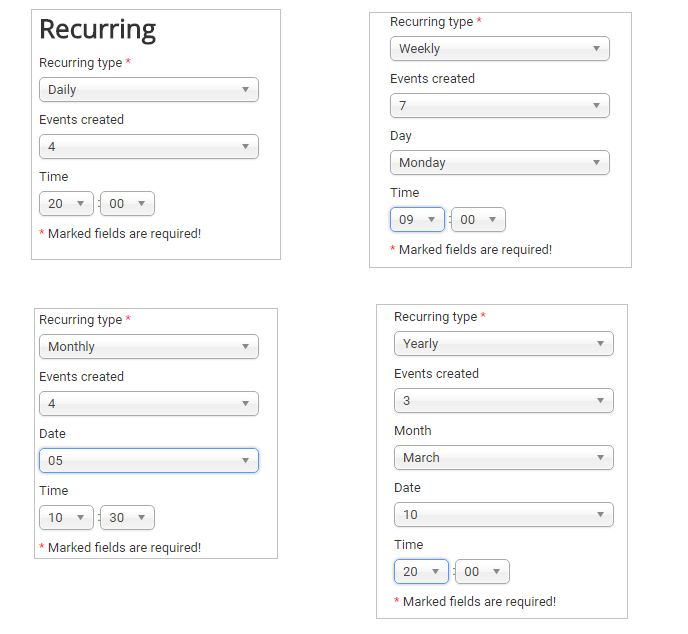
Recurring
You can create multiple events using the same information.
There are 4 recurring types as follows:
* Daily events: this option allows to create repeated events on a daily basis. Enter the number of days you wish to repeat the event, the time of day and click Update Events! to create the recurring events.
* Weekly events: this option allows to create repeated events at weekly intervals. Select this option if you want to repeat your event on a certain weekday, then enter the number of weeks, the day and hour to multiply the event.
* Monthly events: this option allows to create repeated events at monthly intervals. Set the number of months you want to repeat the event, then pick a day of the month and the hour.
* Yearly events: this option allows to create repeated events on a yearly basis. Set the number of years and the full date and hour (Month, Day, Time) and the event will be multiplied for the next years using these details.
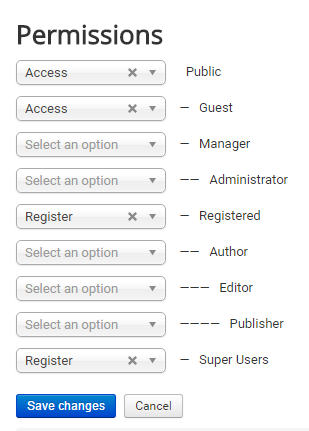
Permissions
From the Permission tab you can set which group can access (view) your event, register for event, or let the default value "Select an option" if you don't want the group to have any access to your event.
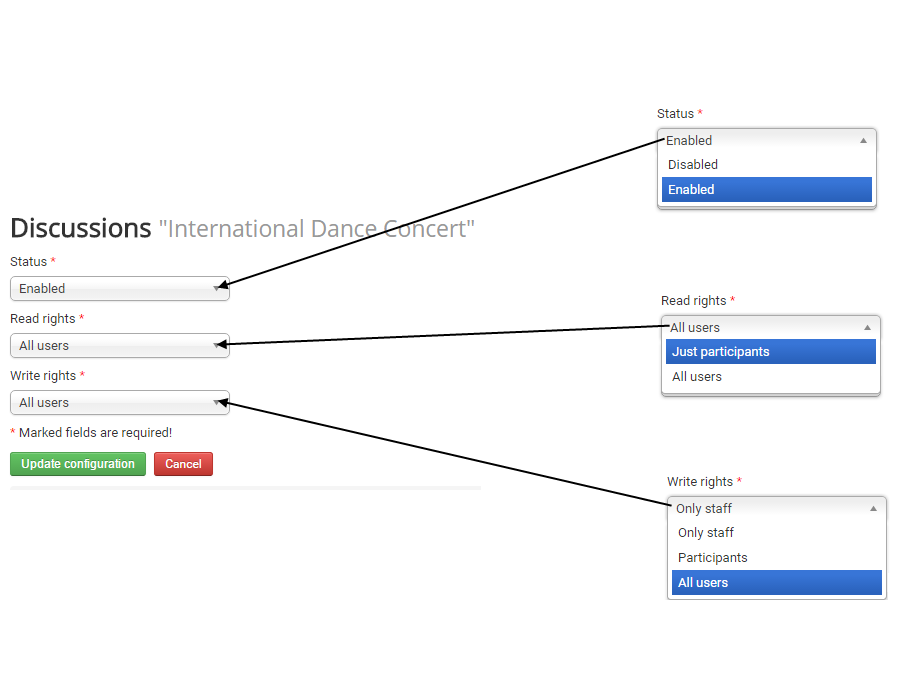
Discussions
Here you can allow the discussion area for your event.
You can set separate rights to All Users/ Participants/ Only Staff:
- Read rights: it will allow the selected group to read comments.
- Write rights: it will allow the selected group to write comments.
Registration Form
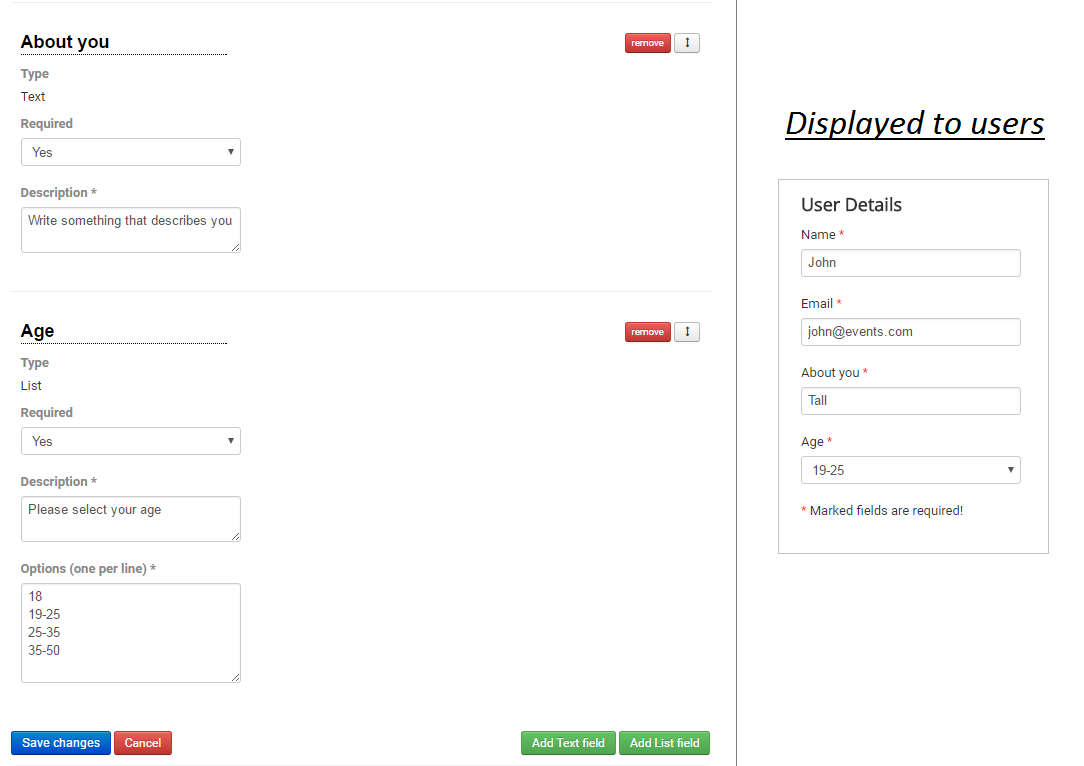
In this section you can see and modify the registration form for participants. There are two mandatory fields (Name and Email), but you can also add new fields.
- you can add a Text field, where you can edit the field name, you can set if it's required for registration and you can make a short description of this new field. On the registration page will appear a text box which has to be completed by users.
- or you can add a List field; the difference from a Text field is that using a list you can add options and the participants will choose between these ones from a drop-down list.
If you want to change the fields order, press and hold click on the button ![]() and you can move up or down the field. To delete a created field, just click remove.
and you can move up or down the field. To delete a created field, just click remove.
Participation Fees
The participation fees are conditioned by the registration fee type specified when you created the event:
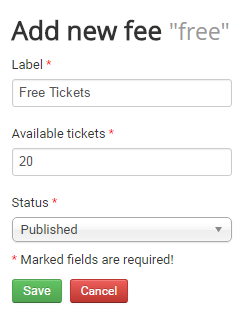
1. If you selected Free, then click "Add new fee" from Participation Fees and you have to specify a label for the fee, the number of available tickets and change the status to Published. All these tickets will be for free.
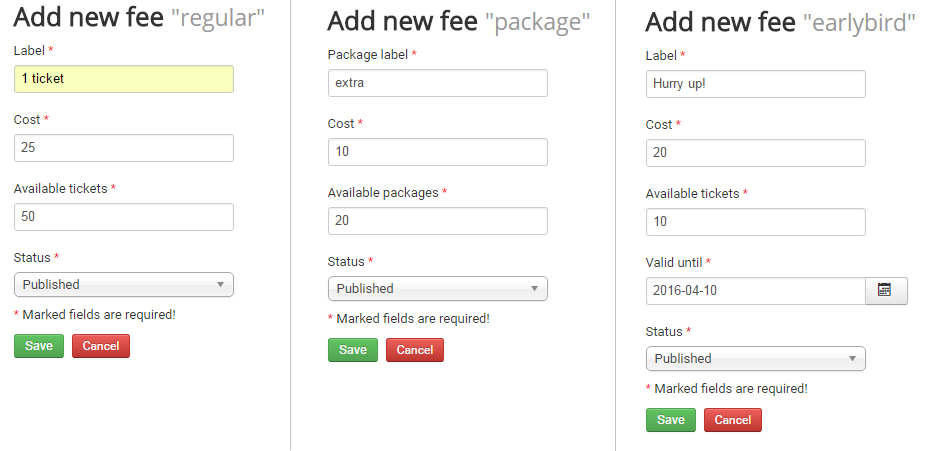
2. If you selected Regular, you can add three types of fees:
- Add new fee: Beside the details from the free tickets, here you will also enter the ticket cost.
- Add new package: This options will add an additional package available for the regular tickets, which can be bought only with the ticket.
- Add new early bird: You can create a separate category of tickets which can be sold until the specified date.
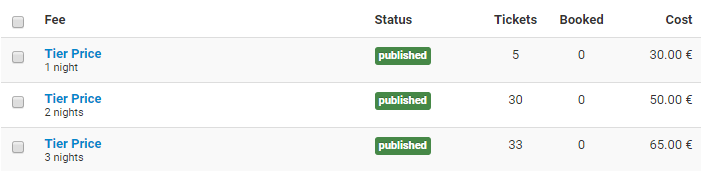
3. If you selected Tier, then you can add different levels of prices and the registrant will choose his option.
Discount
Here you can add an available discount for the participation fee, using a coupon code for validation.
You have two options for the discount type: the first one - Fixed - which decreases the price with a specified amount (Value) from the original price and the second one - Percent - it discounts by the specified percentage (Value) of the original price.
If you want the coupon to be available only for a certain period, please enter the validity dates.

Export Participants List
Click on the Export participants list to get a CSV file with the participants (Name and Email) for the current event.
Payments
From this section you can manage the payments for you event.
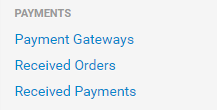
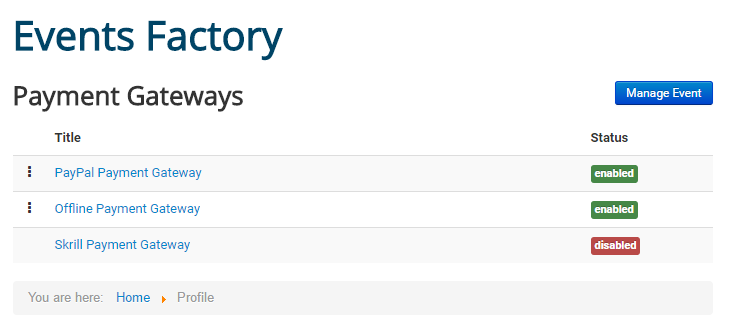
Payment Gateways
Firstly, you need to activate the Payment Gateways available for this event. Notice that the gateways are disabled by default and you have to edit them before turn their status to enabled.
PayPal Payment Gateway
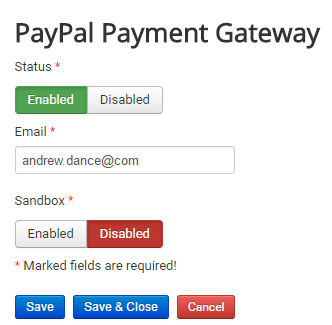
If you want to use this payment method, you will need to add your PayPal Email address.
You can enable PayPal Sandbox as a testing area during the development of your store. With sandbox enabled no payments will be taken.
Offline Payment Gateway

Provides a WYSIWYG text editor where you can add Bank Wire information.
This will require you to manually confirm payments in the system
Skrill Payment Gateway
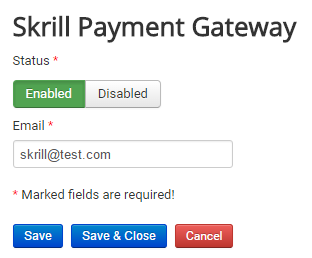
Requires you to set the Email address which will be used by the gateway.
Received Orders
On this page you can see all the detailed orders placed for the event. Here you can see the order id, the status, the title (which contains the event, the participant and the payment gateway used), the payment status, the amount and the date of the order.
Various filters can be found here, based on the following options: Order Status, Paid Status, Payment Gateway.

Received Payments
When a payment is processed by the gateway it will be displayed on this section.
A Filter is available that helps you to find payments made through a specific payment gateway and also you can filter them by the payment status.
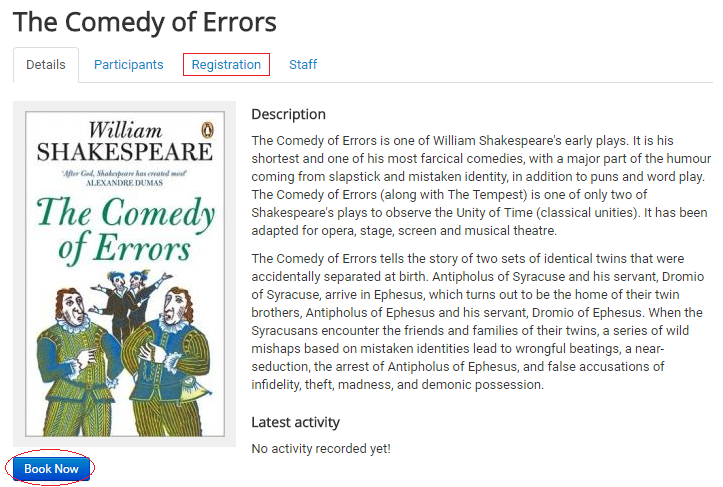
Book an Event
To register to an event, you have to click the Book Now button attached to the event. This action will leads you to the registration page where you will need to enter your details.

The registration form contains the following sections:
- User Details: the users will enter their name and e-mail address as mandatory fields, but there can be more fields depending on the event's settings.
- Ticket Details: select an available ticket.
- Payment Details: choose the payment method.
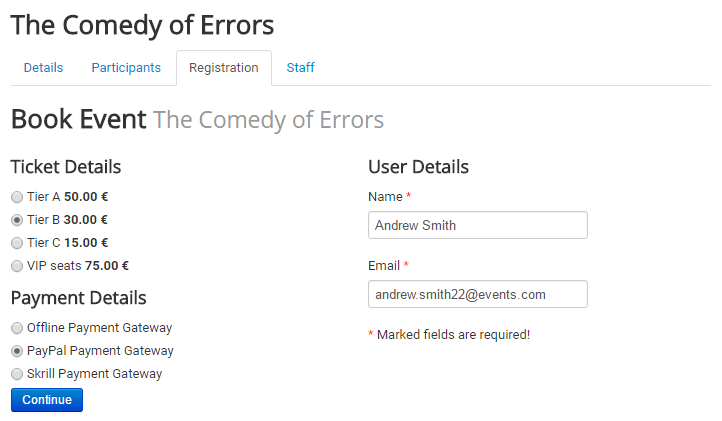
Clicking on Continue will take you to the next step of the payment where you need to confirm the deal.
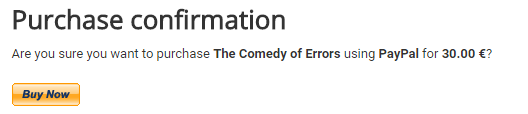
In case you choose PayPal, it will open the following page, read it and click on Buy Now to confirm the details - you will be redirected to the PayPal page to finish the transfer.
(!) Documentation based on Events Factory version 1.0.2